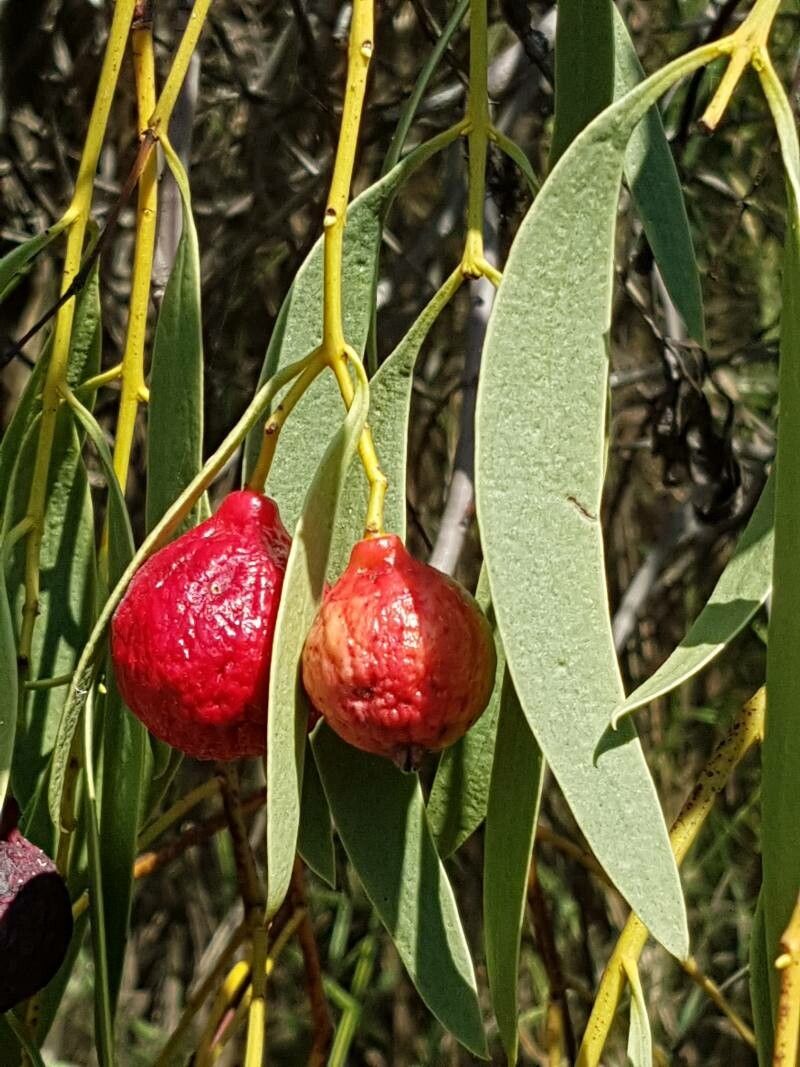
Oh, I’m so glad you’re interested in Santalum acuminatum, also known as the Quandong! It’s a truly special plant. Its striking silver-grey foliage and the promise of those beautiful, tart red fruits make it a real showstopper in any garden. Growing your own, from a little slip to a vibrant young plant, is incredibly satisfying. Now, I won’t sugarcoat it – propagating Quandong can be a bit of a patient game, especially for absolute beginners. It’s not quite as straightforward as a geranium cutting, but with a little dedication, it’s absolutely achievable, and that makes the success all the sweeter.
The Best Time to Start
For the highest chances of success with Santalum acuminatum, I’ve found that late spring or early summer is your golden window. This is when the plant is in a strong growth phase and has plenty of energy to put into developing new roots. You’ll want to be looking for semi-hardwood cuttings. These are stems that have started to firm up but aren’t completely woody and old. Think of a stem that bends a little before snapping cleanly – that’s usually about right.
Supplies You’ll Need
Before you plunge your hands into the soil, let’s gather our tools. It’s always best to be prepared!
- Sharp, clean pruning shears or a razor blade: A clean cut is crucial to prevent disease.
- Rooting hormone powder or gel: This is a vital booster for encouraging root development. Look for one with a good concentration of auxins.
- A well-draining potting mix: I prefer a blend of coarse sand, perlite, and a little peat moss. You want something that won’t hold excess moisture. A commercially available cactus or succulent mix can also work well.
- Small pots or seed trays: Clean ones are a must!
- A plastic bag or propagation dome: To maintain humidity around your cuttings.
- Spray bottle: For misting.
- Gravel or small stones (optional): For the bottom of pots to aid drainage.
Propagation Methods: Stem Cuttings
This is my go-to method for Quandong, and with a bit of luck, it’ll be yours too.
- Take Your Cuttings: Early in the morning is ideal. Select healthy, vigorous shoots from the parent plant. Using your clean shears, take cuttings that are 4-6 inches long. Remove any leaves from the bottom half of the cutting.
- Prepare the Cutting: Gently dip the cut end into your rooting hormone. Make sure it’s coated evenly.
- Plant Your Cuttings: Fill your chosen pots with your well-draining mix, leaving about an inch at the top. Make a small hole in the center with a pencil or your finger. Carefully insert the prepared cutting into the hole, ensuring the base is well-supported by the soil. Firm the soil gently around the base.
- Water Gently: Water the soil lightly until it’s moist but not waterlogged.
- Create a Humid Environment: This is key! Cover the pot loosely with a plastic bag or place it under a propagation dome. This traps humidity, which cuttings desperately need while they develop roots. Make sure some of the leaves aren’t touching the plastic if possible.
- Find the Right Spot: Place your pots in a bright, indirect light location. Avoid direct sun, which can scorch young cuttings.
The “Secret Sauce” (Pro Tips)
Here are a few little tricks I’ve picked up over the years that can really make a difference.
- Bottom Heat is Your Friend: If you have a propagation mat or can place your pots on a warm, sunny windowsill (but not in direct hot sun), a little gentle bottom warmth can significantly speed up root formation. It mimics the natural warmth of the soil in spring.
- Don’t Fuss Too Much: It’s tempting to constantly check, poke, and prod. Resist the urge! Let the cutting do its thing. The more you disturb it, the more stress you put on it. Patience is truly a virtue here.
- Refresh Your Cuttings: If you’re not using rooting hormone, sometimes lightly wounding the very bottom tip of the cutting (just a tiny sliver off the bark) can encourage root initiation.
Aftercare & Troubleshooting
Once you start seeing new leaf growth, that’s a very good sign that roots are forming. Gently tug on the cutting – if you feel slight resistance, you’ve got roots!
- Gradually Acclimate: Once roots have formed and new growth is evident, you can begin to gradually remove the plastic bag or dome over a week or two. This helps the young plant adjust to normal humidity levels.
- Watering: Water when the top inch of soil feels dry. Always water thoroughly and allow excess water to drain away.
- Troubleshooting – The Dreaded Rot: The biggest enemy of cuttings is fungal rot, often caused by too much moisture. If you see the cutting turning black and mushy, it’s usually a sign of rot. There’s not much you can do once this happens, so prevention is key – that well-draining soil and avoiding overwatering are your best defenses. Also, ensure good air circulation around your cuttings.
So there you have it! Propagating Santalum acuminatum is a journey. You might not get every cutting to take, and that’s perfectly alright. Just keep trying, learn from each batch, and celebrate the successes. Enjoy the process of nurturing these little green hopefuls; it’s one of the most rewarding parts of gardening. Happy propagating!
Resource:
https://identify.plantnet.org/k-world-flora/species/Santalum%20acuminatum%20(R.Br.)%20A.DC./data