Well hello there, fellow plant lover! It’s so nice to have you over in my little corner of the garden world. Today, we’re diving into something I get asked about quite a bit: how to coax more of those beautiful Ruellia inundata plants into existence.
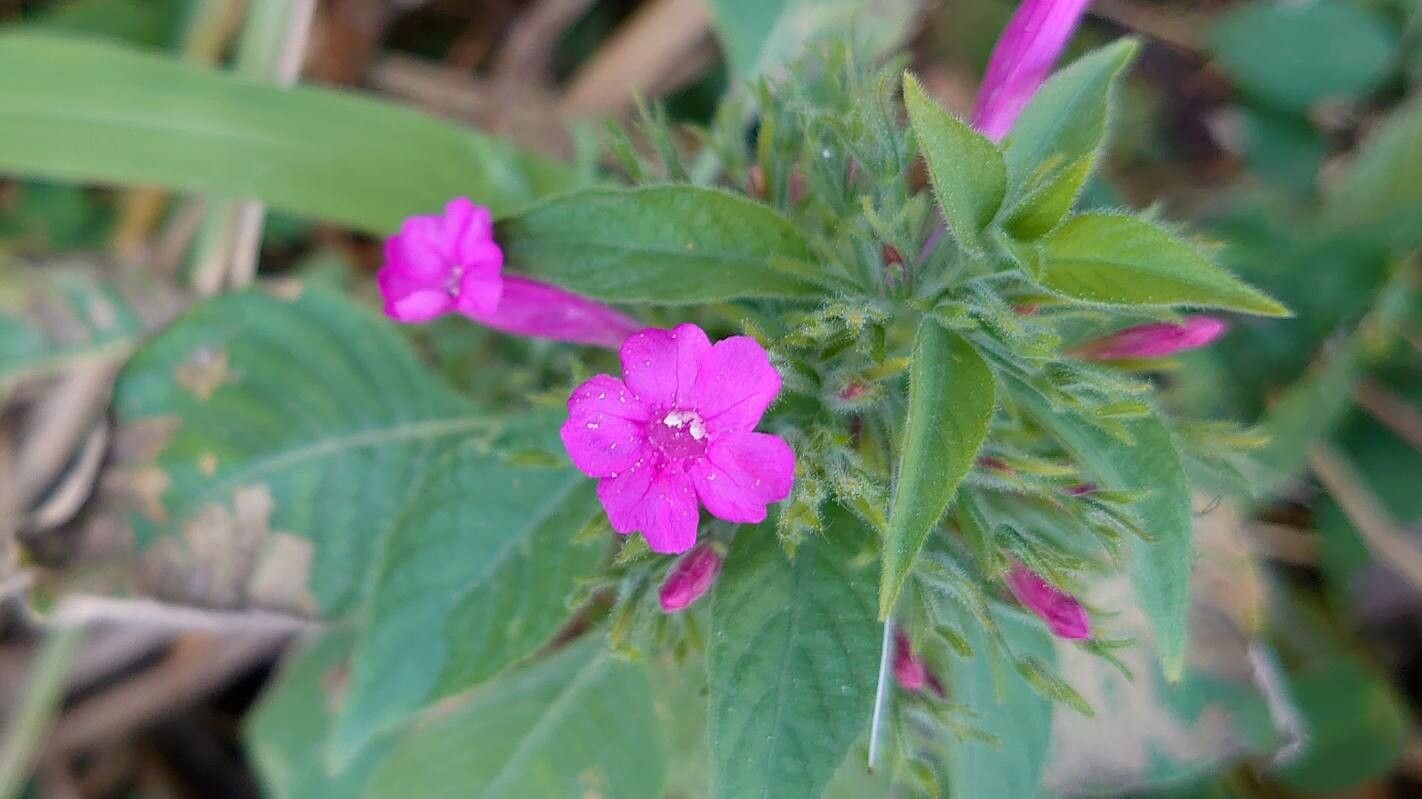
I just adore Ruellia inundata. Its delicate, bell-shaped blooms – often in vibrant purples and blues – have a way of just brightening up any spot they grace. And the best part? They’re surprisingly prolific growers, meaning more plants for you, for friends, or just to fill out that empty space you’ve been eyeing. Good news for beginners: propagating Ruellia inundata is a joy, not a chore. You’ll find it to be a very forgiving and rewarding plant to work with.
The Best Time to Start
For the absolute highest success rate, I’ve found the late spring through early summer to be the sweet spot. This is when the plant is really in its stride, actively growing and full of vigor. You’re essentially tapping into its natural energy surge. Trying to propagate when it’s dormant or stressed just makes things harder on both of you!
Supplies You’ll Need
Gathering your supplies beforehand makes the whole process go much smoother. Here’s what I usually have on hand:
- Sharp pruning shears or a clean knife: For taking clean cuts.
- Rooting hormone (optional but helpful): A little boost never hurt!
- Small pots or trays: About 3-4 inch containers work well.
- Well-draining potting mix: I like a blend of regular potting soil with perlite or sharp sand, about a 1:1 ratio. Some growers also love a coco coir base.
- Watering can or spray bottle: For gentle watering.
- Plastic bags or a propagator lid: To create a humid environment.
- An identification tag: So you don’t forget what you planted!
Propagation Methods
Ruellia inundata is quite versatile, but my favorite and easiest methods involve taking cuttings and, sometimes, just a simple division.
Stem Cuttings: My Go-To
This is where you’ll get the most bang for your buck.
- Select a healthy stem: Look for a piece of stem that’s green and firm, not woody or too soft. Aim for a cutting that’s about 4-6 inches long.
- Make the cut: Using your sharp shears or knife, make a clean cut just below a leaf node. A leaf node is where a leaf attaches to the stem – this is where roots will likely form.
- Remove lower leaves: Gently pinch or trim off the leaves from the bottom half of the cutting. You only want one or two sets of leaves at the very top. This prevents them from rotting in the soil.
- Apply rooting hormone (optional): If you’re using it, dip the cut end into the rooting hormone, tapping off any excess.
- Pot them up: Fill your small pots with your well-draining mix. Make a small hole with your finger or a pencil, and gently insert the cutting, ensuring the leaf nodes where you removed leaves are below the soil line.
- Water gently: Lightly water the soil. You want it moist but not soggy.
- Create humidity: Cover the pot loosely with a plastic bag or a propagator lid. This is crucial to keep the cutting from drying out while it roots.
Water Propagation: A Visual Treat
Want to watch the magic happen?
- Prepare the cutting: Follow steps 1-3 above.
- Place in water: Fill a small jar or glass with clean water. Submerge the bottom half of the cutting, ensuring the leaf nodes are in the water. Make sure no leaves are touching the water’s surface.
- Change water regularly: Every few days, change the water to keep it fresh.
- Watch for roots: You’ll soon see little white nubs appearing from the leaf nodes. Once these roots are about an inch long, it’s time to pot them up into soil (like in step 5 of stem cuttings).
Division: For Established Plants
If you have a larger, established Ruellia inundata plant that’s looking a bit crowded, division is a breeze.
- Gently remove the plant: Carefully lift the whole plant from its pot or the ground.
- Loosen the root ball: On a clean surface, gently tease apart the root ball with your fingers or a trowel. You’re looking to separate it into smaller sections, each with its own roots and some foliage.
- Replant: Pot up each division into its own container with fresh, well-draining soil. Water them in well.
The “Secret Sauce” (Pro Tips)
Here are a few little tricks I’ve learned over the years that really seem to give Ruellia inundata cuttings a helping hand:
- Don’t let the leaves touch the water (in water propagation): This is a big one. If leaves sit in stagnant water, they’ll rot and can take your whole cutting down with them. Keep them high and dry!
- A touch of bottom heat: If you have a heat mat, placing your pots on it can dramatically speed up root formation, especially if your house is on the cooler side. It mimics that lovely warm soil of summer.
- Don’t rush the transplant: With stem cuttings, be a little patient. I usually wait until I see new leaves starting to emerge from the top and I feel a gentle resistance when I tug lightly on the cutting. That tells me roots have formed.
Aftercare & Troubleshooting
Once your cuttings have developed a good root system (you’ll see roots peeking from the drainage holes or new growth appearing), it’s time to give them a bit more dedicated care.
- Acclimatize slowly: If you’ve been using a plastic bag or propagator, gradually remove the cover over a few days to let the new plant get used to your home’s humidity.
- Water consistently: Keep the soil consistently moist but not waterlogged. Water when the top inch of soil feels dry.
- Move to brighter light: Once established, they’ll love a spot with plenty of sun, though they can tolerate some shade.
What if things go wrong? The most common issue is rot. This usually happens when the soil is too wet and there isn’t enough air circulation. If a cutting turns black and mushy, sadly, it’s best to discard it and try again. Overwatering is your biggest enemy here. Yellowing leaves can sometimes mean too much direct sun too soon, or simply not enough water. Just observe your little ones closely!
Watching a new plant sprout from a tiny cutting is one of gardening’s greatest satisfactions. It’s a testament to patience and a little bit of nurturing. So grab your shears, find a healthy stem, and give it a go. I have a feeling you’ll be rewarded with many beautiful Ruellia inundata plants to enjoy. Happy propagating!
Resource:
https://identify.plantnet.org/k-world-flora/species/Ruellia%20inundata%20Kunth/data