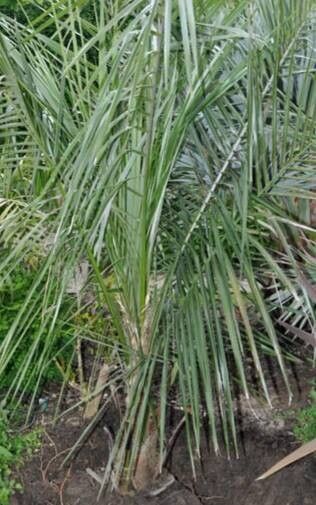
Hello green thumbs! I’m so thrilled you’re thinking about propagating your Parajubaea torallyi. These elegant palms, with their delicate, feathery fronds, bring a touch of the Andes right into our gardens. Seeing a new palm sprout from what was once a mature plant is just incredibly satisfying. It’s a wonderful way to expand your collection or share these beauties with fellow enthusiasts.
Now, let’s talk about ease. For beginners, Parajubaea torallyi can be a tad more challenging than, say, a spider plant grown from division. Patience is definitely your best friend here. But with a little know-how and a gentle touch, you can absolutely succeed!
The Best Time to Start
The absolute sweet spot for propagating Parajubaea torallyi is during its active growing season. Think late spring through summer. This is when the plant has the most energy to put into producing new growth and developing roots. Starting too early or too late in the year can mean the new cuttings or divisions don’t have enough warmth and light to get established.
Supplies You’ll Need
Gathering your supplies beforehand makes the whole process much smoother. Here’s what I always have on hand:
- Sharp, clean pruning shears or a knife: For making clean cuts. Sterilize them with rubbing alcohol between uses!
- Well-draining potting mix: A blend for palms or a cactus/succulent mix often works wonders. You can also create your own with peat moss, perlite, and coir.
- Small pots or propagation trays: With drainage holes, of course.
- Rooting hormone (optional, but recommended): A powder or gel can give your cuttings a boost.
- Fine-grained perlite or sharp sand: To mix into your potting medium for extra aeration.
- A watering can with a fine rose: For gentle watering.
- Plastic bags or a propagation dome: To create a humid microclimate.
- A heat mat (highly beneficial!): Especially if your propagation space is on the cooler side.
Propagation Methods: Getting Started
For Parajubaea torallyi, the most reliable method by far is division. These palms tend to produce basal offshoots, also known as pups.
Method: Division of Basal Offshoots
- Choose your timing: Make sure the parent plant is actively growing (late spring/summer).
- Gently excavate: Carefully dig around the base of the mother plant without damaging its root system. You want to expose where the pup is emerging from the main stem.
- Inspect the pup: Look for a young plant that already has several leaves and, ideally, its own developing roots.
- Make the cut: Using your sterilized sharp knife or pruning shears, make a clean cut to separate the pup from the mother plant. Try to sever as many of its own roots as possible. If the pup has no visible roots, don’t worry; it can still root!
- Allow to callous: After separating, let the cut surface of the pup air dry for 24-48 hours. This helps prevent rot when planted.
- Potting up: Fill your small pot with your prepared well-draining potting mix.
- Plant the pup: Make a small hole in the soil and gently place the pup in, firming the soil around its base. Ensure the lowest leaves are not buried.
- Water gently: Water thoroughly but gently.
- Create humidity: Cover the pot with a plastic bag or propagation dome. Ensure the leaves don’t touch the plastic if possible.
The “Secret Sauce” Pro Tips
Here are a few things I’ve learned over the years that just make a difference:
- Bottom heat is your best friend: Palms love warm soil for root development. Placing your pots on a heat mat set to around 75-80°F (24-27°C) will drastically speed up the rooting process and significantly increase your success rate. It’s like giving your new plant a cozy, warm bed to sprout roots in.
- Don’t overwater, water logically: While humidity is key, soggy soil is the enemy of new roots. Let the top inch of soil dry out slightly between waterings. It’s a delicate balance, but checking with your finger is the best way to get a feel for it.
- Patience is a virtue (and a necessity!): Palms are naturally slow growers, and their propagation is no exception. Don’t be tempted to dig up your pup every week to check for roots. It can take several weeks, sometimes even a couple of months, for new roots to establish and for you to see the first signs of growth. Trust the process!
Aftercare & Troubleshooting
Once you see new growth on your Parajubaea torallyi pup – maybe a new frond unfurling – that’s a great sign!
- Acclimate gradually: Slowly remove the plastic bag or dome over a week or so to help the pup adjust to normal humidity levels.
- Move to brighter light: Once it’s established, move it to a brighter spot, but avoid direct, scorching sun initially, as it can burn the tender new leaves.
- Continue regular watering: Keep the soil consistently moist but not waterlogged.
- Watch for rot: The most common problem is stem or root rot, which usually shows up as a mushy, blackening stem base or yellowing, wilting leaves that don’t recover. This is almost always due to overwatering and poor drainage. If you see it, act fast – sometimes you can save a portion, but often it’s too late. Ensure your potting mix is excellent and you’re not drowning the plant.
- Pests: Keep an eye out for common houseplant pests like spider mites or mealybugs, especially in dry, humid conditions.
Keep Growing!
Propagating Parajubaea torallyi is a journey, my friends. It requires a bit of specialized care, but oh, the reward of seeing a new palm flourish is just immense. Be patient, observe your little plant closely, and don’t be discouraged if your first attempt isn’t perfect. Every gardener learns through doing, and you’ve got this! Happy propagating!
Resource:
https://identify.plantnet.org/k-world-flora/species/Parajubaea%20torallyi%20(Mart.)%20Burret/data