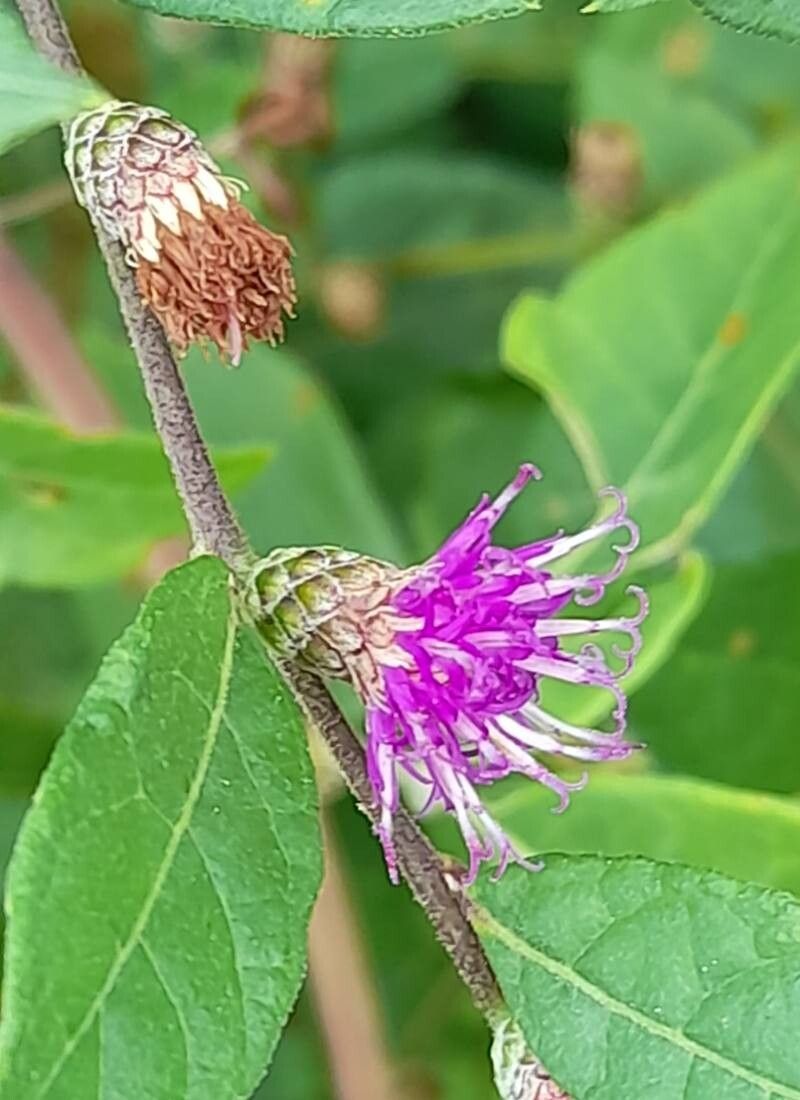
Hello, fellow plant enthusiasts! Today, we’re diving into the wonderful world of Lessingianthus saltensis. I’ve been growing these beauties for years, and honestly, they never cease to amaze me. Their intricate foliage and delicate blooms bring such a unique charm to any space, whether it’s a sunny windowsill or a vibrant garden bed. Propagating them might sound a little intimidating, but trust me, it’s incredibly rewarding, and with a little guidance, it’s certainly achievable. I’d say it’s more of a gentle challenge, perfect for those looking to expand their plant family with something a little special.
The Best Time to Start
For Lessingianthus saltensis, the sweet spot for propagation is late spring to early summer. This is when the plant is in its most vigorous growth phase. You’ll find it easier to get cuttings that are healthy and full of life, which significantly boosts your chances of success. Waiting until after the plant has settled into its spring growth cycle is key.
Supplies You’ll Need
Before we get our hands dirty, let’s gather our tools:
- Sharp, clean pruning shears or a sharp knife: This is essential for making clean cuts.
- Rooting hormone (optional but recommended): A powder or gel to encourage root development.
- A well-draining potting mix: I like a blend of equal parts peat moss, perlite, and coco coir.
- Small pots or seedling trays: Clean containers are a must to prevent disease.
- A misting bottle: For keeping your cuttings hydrated.
- A clear plastic bag or humidity dome: To create a mini-greenhouse effect.
- Labels and a pen: So you don’t forget what you propagated and when!
Propagation Methods
My go-to method for Lessingianthus saltensis is stem cuttings. It’s straightforward and consistently gives me great results.
- Taking the Cutting: On a healthy, non-flowering stem, select a piece that’s about 4-6 inches long. Look for a stem that has several sets of leaves. Use your sharp shears to make a clean cut just below a leaf node (where a leaf attaches to the stem).
- Preparing the Cutting: Gently remove the lower leaves from the cutting, leaving just two to four sets of leaves at the top. If any leaves are very large, I like to cut them in half to reduce water loss.
- Applying Rooting Hormone (Optional): If you’re using rooting hormone, dip the cut end into the powder or gel. Tap off any excess.
- Planting the Cutting: Fill your small pots or trays with your potting mix. Make a small hole in the center with your finger or a pencil. Carefully insert the cut end of the stem into the hole. Gently firm the soil around the cutting.
- Watering: Water thoroughly so the soil is evenly moist but not waterlogged.
- Creating Humidity: This is crucial! Place the pot or tray inside a clear plastic bag and seal it, or cover it with a humidity dome. Ensure the leaves aren’t touching the sides of the bag too much if possible.
Water propagation is another option, and it’s quite satisfying to watch the roots grow.
- Take Your Cutting: Follow steps 1 and 2 above.
- Place in Water: Put the cutting in a small jar or glass of clean water.
- Positioning: Make sure the leaf nodes are submerged but none of the leaves are in contact with the water. Leaves in the water tend to rot.
- Water Changes: Change the water every few days to keep it fresh and prevent bacterial growth.
- Waiting Game: Place the jar in bright, indirect light and wait for roots to form. This can take a few weeks. Once roots are about an inch long, you can transplant them into soil.
The “Secret Sauce” (Pro Tips)
Here are a couple of little tricks I’ve learned over the years that really help:
- Bottom Heat is Your Friend: If you can, place your potted cuttings on a seedling heat mat. This gentle warmth from below encourages root development much faster than ambient room temperature alone. It makes a noticeable difference!
- Don’t Over-Mist: While humidity is vital, over-misting can lead to fungal issues. Aim for a light misting of the air and the leaves every few days, especially if you see condensation inside your humidity dome. You want it moist, not soggy.
- Be Patient with Water Propagation: When propagating in water, sometimes the initial roots that form are softer and more adapted to water. When you transplant these into soil, they might look a little stressed. Give them time. They’ll adjust!
Aftercare & Troubleshooting
Once you see signs of new growth – tiny leaves emerging or roots peeking through the drainage holes – it’s time to start transitioning your new plant from its humid environment.
Gradually acclimate your cutting by opening the plastic bag a little each day for a week, or lifting the humidity dome for longer periods. Continue to water when the top inch of soil feels dry. Avoid direct sunlight initially; bright, indirect light is best.
The most common issue you might encounter is rot. If you see your cutting becoming mushy or the leaves turning yellow and dropping quickly, it’s usually a sign of too much moisture or poor air circulation. If this happens, you might need to start again with a fresh cutting and adjust your watering or humidity levels. Don’t get discouraged; it’s part of the learning process!
A Encouraging Closing
Propagating Lessingianthus saltensis is a beautiful way to connect with nature and multiply the joy these plants bring. Be patient with yourself and your new little green charges. Some take longer than others, and that’s perfectly okay. Enjoy the process, celebrate every tiny new leaf, and you’ll soon have a whole new collection to admire! Happy gardening!
Resource: