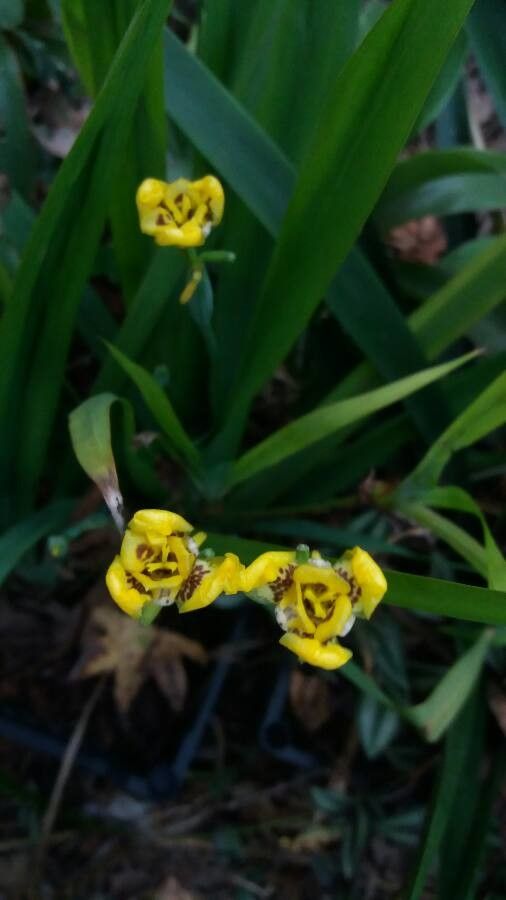
Well hello there, fellow plant lovers! It’s so good to have you join me today. I’m absolutely thrilled to chat about a little gem that’s been capturing hearts for years: Cipura xanthomelas. If you’ve ever seen one of these beauties, you know what I mean. Their cheerful, sunny yellow blooms just have a way of brightening any corner, don’t they? Propagating them is incredibly rewarding. You get to multiply that joy and share it with friends, or simply fill your own garden with even more of their happy faces. For beginners, I’d say Cipura xanthomelas is a wonderfully approachable plant to try your hand at propagation. You’ll likely find great success with a little patience and care.
The Best Time to Start
Timing is, as they say, everything in the garden! For Cipura xanthomelas, the ideal time to propagate is in the spring, as the plant begins its active growth phase. You’ll want to work with healthy, vigorous specimens. If you’re dividing older plants, late winter or very early spring, just as new shoots are emerging, is also a good window. Essentially, you want to catch them when they’re full of life and ready to embrace new beginnings.
Supplies You’ll Need
Gathering your tools beforehand makes the whole process so much smoother. Here’s what I always have on hand:
- Sharp, clean pruning shears or a sharp knife: Crucial for making clean cuts to prevent disease.
- A well-draining potting mix: I often use a mix of equal parts peat moss, perlite, and coco coir. For bulb plants like this, ensuring good drainage is paramount. You can also buy a specialized bulb mix.
- Small pots or containers: Clean ones, of course! Terracotta pots are fantastic because they allow the soil to breathe.
- Rooting hormone (optional but recommended): This little helper can significantly speed up root development and increase success rates.
- Watering can or spray bottle: For gentle watering.
- Labels and a marker: To keep track of what you’ve propagated and when!
Propagation Methods
Cipura xanthomelas is primarily propagated by division, which is quite straightforward.
Division:
- Gently excavate the parent plant: Carefully dig up the entire clump from its pot or from the garden. Try to disturb the roots as little as possible.
- Separate the offsets: You’ll notice smaller bulbs or corms, often called offsets, clustered around the base of the main bulb. Gently tease these apart. If they’re stubbornly attached, use your clean knife or shears to make a clean cut. Make sure each offset has at least one healthy growth bud or shoot.
- Inspect and trim: Remove any dead or mushy material from the offsets. You can also trim back any excessively long roots, but it’s not strictly necessary if they’re healthy.
- Pot them up: Plant each divided offset in its own small pot filled with your well-draining potting mix. Plant them at the same depth they were growing previously, or just slightly deeper. Ensure the pointy end, if you can discern one, is facing upwards.
- Water gently: Give your newly potted offsets a good, gentle watering to settle the soil around the roots.
The “Secret Sauce” (Pro Tips)
Here are a couple of things I’ve learned over the years that really make a difference:
- Let it breathe (but not dry out completely): After dividing and potting, I like to let the divisions sit for a day or two in a slightly shady, airy spot before watering. This allows any small cuts to callus over, which can prevent rot. However, don’t let them shrivel up! It’s a balance.
- The magic of bottom heat: If you’re starting divisions earlier in the spring and your greenhouse or indoor space is a bit cool, placing your pots on a heat mat can work wonders. Warmth encourages faster root development. Just ensure the mat is set to a gentle warmth, not scorching hot.
- Don’t overwater early on: This is probably the biggest mistake beginners make. New divisions don’t have a robust root system yet to take up a lot of water. Keep the soil consistently moist but never waterlogged. It’s better to err on the side of slightly too dry than too wet.
Aftercare & Troubleshooting
Once your Cipura xanthomelas divisions are potted, place them in a bright location with indirect sunlight. Avoid direct, harsh sun, which can scorch delicate new growth. Keep the soil consistently moist, but as I mentioned, avoid soggy conditions. You should start to see signs of new growth within a few weeks.
The most common issue you might encounter is rot. This usually happens due to overwatering or poor drainage. If you notice a bulblet turning mushy and dark, it’s best to remove it to prevent it from spreading. Yellowing leaves can also indicate issues. If the soil is very wet, it might be overwatering. If it’s very dry, then it needs a drink.
A Encouraging Closing
Propagating plants is such a beautiful way to connect with nature and to build your own little plant kingdom. Be patient with your Cipura xanthomelas divisions. They’re resilient little things, and with a bit of tender loving care, you’ll soon have a whole new patch of sunshine to enjoy. Happy propagating, and remember to always enjoy the journey!
Resource:
https://identify.plantnet.org/k-world-flora/species/Cipura%20xanthomelas%20Maxim.%20ex%20Klatt/data