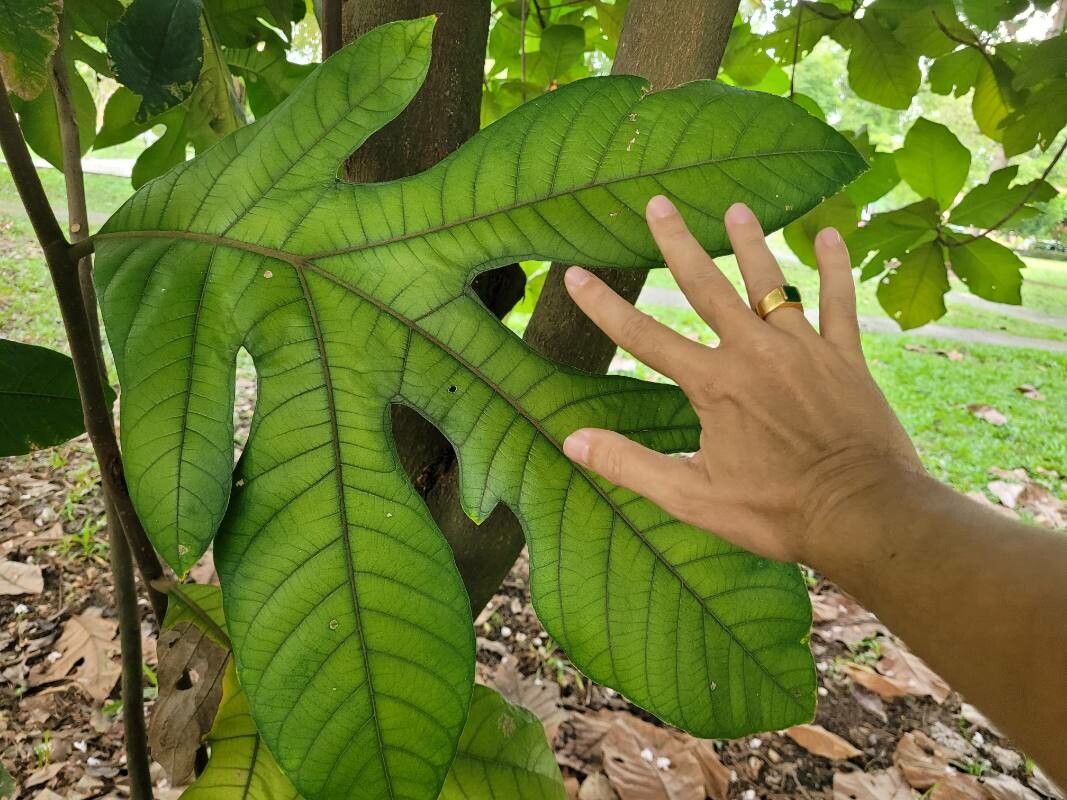
Oh, Artocarpus odoratissimus! What a treat to even say the name. I remember the first time I encountered this magnificent plant. Its large, deeply lobed leaves are absolutely stunning, and if you’re lucky enough to get it to fruit, the aroma is simply divine. Some call it Tarap, others Kimam, but whatever you call it, it’s a tropical gem that’s a real joy to grow.
Propagating Artocarpus odoratissimus might sound a bit daunting, especially if you’re new to the plant world. Let me be honest, it’s not the absolute easiest plant to start from scratch, but with a little care and patience, it’s wonderfully rewarding. Seeing a tiny cutting transform into a healthy, thriving plant is one of life’s simple pleasures, wouldn’t you agree?
The Best Time to Start
For the highest success rate with Artocarpus odoratissimus, you’ll want to work with it during its active growing season. This typically falls in the late spring through summer months. The plant is full of energy then, readily pushing out new growth, which means cuttings are more likely to take and root. Avoid propagating when the plant is dormant or stressed.
Supplies You’ll Need
Before we get our hands dirty, let’s gather our tools. Here’s what I usually have on hand:
- Sharp, clean pruning shears or a knife: For making clean cuts. Sterilize them with isopropyl alcohol!
- Rooting hormone powder or gel (optional but recommended): This encourages faster root development.
- Well-draining potting mix: A good blend of peat moss, perlite, and coir works wonders. You want it airy, not soggy.
- Small pots or propagation trays: With drainage holes, of course!
- Plastic bags or a propagation dome: To create a humid environment.
- A spray bottle: For misting.
- A watering can with a fine rose: For gentle watering.
- A warm location: A sunny windowsill or a heated propagation mat is ideal.
Propagation Methods: Let’s Get Growing!
While Artocarpus odoratissimus can be grown from seed, which isn’t always true to the parent plant, for a specific variety and more predictable results, stem cuttings are the way to go.
Stem Cuttings:
- Select a healthy stem: Look for a piece of stem that is semi-hardwood, meaning it’s not brand new and floppy, but also not old and woody. It should snap cleanly with a bit of resistance. Aim for a cutting about 6-8 inches long, with at least 2-3 healthy leaves.
- Take the cutting: Using your clean shears, make a clean cut just below a leaf node (where a leaf attaches to the stem).
- Prepare the cutting: Gently remove the lower leaves, leaving just two or three at the top. If the remaining leaves are very large, I often cut them in half horizontally. This reduces water loss through transpiration while still allowing for photosynthesis.
- Apply rooting hormone (optional): Dip the cut end of the stem into rooting hormone, tapping off any excess.
- Potting up: Fill your small pot with your prepared well-draining mix. Make a hole in the center with your finger or a pencil.
- Insert the cutting: Gently place the cut end of the stem cutting into the hole and firm the soil around it.
- Create humidity: Water the soil gently. Then, cover the pot with a plastic bag, securing it with a rubber band, or place it under a propagation dome. Make sure the plastic doesn’t touch the leaves too much. If it does, prop it up with little stakes.
- Location, location, location: Place the pot in a bright spot, out of direct sunlight. A windowsill that gets bright, indirect light is perfect. If you have a heated propagation mat, now’s the time to use it – warmth from below is a real boost.
The “Secret Sauce” (Pro Tips)
Here are a couple of things I’ve learned over the years that seem to make a difference:
- Bottom Heat is Your Friend: Artocarpus odoratissimus loves warmth. If you can provide consistent bottom heat (around 75-80°F or 24-27°C), your cuttings will root much faster and with a higher success rate. It mimics that cozy tropical environment they crave.
- Don’t Drown Your Dreams: While humidity is crucial, you absolutely do not want soggy soil. The cuttings need moisture, but overwatering is a fast track to rot. Check the soil moisture daily and only water when the top inch feels dry. A light misting of the leaves every few days can also help maintain that humid microclimate.
Aftercare & Troubleshooting
Once your cuttings have developed roots (you might see them peeking out of the drainage holes, or you can gently tug on the cutting – resistance means roots!), it’s time to ease them out of their humid haven.
- Gradual Acclimation: Over a week or two, gradually uncover your plant. Start by taking off the bag for a few hours each day, increasing the time until it’s fully exposed.
- Transplanting: Once the roots are well-established and the plant is actively growing, you can transplant it into a slightly larger pot with fresh potting mix.
- Watch for Rot: The most common sign of failure is rot, which usually appears as a black, mushy stem base. This is almost always due to overwatering or poor drainage. If you see this, unfortunately, it’s usually too late.
- Wilting: Some slight wilting is normal as a cutting adjusts. However, persistent wilting could indicate lack of moisture, insufficient roots, or, yes, rot.
Keep Digging In!
Propagating Artocarpus odoratissimus requires a touch of patience, but the thrill of nurturing a new life from a simple cutting is truly special. Don’t be discouraged if your first attempt isn’t perfect. Every gardener has had their share of cuttings that didn’t make it! Just keep learning, keep experimenting, and enjoy the beautiful journey of growing your own piece of the tropics. Happy propagating!
Resource:
https://identify.plantnet.org/k-world-flora/species/Artocarpus%20odoratissimus%20Blanco/data