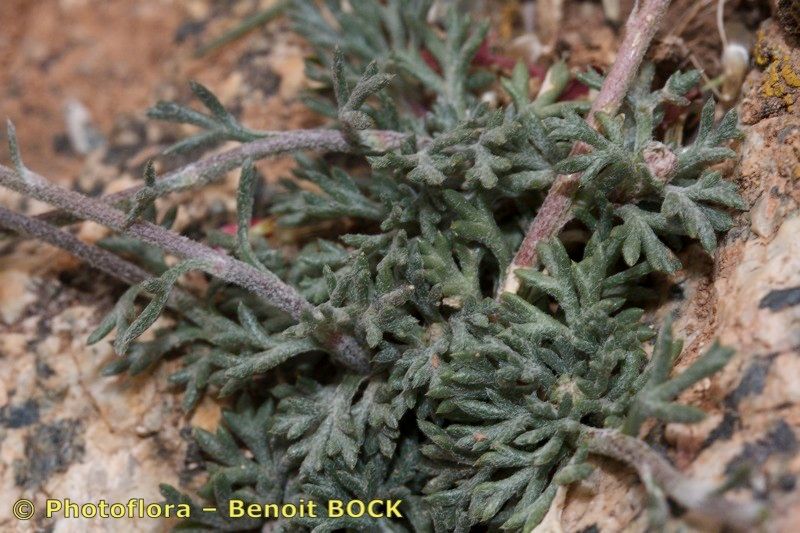
Oh, hello there! Come on in, pull up a chair. I’ve been meaning to chat with you about Rhodanthemum atlanticum, or as I like to affectionately call them, the “African Daisies” of the Mount Atlas. Their cheerful, silvery foliage and delicate white flowers with bright yellow centers are just such a joy, aren’t they? They bring a little bit of that wild, Mediterranean charm right into our gardens. And the best part? They’re surprisingly rewarding to propagate. If you’re new to the gardening game, I think you’ll find this one to be a pretty friendly start.
When’s the Magic Time to Propagate?
For Rhodanthemum atlanticum, I’ve found the absolute best time to get those cuttings going is late spring to early summer. Think of it as after the plant has had a good flush of growth from the spring rains but before the intense heat of mid-summer sets in. You want to catch it when it’s strong and actively growing.
Everything You’ll Need to Get Started
Gathering your supplies beforehand makes the whole process so much smoother. Here’s what I usually have on hand:
- Sharp, clean secateurs or pruning shears: Essential for making clean cuts.
- A rooting hormone powder or gel: This is a bit of a game-changer for encouraging strong root development.
- A well-draining potting mix: I like a mix of perlite, peat moss, and a bit of compost. Or you can buy a good quality seed-starting or succulent mix.
- Small pots or trays: Clean ones, of course!
- A watering can with a fine rose or a spray bottle: To keep things gently moist.
- Labels: So you don’t forget what you’ve planted where!
- A plastic bag or a clear dome: To create a humid environment.
Let’s Get Those New Plants Growing!
Stem Cuttings: My Go-To Method
This is almost always my favorite way to go with Rhodanthemum atlanticum. It’s straightforward and usually gives fantastic results.
- Take Your Cuttings: On a mild, overcast morning if possible, use your sharp secateurs to take softwood cuttings from healthy, non-flowering shoots. Aim for cuttings that are about 3-4 inches long. Make your cut just below a leaf node (that little bump where a leaf attaches to the stem).
- Prepare the Cuttings: Gently remove the lower leaves from the cutting, leaving just a couple of leaves at the very top. You can even take a sharp knife and lightly score the bottom inch of the stem if you’re feeling ambitious, but it’s not always necessary.
- Dip in Rooting Hormone: Dip the cut end of each stem into your rooting hormone, tapping off any excess. This really helps form sturdy roots faster.
- Potting Them Up: Fill your clean pots or trays with your well-draining potting mix. Make a small hole in the center of the mix with a pencil or your finger.
- Planting Cuttings: Insert the hormone-coated end of the cutting into the hole, and then gently firm the soil around the stem. You want them to stand up straight.
- Water and Cover: Water the soil gently. Then, place the pots inside a plastic bag, or cover them with a clear dome to create a mini-greenhouse effect.
Water Propagation (Though I Prefer Soil!)
While I’m a soil girl at heart for these, you can try water propagation for Rhodanthemum atlanticum.
- Prepare Cuttings: Follow steps 1 and 2 from the stem cuttings method.
- Place in Water: Place the prepared cuttings in a clean jar or glass of lukewarm water.
- Crucial Note: Make sure no leaves are submerged in the water. This is a common pitfall that leads to rot. Only the stem should be in the water.
- Location: Place the jar in a bright spot, but out of direct sunlight.
- Water Changes: Change the water every few days to keep it fresh and prevent stagnation. Roots should appear in a few weeks. Once you have a good network of roots, carefully pot them into soil.
Division: For Established Plants
If you have a larger, well-established clump of Rhodanthemum atlanticum, you can propagate it by division.
- Timing: The best time for this is either early spring as new growth begins, or in the fall after flowering has finished.
- Digging Up the Plant: Gently dig up the entire plant. It’s best to do this on a cool, damp day.
- Separating the Roots: Gently shake off excess soil to expose the root ball. Using your hands or two sturdy garden forks, carefully pull apart the plant into smaller sections. Try to ensure each section has a good amount of roots and some healthy shoots.
- Replanting: Replant the divisions immediately into prepared soil, watering them in well.
The “Secret Sauce” You Won’t Want to Forget
- Don’t Be Afraid to Pinch: Once your cuttings have rooted and you see new growth, pinch off the tips. This little action encourages the plant to branch out, making for a bushier, fuller specimen later on. It’s a simple trick that makes a big difference!
- Bottom Heat is Your Friend (Sometimes): If you’re struggling with root development, especially if your house is a bit on the cool side, a heat mat placed under your propagation trays can really speed things up. It mimics the warmth of the soil in warmer climates and encourages those roots to get a move on.
Aftercare and What to Watch For
Once your cuttings have developed about an inch or two of roots – you’ll know because they’ll resist a gentle tug – it’s time to give them a little more attention.
- Gradual Acclimation: If you’ve used a plastic bag or dome, slowly start to acclimate them to the drier air. Open the bag a little more each day for a few days before removing it entirely.
- Watering: Keep the soil consistently moist but not waterlogged. Overwatering is the quickest way to invite trouble. Let the top inch of soil dry out slightly between waterings.
- Light: Place your newly potted cuttings in a bright location with indirect sunlight. Direct sun can scorch young, tender foliage.
- Troubleshooting: The most common issue you’ll encounter is rot, often caused by too much moisture and poor drainage. If you see stems turning mushy and brown or black at the soil line, sadly, that cutting is likely lost. Act quickly to remove affected plants and improve air circulation for the others. Sometimes, a lack of root development just means it’s taking its sweet time, so patience is key!
So there you have it! Propagation is all about patience and observation, and once you get the hang of it, it’s incredibly satisfying. Watching a tiny cutting transform into a vibrant new plant is one of gardening’s greatest rewards. Don’t be discouraged if you have a few failures along the way; it happens to all of us! Just keep trying, and enjoy the process. Happy planting!
Resource: