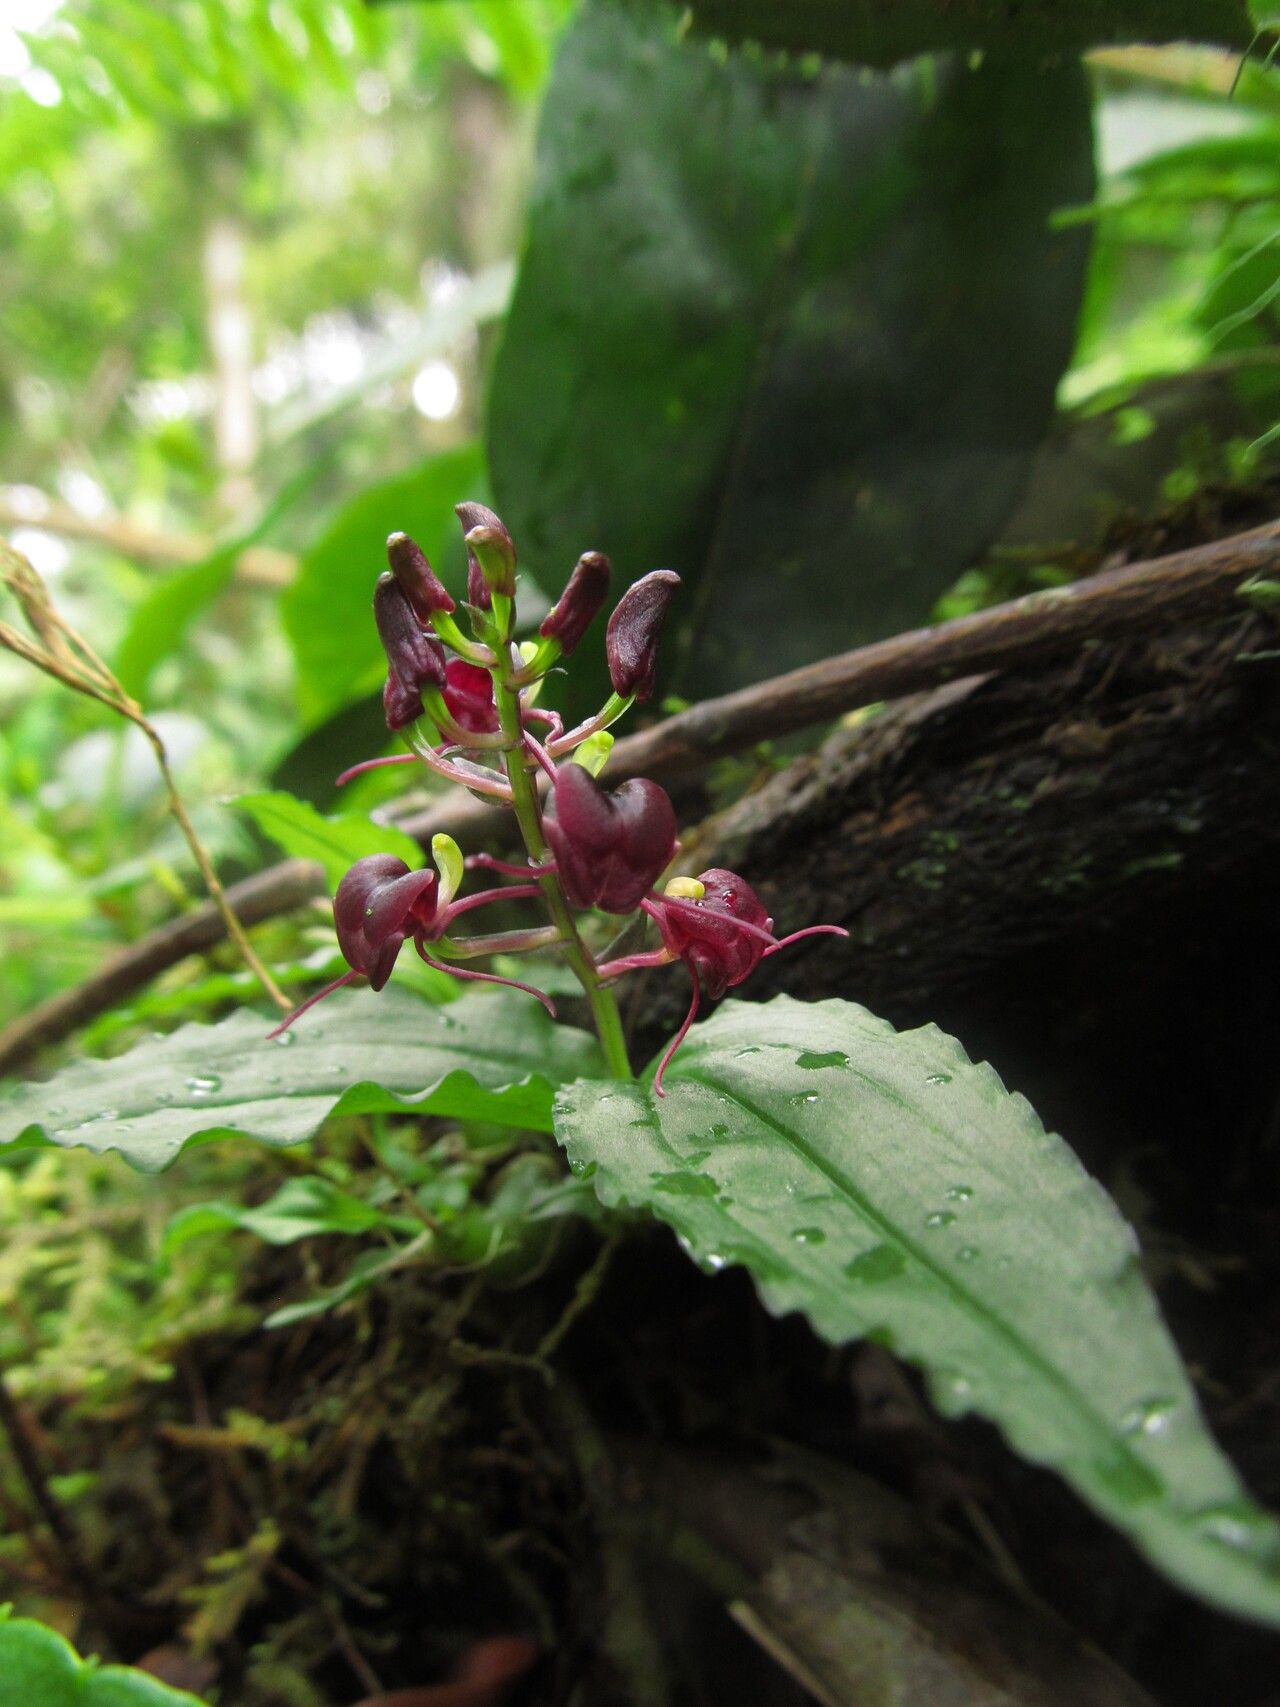
Hello fellow plant lovers! Today, we’re diving into the delightful world of propagating Liparis deistelii. If you haven’t met this gem yet, imagine cascading clusters of delicate, often vibrantly colored, miniature orchids. They have a way of just bringing a touch of elegance to any windowsill or terrarium. Growing more of these beauties from an existing plant is incredibly rewarding. It’s like giving the gift of life to your favorite things, and honestly, it’s how my orchid collection started – with just a few divisions!
Now, I won’t sugarcoat it: Liparis deistelii isn’t the absolute easiest orchid for a complete beginner, but it’s certainly achievable with a little patience and the right approach. Don’t let that deter you!
The Best Time to Start
For Liparis deistelii, the spring or early summer is absolutely prime time for propagation. This is when the plant is actively growing and putting out new energy. You’ll often see new pseudobulbs forming or stems elongating – these are perfect indicators that your plant is ready to share its bounty. Trying to propagate when the plant is stressed or dormant is a recipe for disappointment.
Supplies You’ll Need
Gathering your tools beforehand makes everything so much smoother. Here’s what I always have on hand:
- Sterilized pruning shears or a sharp knife: Cleanliness is crucial to prevent introducing any nasty bugs or diseases.
- Orchid bark mix or a specialized seedling mix: Something airy and well-draining is key. I often use a bark mix with a touch of perlite for extra aeration.
- Small pots or propagation trays: Ensure they have good drainage holes.
- Rooting hormone (optional but recommended): This can give your cuttings a nice boost.
- Spray bottle: For gently misting.
- Clear plastic bags or a propagation dome: To create a humid environment.
- Labels and a waterproof marker: Because trust me, you will forget what you planted where!
Propagation Methods
Liparis deistelii is most commonly propagated through division and sometimes, if you have a particularly vigorous specimen, by taking keikis (baby plantlets that form on mature stems).
Division (The most reliable method!)
This is like giving your plant a haircut and getting new plants as a bonus.
- Gently remove the plant from its pot. If it’s really stuck, a little wiggle or careful prying around the edges might be needed.
- Inspect the root ball. Look for natural divisions where pseudobulbs (those swollen stem bases) have grown sufficiently and have their own set of roots. You’re looking for sections that have at least 2-3 pseudobulbs and a healthy root system.
- Using your sterilized shears or knife, carefully cut between the divisions. Make sure each new section has plenty of roots. If there are any old, mushy, or dead roots, snip those away.
- Allow the cut surfaces to air dry for a few hours, or even overnight. This helps to callus over the wound and prevent rot.
- Pot up your new divisions. Use your well-draining orchid mix. Plant them so the base of the pseudobulbs is just at the surface of the mix.
- Water very lightly initially. You don’t want to soak them right away. A gentle misting is usually enough to get things started.
Keikis (The exciting sprout!)
Sometimes, Liparis deistelii will produce little baby plantlets, called keikis, on its flower spikes or at the base of pseudobulbs.
- Wait for the keiki to be a decent size. This means it should have at least 2-3 small leaves and ideally some tiny roots starting to emerge.
- Carefully cut the keiki from the mother plant. Use your sterilized shears and try to get a little bit of the mother plant’s stem attached to the keiki if possible, along with those new roots.
- Pot it up. Treat it just like a division, planting it in a small pot with your orchid mix.
- Mist and cover. These little guys are delicate and will appreciate the high humidity.
The “Secret Sauce” (Pro Tips)
Here are a couple of things I’ve learned over the years that really make a difference:
- Don’t overwater immediately after division. This is probably the BIGGEST mistake new orchid growers make. The pseudobulbs are like little water reservoirs, and the plant needs to establish new roots before it can handle constant moisture. Let them dry out a bit between gentle waterings.
- Consider bottom heat. If you have a propagation mat or can place your pots on top of a gently warm appliance (like a refrigerator top, but be careful!), this can significantly speed up root development. Orchids love a bit of warmth from below.
Aftercare & Troubleshooting
Once your new Liparis deistelii divisions or keikis have been potted, keep them in a spot with bright, indirect light. High humidity is their friend, so misting them daily or placing them under a propagation dome or in a clear plastic bag (with a few ventilation holes) is a great idea.
The most common issue you’ll encounter is rot. If you see your new plant turning mushy, yellowing excessively, or developing dark spots on the leaves, it’s often a sign of too much moisture or a fungal infection. Act quickly: remove the affected parts, allow the rest to air dry, and repot in fresh, dry mix. Ensure good air circulation around your new plants.
If you see tiny white root nubs emerging, congratulations! You’re on your way to a new plant. Gradually reduce the humidity as the roots grow, and eventually, you can treat it like a mature plant.
A little patience goes a long way.
Propagating Liparis deistelii is a beautiful way to multiply your enjoyment of these exquisite orchids. Don’t be discouraged if your first attempt isn’t perfect; each plant and each season is a learning experience. Just enjoy the process, celebrate the little victories, and soon you’ll have a whole collection of these captivating beauties. Happy growing!
Resource:
https://identify.plantnet.org/k-world-flora/species/Liparis%20deistelii%20Schltr./data