Oh, hello there, fellow plant lover! Grab yourself a mug of something warm, and let’s chat about a truly delightful plant: Xanthostemon aurantiacus, or as some lovingly call it, the Golden Penda.
The Charm of the Golden Penda, and Why You’ll Want More
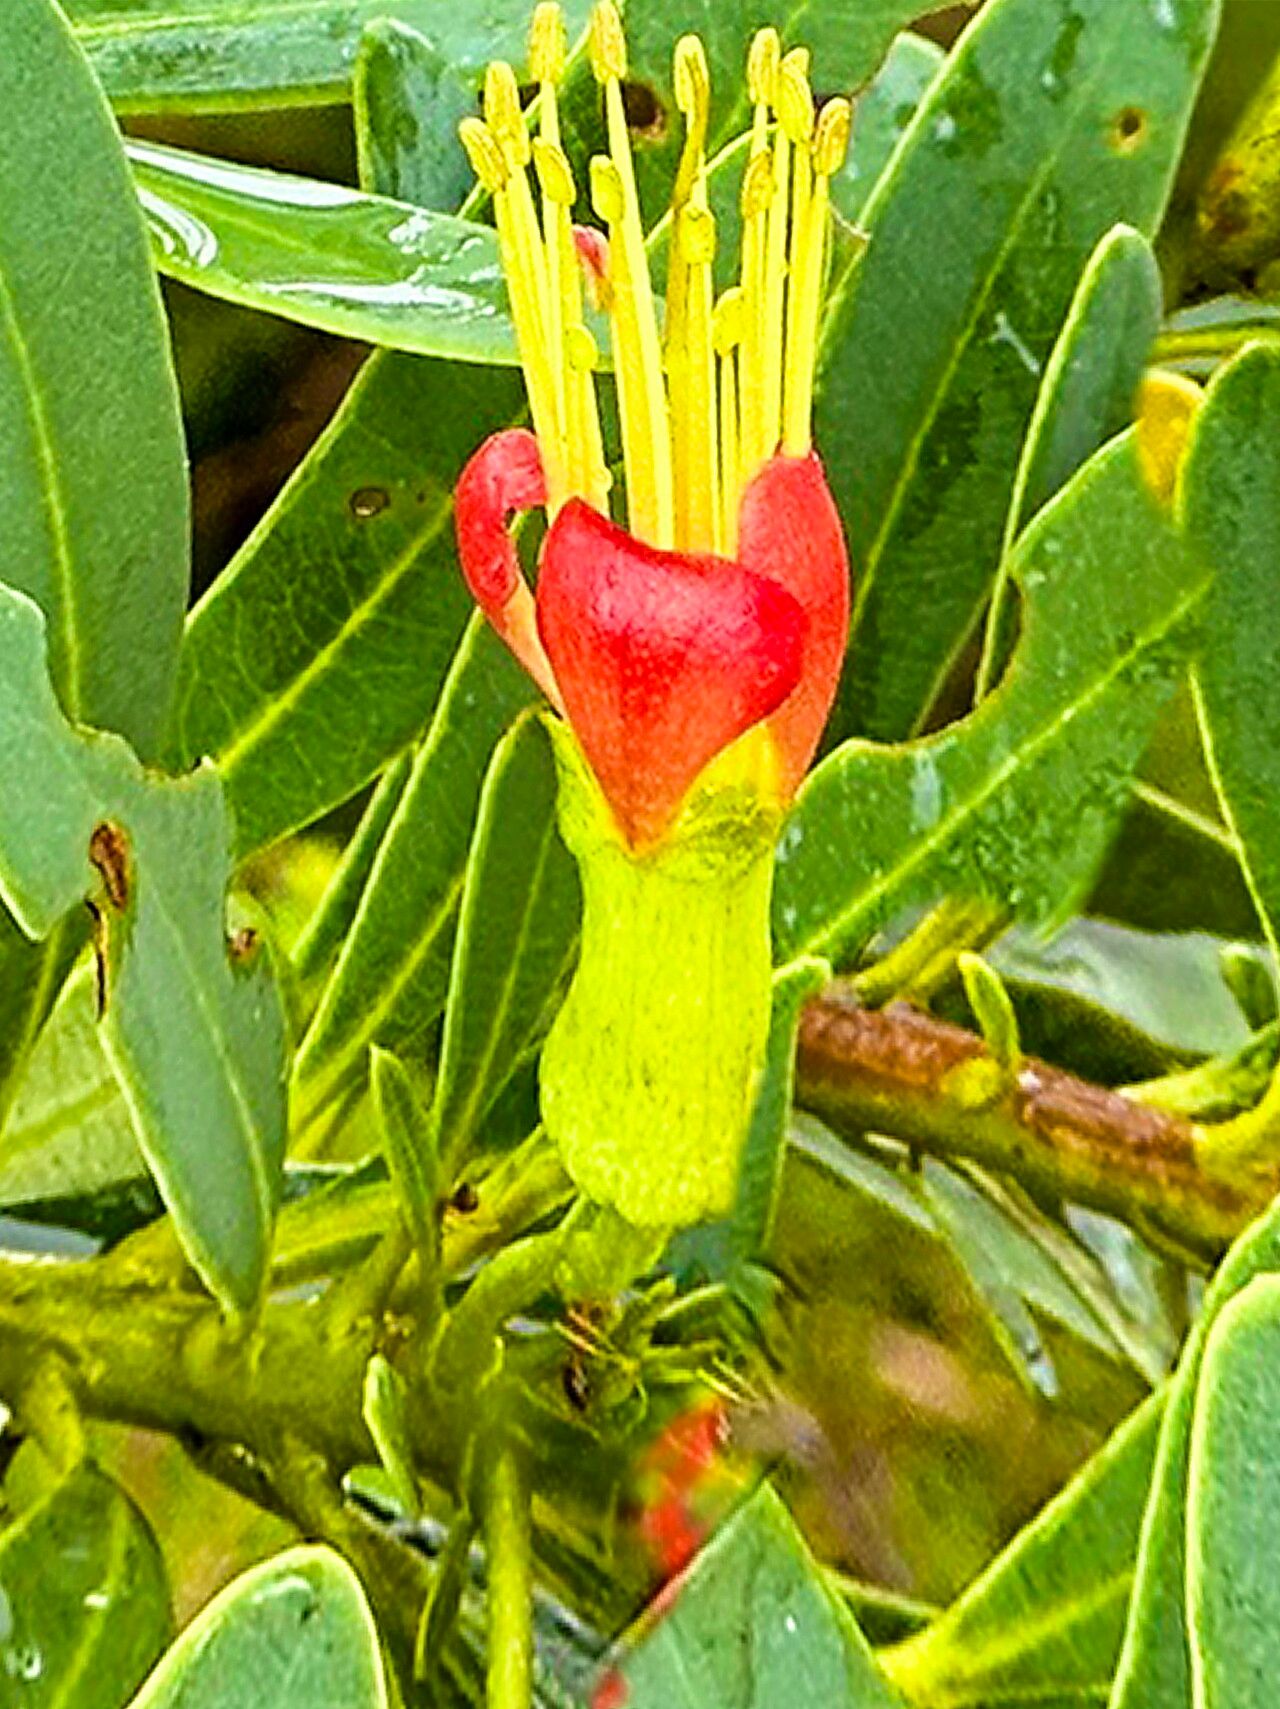
This beauty is a stunner, isn’t it? With its vibrant, fiery orange bottlebrush-like flowers, it’s a magnet for pollinators and brings a splash of sunshine to any garden. Growing them from scratch? It’s incredibly rewarding. You nurture a tiny cutting, and before you know it, you have a whole new shrub to enjoy or share. Now, for the burning question: is it easy for beginners? I’d say it’s moderately easy. A little attention to detail goes a long way, and once you get the hang of it, you’ll be hooked.
The Best Time to Start Your Golden Penda Journey
When it comes to our Golden Penda, spring and early summer are your best friends. This is when the plant is actively growing, pushing out new shoots, and generally feeling full of vigor. Taking cuttings from this vigorous new growth dramatically increases your chances of success. You’re essentially working with the plant’s natural energy reserves.
Supplies You’ll Need for Propagation Success
Gathering your tools before you begin makes the whole process so much smoother. Here’s what I always have on hand:
- Sharp Pruning Shears or a Craft Knife: Cleanliness is key!
- Rooting Hormone: A little boost can make a big difference. I prefer the powder form for cuttings.
- Well-Draining Potting Mix: A good blend is crucial. I often use a mix of coarse sand, perlite, and peat moss in roughly equal parts. You can also buy specialized seed-starting or propagation mixes.
- Small Pots or Trays: Clean ones are a must to prevent disease.
- Plastic Bag or Propagation Dome: This creates that humid environment our cuttings love.
- Watering Can or Spray Bottle: For gentle watering.
- Labels and a Pen: Don’t lose track of what you’ve planted!
Propagating Your Golden Penda: Step-by-Step
We’ll focus on the most successful method for Xanthostemon aurantiacus: stem cuttings.
- Select Your Cuttings: Look for healthy, non-flowering shoots that are about 4-6 inches long. They should be somewhat firm but still flexible – not old, woody growth, and not ridiculously soft, new growth either. Gently snap one off; if it snaps cleanly, it’s usually a good indicator of the right stage.
- Prepare the Cuttings: Using your clean shears or knife, cut the stem just below a leaf node (where a leaf attaches to the stem). Remove the lower leaves, leaving only the top 2-3 sets. This reduces water loss and gives you space to insert the cutting into the soil.
- Apply Rooting Hormone: Dip the cut end of the stem into your rooting hormone, tapping off any excess. This stuff is like a little cheerleader for roots.
- Plant Your Cuttings: Fill your clean pots or trays with your prepared potting mix. Make a small hole in the center with your finger or a pencil. Gently insert the treated end of the cutting into the hole, ensuring it sits snugly against the soil. Firm the soil around the base.
- Water Gently: Water thoroughly but gently, making sure the soil is moist but not waterlogged. A good soaking initially helps settle the soil around the cutting.
- Create a Humid Environment: Cover your pots or trays with a plastic bag, propped up with stakes so it doesn’t touch the leaves, or use a propagation dome. This traps humidity, which is vital for cuttings to root.
- Find the Right Spot: Place your cuttings in a bright location with indirect light. Avoid direct sun, which can scorch the delicate cuttings. Keep the temperature warm, ideally around 70-75°F (21-24°C).
The “Secret Sauce”: My Insider Tips
Over the years, I’ve learned a few tricks that can really boost your success rates with tricky propagations.
- Bottom Heat is Your Friend: If you have a heat mat designed for seedlings, using it under your propagation tray is a game-changer. It encourages root development from the bottom up, and our Golden Penda really thrives with that gentle warmth.
- Don’t Overwater, but Don’t Let Them Dry Out Either: This is a fine balance. Feel the soil every few days. If it’s dry to the touch about an inch down, give it a gentle watering or a light misting. The plastic cover helps a lot with maintaining consistent moisture.
- Sterility, Sterility, Sterility: I can’t stress this enough. Clean your tools, clean your pots, and even use filtered or distilled water if your tap water is very hard. This helps prevent fungal diseases that can quickly decimate your precious cuttings.
Aftercare & Troubleshooting: Nurturing Your New Plant
Be patient! It can take anywhere from 4 to 8 weeks or even longer for your cuttings to develop roots. You’ll know they’re rooting when you see new growth emerging, or if you gently tug on a cutting and feel resistance.
Once you see good root development (you might even see roots peeking out of the drainage holes), it’s time to acclimate them to drier air gradually. Remove the plastic bag or dome for a few hours each day, slowly increasing the time over a week. Then, you can transplant them into slightly larger pots with a good quality potting mix. Water them well and continue to keep them in bright, indirect light.
Common Signs of Failure:
- Rotting: This is usually a sign of too much moisture and poor air circulation. The stem will turn mushy and black. If you catch it early, you might be able to salvage a healthy part of the stem, but often it’s best to discard the infected cutting and start again, paying closer attention to watering and sterility.
- Wilting and Yellowing: This can happen if the cutting is too dry, or sometimes if the light is too intense. Adjust your watering and move it to a shadier spot if necessary.
Keep Growing, Keep Enjoying!
Propagation is a journey, not a race. Some attempts will be more successful than others, and that’s perfectly okay. The process itself is incredibly satisfying. So, go ahead, give it a try, and enjoy the magic of watching a new Golden Penda bloom into life. Happy gardening!
Resource: