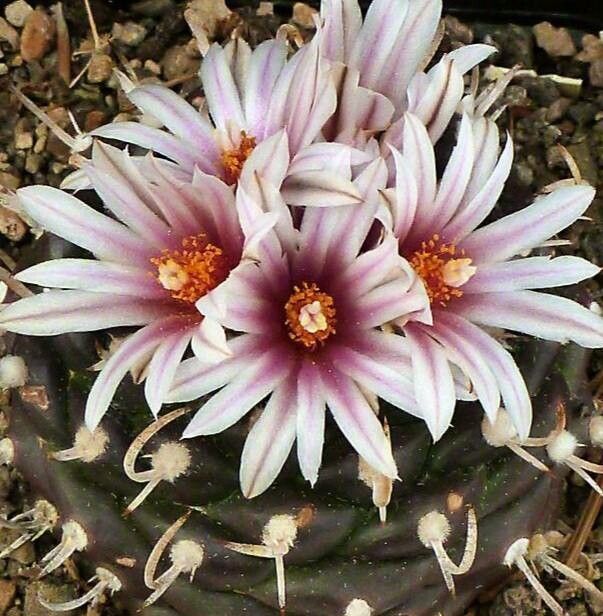
Oh, hello there! Pull up a chair, grab yourself a cuppa. Today, we’re diving into the wonderful world of propagating Turbinicarpus schmiedickeanus. It’s a little gem, isn’t it? Such intriguing textures and a delightful, delicate bloom. Growing these beauties from scratch is incredibly satisfying, a real labor of love that connects you even deeper to your plants. Now, I won’t lie and say this is the absolute easiest succulent to start with for a complete beginner. It requires a bit of patience and attention to detail, but with a few pointers, you’ll be well on your way.
When is the World Ready for New Life?
For Turbinicarpus schmiedickeanus, the sweet spot for propagation is right in the heart of their active growing season. Think late spring through summer. This is when the plant has plenty of energy to put into producing new roots and shoots. Starting a cutting or division when the plant is actively growing gives it the best chance of success. You want to avoid trying this when the plant is dormant in cooler months.
Your Propagation Toolkit
Gathering your supplies makes the whole process smoother. Here’s what I always have on hand:
- Well-draining cactus or succulent soil mix: A blend of potting soil, perlite, and coarse sand is ideal. You can buy pre-made mixes or create your own.
- Sharp, clean pruning shears or a sterile knife: For making clean cuts.
- Rooting hormone powder (optional but helpful): This can give your cuttings an extra boost.
- Small pots or seed trays: Clean ones are crucial to prevent disease.
- Labels and a marker: For keeping track of what you’ve propagated and when.
- Gloves (optional): Some cacti can be prickly!
- A spray bottle: For gentle watering.
Bringing New Turbinicarpus to Life
There are a couple of reliable ways to encourage new life from your Turbinicarpus schmiedickeanus.
Method 1: Offsetting Division
These cacti often produce little baby plants, called offsets, around their base. This is usually the easiest and most successful method.
- Gently unpot your mature Turbinicarpus schmiedickeanus.
- Carefully inspect the roots and the base of the plant. You’re looking for any small, independent plantlets that have their own root system or are clearly starting to separate from the parent.
- Using your clean pruning shears or knife, carefully cut the offset away from the mother plant. Try to get a bit of root with it if possible. If not, don’t worry, it can still root!
- Let the offset callus over. This is a really important step. Place the offset in a dry, well-ventilated spot for 2-3 days to allow the cut surface to dry and form a protective “skin.”
- Once callused, pot the offset into your well-draining soil mix. Plant it just deep enough so it stands upright.
- Water sparingly after a week or so. You’re coaxing it to root, not drowning it.
Method 2: Stem Cuttings (if applicable)
While Turbinicarpus schmiedickeanus often offsets, you might sometimes have a stem that has broken or needs trimming.
- If you have a healthy part of the stem (or a pup that has broken off), inspect the cut end.
- Allow the cutting to callus in a dry, airy place for several days, sometimes up to a week, until the cut is completely dry and sealed. This is your best defense against rot.
- Once callused, dip the cut end into rooting hormone powder, if you’re using it.
- Gently insert the callused end into your prepared, dry soil mix. You don’t need to push it too deep, just enough for it to stand.
- Do not water immediately. Wait at least a week before giving it a very light misting.
The “Secret Sauce”: My Gardener’s Wisdom
I’ve learned a few tricks over the years that can make all the difference.
- Patience with the Callus: Don’t rush the callusing process. It’s the single most important step to prevent rot. If it still looks moist, let it sit longer.
- Bottom Heat is Your Friend: For cuttings, especially if your home is a bit on the cooler side, placing the pot on a gentle heat mat can significantly speed up root development. It mimics the warmth of the soil when the plant is actively growing.
- Don’t Mist Too Much: It’s tempting to keep the soil moist to encourage roots, but with cacti, less is definitely more. Overwatering is the quickest way to lose a new propagation. Let the soil dry out almost completely between waterings.
Life After Rooting & When Things Go Wrong
Once you see signs of new growth, or gently tug on the new plant and feel resistance (indicating roots), it’s a good sign!
- Gradually increase watering frequency as roots establish. Still, aim for the “soak and dry” method.
- Provide bright, indirect light. Avoid harsh, direct sun that can scorch delicate new growth.
- Signs of trouble usually point to rot. This looks like a mushy, discolored base or stem. If you see this, unpot immediately, cut away any rotting parts with a sterile knife, and let the healthy part callus and try again (if there’s enough healthy material). It’s a bit heartbreaking, but it happens. You might also see shriveling, which can be due to lack of roots or underwatering.
Keep Growing!
Propagating Turbinicarpus schmiedickeanus might take a little finesse, but the reward of nurturing a new life from a piece of another is truly special. Be patient, observe your plants, and don’t be discouraged if you have a failure or two – it’s all part of the learning journey. Happy propagating!
Resource: