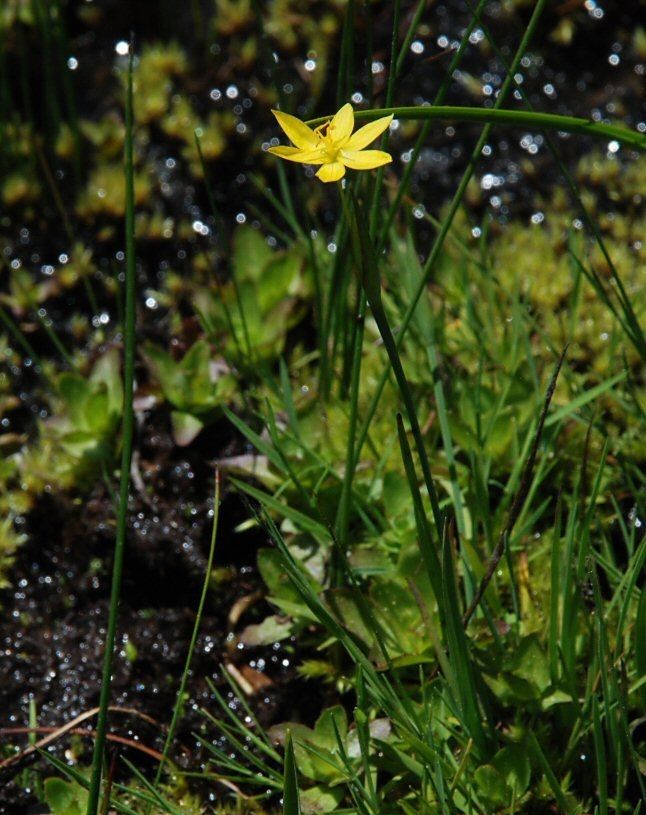
Hello, fellow plant enthusiasts! If you’ve ever admired the cheerful, star-like blossoms of Sisyrinchium elmeri, or more commonly, Elmer’s Blue-eyed Grass, you’re in for a treat. Getting more of these delightful little plants for your garden is not only possible, it’s incredibly rewarding. I’ve spent years coaxing new life from my favorite plants, and I can tell you, Sisyrinchium elmeri is a wonderfully accessible plant to propagate, even if you’re just starting out on your green-thumb journey. It’s a true joy to watch these tiny wonders unfurl and bloom.
The Best Time to Start
For Elmer’s Blue-eyed Grass, the sweet spot for propagation is after flowering, typically in late spring or early summer. This is when the plant has put its energy into blooming and is ready to focus on growth and reproduction. You’ll usually see new shoots emerging from the base of the plant, offering the perfect opportunity to get started. Waiting until after the main bloom cycle ensures you’re not taking energy away from the parent plant’s showiest display.
Supplies You’ll Need
Gathering your tools beforehand makes the process so much smoother. You won’t need a ton, but having the right bits and bobs handy makes all the difference:
- Sharp Pruning Shears or a Knife: For clean cuts that heal well.
- Well-Draining Potting Mix: A good blend for succulents or cacti works wonderfully, or you can mix your own with equal parts potting soil, perlite, and coarse sand.
- Small Pots or Seed Trays: With drainage holes, of course!
- Watering Can or Spray Bottle: For gentle watering.
- Optional: Rooting Hormone: While not strictly necessary for Sisyrinchium elmeri, it can give cuttings a little extra boost.
- Optional: A Dibber or Pencil: To make planting holes.
Propagation Methods
There are a couple of really effective ways to get more Elmer’s Blue-eyed Grass. I find division to be the most straightforward and reliable method for this particular plant.
Method 1: Division (My Favorite!)
This is like giving your plant a little haircut and making new friends at the same time.
- Gently Excavate: Carefully dig up the entire clump of Sisyrinchium elmeri from its current location. Try to get as much of the root system as possible.
- Clean the Roots: Gently brush away excess soil from the roots. This helps you see where the natural divisions are. You’ll notice the plant grows in clumps, with new shoots arising from a central root ball.
- Separate the Clumps: With your hands, or a clean knife if the clumps are stubborn, carefully pull or cut the clump apart into smaller sections. Ensure each division has at least a few shoots and a healthy section of roots. Don’t be afraid to break it apart; these plants are tougher than they look!
- Replant Immediately: Plant each division into its new pot or garden spot, using your well-draining potting mix. Make sure the base of the plant is at soil level. Water them in gently.
Method 2: Seed Starting (A Little More Patience)
If you’re lucky enough to have gathered seeds, this is a wonderful way to grow them from scratch.
- Sow in Fall or Early Spring: Collect seeds after they’ve dried from the spent flower stalks. Sow them in a seed-starting mix in pots or trays.
- Stratification (Optional but Recommended): For better germination, you can stratify the seeds. Mix them with a little damp sand and place them in a plastic bag in the refrigerator for about 4-6 weeks.
- Germination: After stratification (or directly sown), place the pots in a bright, cool location. Keep the soil consistently moist but not soggy. Germination can be a bit slow and sporadic, often taking several weeks.
- Transplanting: Once seedlings are large enough to handle and have a few true leaves, you can transplant them into individual pots or their final garden location.
The “Secret Sauce” (Pro Tips)
Here are a couple of things I’ve learned over the years that really make a difference:
- Don’t Overwater After Division: This is crucial. New divisions can be susceptible to rot if their roots stay too wet. Water thoroughly at first, then allow the soil to dry out slightly between waterings until you see new growth indicating they’ve established.
- Give Them a Little Space: When you replant divisions, ensure they are not overcrowded. This allows for better air circulation, which is a big win against common fungal issues. If you’re planting divisions directly into the garden, give them at least 6-8 inches of space.
Aftercare & Troubleshooting
Once your divided clumps or seedlings are in their new homes, consistent care will help them thrive.
- Watering: For divisions, water them well initially. Then, let the soil dry out somewhat before watering again. For seedlings, keep the soil consistently moist but never waterlogged. As they mature, they’ll become more drought-tolerant, just like the parent plant.
- Sunlight: Elmer’s Blue-eyed Grass prefers full sun to partial shade. Find a spot with at least 6 hours of sunlight daily for the best bloom production.
- Signs of Trouble: The most common issue is rot, often caused by overwatering. If you see mushy stems or leaves that turn yellow and wilt, it’s a sign the roots are staying too wet. If you catch it early, you might be able to save the plant by letting it dry out completely and ensuring excellent drainage. If you see no new growth after a few weeks, check the roots – they might not have taken, or they might have rotted. Patience is key here!
A Warm Encouraging Closing
Propagating plants is about connection – connecting with nature, and connecting with the cycle of life. Don’t get discouraged if your first attempt isn’t perfect. Every gardener experiences setbacks, myself included! The most important thing is to enjoy the process, learn from each step, and celebrate every new sprout that emerges. Happy propagating!
Resource:
https://identify.plantnet.org/k-world-flora/species/Sisyrinchium%20elmeri%20Greene/data