Hello there, fellow garden enthusiasts! Today, we’re diving into the wonderfully zesty world of Momordica charantia. You might know it better as bitter melon, bitter gourd, or karela. This fascinating vine, with its uniquely shaped fruits and striking flowers, brings a touch of the exotic to any garden. And the best part? You can easily bring it into your own little patch by propagating it yourself! It’s a truly rewarding experience to nurture a new plant from just a piece of an established one. For beginners, I’d say it’s moderately easy – a little patience goes a long way!
The Best Time to Start
The ideal time to snag those propagation materials from your existing Momordica charantia plant is when it’s in its active growing season. Think late spring and early summer. The plant is strong, vigerous, and full of life, which means the cuttings or seeds will have a better chance of taking hold and growing. Starting during this period gives your new plant plenty of time to establish itself before the cooler weather arrives.
Supplies You’ll Need
Gathering your tools beforehand makes the whole process much smoother. Here’s what I usually have on hand:
- Sharp pruning shears or a clean knife: For taking clean cuttings.
- Well-draining potting mix: A good blend for seedlings and cuttings, maybe with some perlite.
- Small pots or seedling trays: With drainage holes, of course!
- Clear plastic bags or a propagator lid: To create a humid environment.
- Watering can with a fine rose: For gentle watering.
- Rooting hormone (optional): For an extra boost, especially for stem cuttings. I like the powder form.
- Clean water: For water propagation.
Propagation Methods
Momordica charantia can be propagated in a couple of ways, but I find stem cuttings and seeds to be the most reliable and rewarding.
Stem Cuttings
This is my favorite method for a quick start.
- Take a cutting: On a healthy, non-flowering stem, make a clean cut just below a leaf node. Aim for a cutting that’s about 4-6 inches long. Remove the lower leaves, leaving just a couple at the top.
- Apply rooting hormone (optional): Dip the cut end into your rooting hormone.
- Plant it: Moisten your potting mix and gently insert the cutting into the soil, ensuring the nodes where you removed leaves are buried.
- Create humidity: Cover the pot with a clear plastic bag or propagator lid.
- Place it: Put it in a warm spot with bright, indirect light.
From Seeds
If you have access to fresh seeds from a ripe fruit, this is also a straightforward approach.
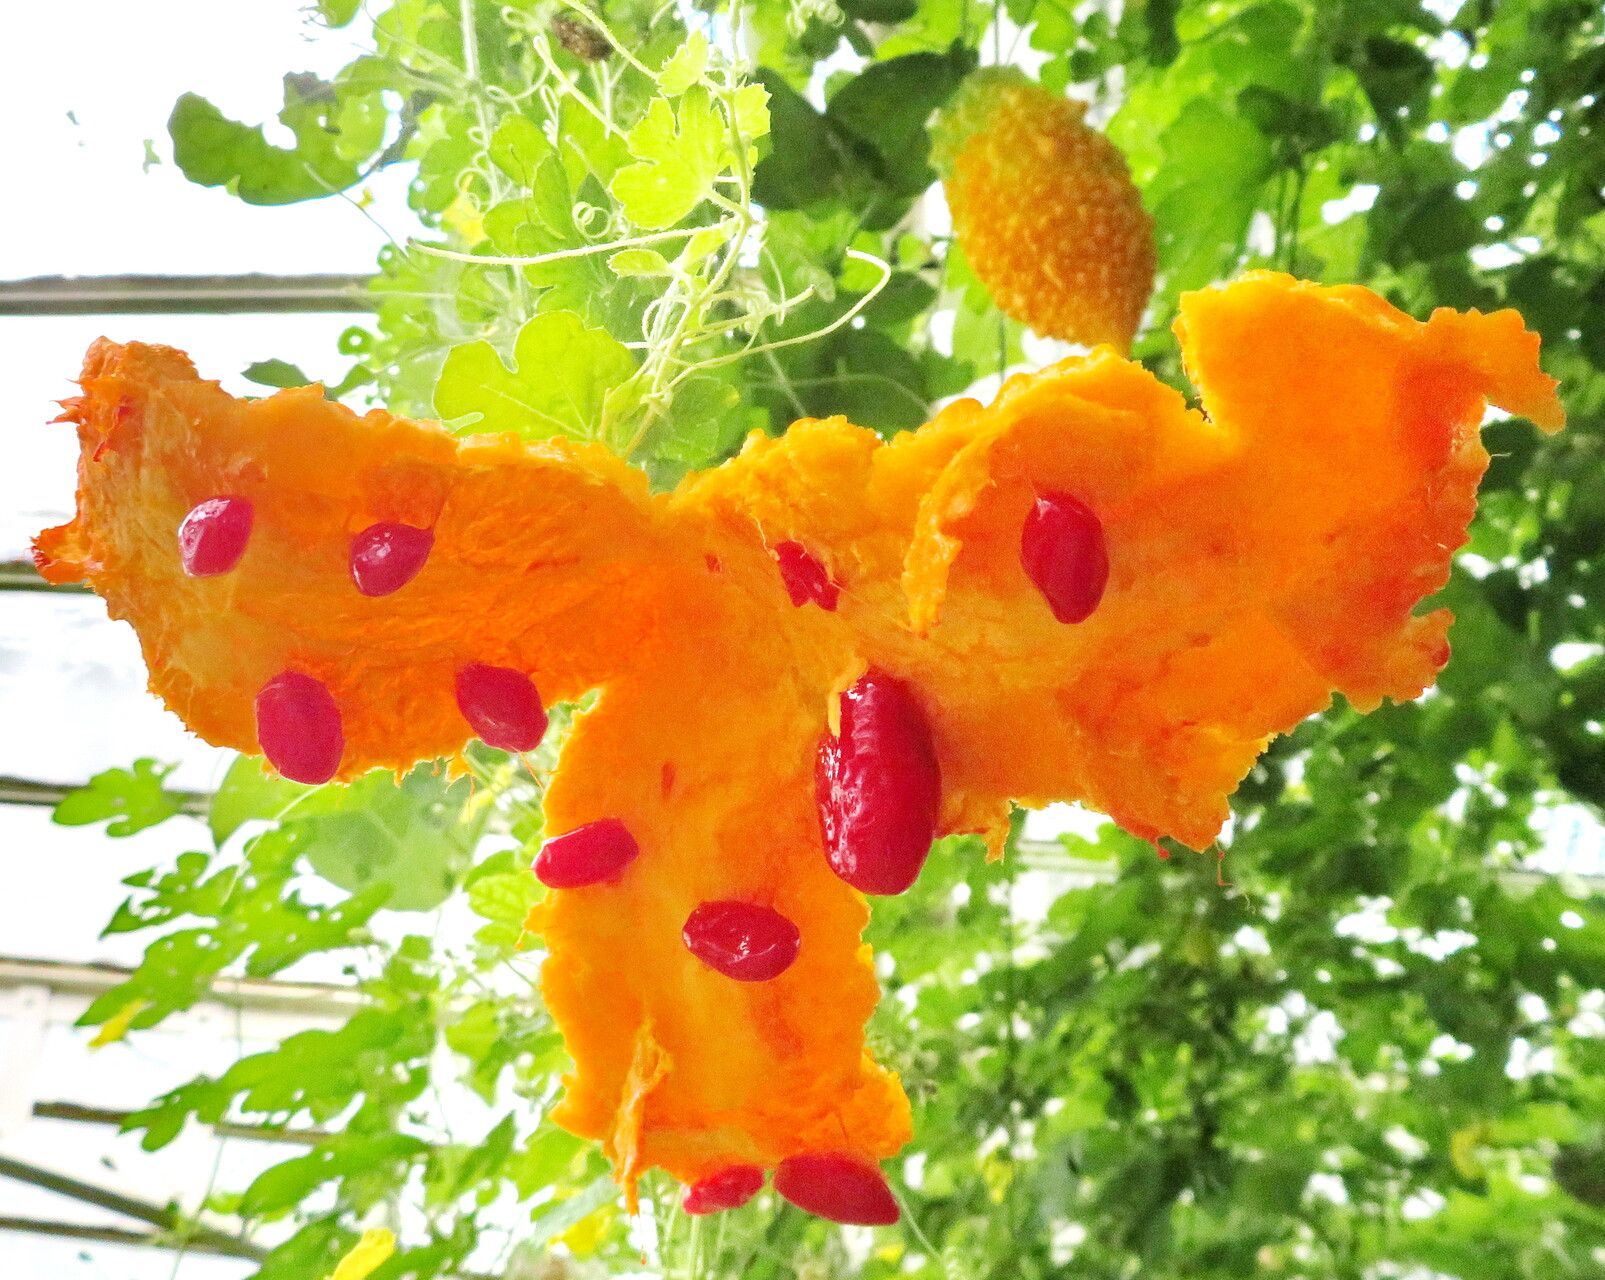
- Harvest seeds: Carefully extract the seeds from a ripe bitter melon. Wash them gently to remove any pulp and let them dry for a day or two.
- Sow the seeds: Plant the seeds about 1/2 inch deep in your potting mix.
- Water gently: Keep the soil consistently moist, but not waterlogged.
- Provide warmth: Bitter melon seeds love warmth to germinate. A sunny windowsill or a heat mat can be very beneficial. Germination usually takes 1-3 weeks.
The “Secret Sauce” (Pro Tips)
Here are a few things I’ve learned over the years that can seriously boost your success rate:
- Don’t let the leaves dip into water: If you’re doing water propagation (which also works for Momordica, as long as you change the water frequently!), make sure the leaves are above the water line. Rot can set in surprisingly fast if you don’t.
- Bottom heat is a game-changer: Especially for stem cuttings and seed starting, placing your pots on a gentle heat mat will encourage root development much faster. It mimics the warmth of spring soil beautifully.
- Be patient with the “wiggle test”: When you think your cutting might have roots, give it a very gentle tug. If you feel resistance, you’ve got roots! Don’t be tempted to dig around too much before then.
Aftercare & Troubleshooting
Once you see roots forming (you might see new growth or feel that resistance during the wiggle test), it’s time to transition your new plant.
- Gradual acclimatization: If you’ve used a plastic bag, start by opening it for a few hours each day to get your seedling used to drier air. Eventually, remove it completely.
- Transition to a larger pot: Once your seedling has a good root system and a few sets of true leaves, transplant it into a slightly larger pot with fresh potting mix.
- Watering: Keep the soil consistently moist, but avoid overwatering, which can lead to issues. Water when the top inch of soil feels dry.
- Signs of trouble: The most common issues are rot (mushy stems, wilting of healthy-looking leaves) and damping off (seedlings collapsing at the soil line). These are usually caused by too much moisture and poor air circulation. Make sure your pots have good drainage and avoid crowding your plants.
A Bit of Encouragement
Propagating Momordica charantia is a wonderful way to connect with nature and grow your own unique produce. Don’t be discouraged if your first attempt isn’t perfect. Gardening is all about learning and adapting. Keep trying, observe your plants, and soon you’ll be enjoying the satisfaction of nurturing these amazing vines from tiny beginnings. Happy growing!
Resource:
https://identify.plantnet.org/k-world-flora/species/Momordica%20charantia%20L./data