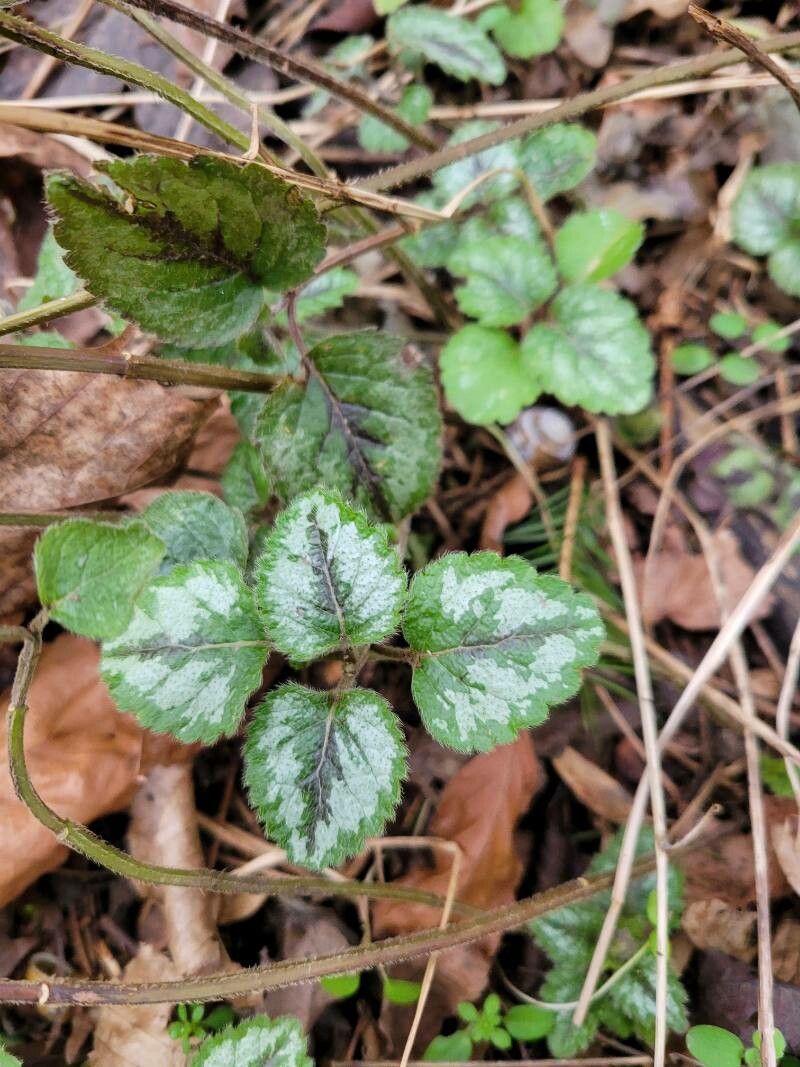
Hello there, fellow garden enthusiasts! I want to chat today about a plant that’s been a quiet achiever in my own garden for years: Lamium galeobdolon. You might know it better as Yellow Archangel or Barrenwort. It’s a wonderful groundcover with its attractive, often silver-splashed foliage and cheerful yellow flowers in spring. If you’ve ever admired its sprawling beauty and thought, “I wish I had more of that!” then you’re in luck. Propagating Lamium is surprisingly straightforward, even for those of you just dipping your toes into the wonderful world of plant propagation. It’s a truly rewarding process that lets you double, triple, or even quadruple your plantings without spending a dime.
The Best Time to Start
My personal favorite time to propagate Lamium is during the late spring to early summer. This is when the plant is actively growing after its spring surge and before the intense heat of midsummer sets in. The new shoots are flexible and full of life, making them ideal candidates for cuttings. You can also have success with cuttings in the early autumn, but the rooting might be a little slower as the plant prepares for dormancy.
Supplies You’ll Need
Gathering your tools makes the process so much smoother. Here’s what I usually have on hand:
- Sharp pruning shears or a clean knife: For taking cuttings. Sterilize them with rubbing alcohol to prevent disease.
- Rooting hormone (optional but recommended): A powdered or gel product that encourages faster root development.
- Small pots or seed trays: With drainage holes, of course!
- A good quality potting mix: Something light and well-draining. A blend of peat moss or coco coir, perlite, and a bit of compost works beautifully. You can also use a dedicated seed-starting mix.
- A watering can with a fine rose: For gentle watering.
- Plastic bags or a propagation dome (optional): To create a humid environment.
Propagation Methods
Lamium galeobdolon is wonderfully versatile, and I’ve had great success with a couple of methods.
Stem Cuttings
This is my go-to method for Lamium.
- Select healthy stems: Look for non-flowering, vigorous stems that are about 4-6 inches long. Gently bend a stem; if it snaps easily, it’s usually a good sign it’s ready.
- Make the cut: Using your clean shears or knife, make a cut just below a leaf node. A leaf node is where a leaf attaches to the stem. This is where the magic happens, where roots are most likely to form.
- Prepare the cuttings: Strip off the lower leaves from the bottom 2-3 inches of the stem. This prevents them from rotting when you plant the cutting. You can leave the top few leaves if they are smaller, or even cut larger leaves in half to reduce water loss.
- Apply rooting hormone (optional): Dip the cut end into rooting hormone, tapping off any excess.
- Plant your cuttings: Fill your pots or trays with the potting mix. Make a small hole with your finger or a pencil. Insert the cut end of the stem into the hole, firming the soil gently around it. You can plant several cuttings in one pot, ensuring they have a little space between them, about 2-3 inches.
- Water gently: Water thoroughly until the soil is moist but not soggy.
Division
If you have a mature clump of Lamium, division is a fantastic way to get multiple plants instantly.
- Dig up the clump: In spring or early autumn (when it’s not too hot or dry), carefully dig up the entire plant. You’ll often find that this vigorous spreader has roots growing from its stems.
- Separate the sections: Gently tease apart the root ball with your hands or a trowel. You’re looking for sections that have both roots and shoots. Don’t be afraid to break it apart; Lamium is tough!
- Replant: Immediately replant the separated divisions in their new locations or in pots as described below. Water them well.
The “Secret Sauce” (Pro Tips)
Here are a few little tricks I’ve picked up over the years that really boost success rates:
- Don’t let those lower leaves touch the soil (or water!): This is crucial. Any foliage submerged in the potting mix or water will eventually rot and can take down your promising cutting with it. Be ruthless with your leaf removal.
- Create a mini-greenhouse: Pop a clear plastic bag over your pots or use a propagation dome. This traps humidity, which is vital for cuttings while they develop roots. Just make sure to open the bag for a few minutes each day to allow for air circulation and prevent fungal issues.
- Warmth is your friend: If you have access to a heat mat, placing your pots on it can significantly speed up root formation. A gently warm soil temperature mimics the conditions plants love for sending out roots.
Aftercare & Troubleshooting
Once your cuttings are planted, keep them in a bright spot out of direct, harsh sunlight. Water whenever the top inch of soil feels dry. You can give the pot a gentle tug after a few weeks. If you feel resistance, that’s a good sign roots are forming!
The most common issue you might encounter is rot. If you see a cutting turning black or mushy, it’s usually a sign of too much moisture and not enough airflow. Remove the affected cutting immediately and try to improve ventilation for the others. Occasionally, a cutting just won’t root. Don’t get discouraged! It happens to all of us. Just try again with a fresh stem.
A Encouraging Closing
As you take your first cuttings of Lamium galeobdolon, remember to be patient. Plant propagation is a journey, and each success builds your confidence. Enjoy the process of nurturing these tiny new life forms, and soon you’ll have an abundance of this lovely groundcover to fill your garden beds! Happy gardening!
Resource:
https://identify.plantnet.org/k-world-flora/species/Lamium%20galeobdolon%20(L.)%20L./data