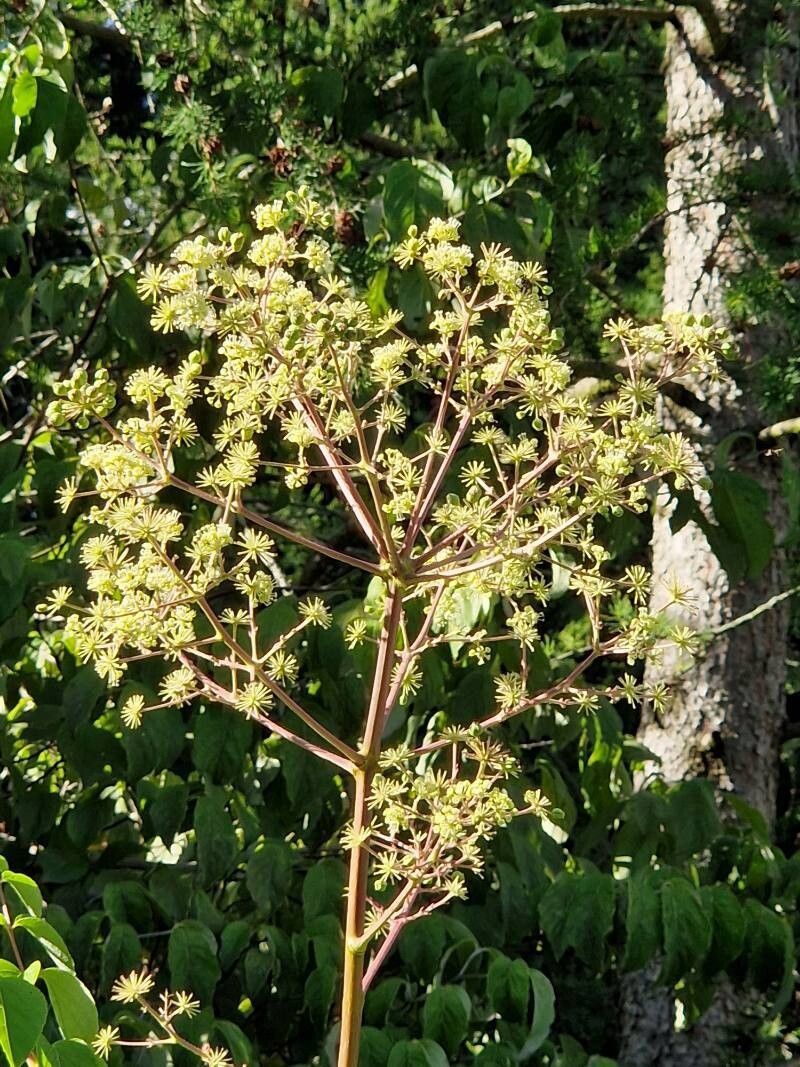
Oh, have you met Aralia spinosa, also known as Devil’s Walking Stick? If not, you’re in for a treat! This magnificent native shrub is a real showstopper with its dramatic, spiky stems, ethereal white flower clusters in summer, and gorgeous dark berries that songbirds adore. Growing one from scratch is incredibly rewarding. It’s a plant that rewards your efforts with its striking presence and ecological benefits. Now, for beginners, I’d say propagation isn’t super straightforward, but with a little patience and these pointers, you’ll be well on your way.
The Best Time to Start
For Aralia spinosa, the absolute sweetest spot for propagation is late spring to early summer. This is when the plant is actively growing and has plenty of energy to put into developing new roots. You’re looking for stems that are firm but not yet woody. Think of them as being in that perfect “tender but not limp” stage.
Supplies You’ll Need
Gathering your supplies beforehand makes the whole process so much smoother. Here’s what I usually have on hand:
- Sharp pruning shears or a clean knife
- A small trowel or dibber
- Rooting hormone (a powder or gel works fine)
- Perlite
- Peat moss (or a good quality potting mix)
- Small pots or trays with drainage holes
- A misting bottle
- Plastic bags or a propagator lid
Propagation Methods
Let’s dive into a couple of reliable ways to get more Devil’s Walking Stick plants.
Stem Cuttings
This is my go-to method. It’s efficient and gives you a good chance of success.
- Select Your Cuttings: In late spring or early summer, choose healthy, non-flowering stems. Look for sections that are about 6-8 inches long and have at least two sets of leaves.
- Make the Cut: Using your sharp pruning shears or knife, make a clean cut just below a leaf node. This is where roots are most likely to form. Gently remove the lower leaves, leaving just the top couple.
- Apply Rooting Hormone: Dip the cut end of the stem into your rooting hormone, coating it well. Tap off any excess.
- Prepare Your Potting Mix: Mix equal parts perlite and peat moss (or use a well-draining potting mix). Moisten the mix until it’s damp, not soggy.
- Plant the Cuttings: Make a hole in the potting mix with your dibber or finger and insert the cutting, ensuring the leaf nodes are buried. Gently firm the soil around it.
- Create a Humid Environment: Water lightly and then cover the pot with a plastic bag or propagator lid. Place it in a bright spot, but out of direct sunlight.
Division
This is a fantastic method if you already have a mature plant. You’re essentially splitting up an established root system.
- Timing is Key: The early spring, just as the plant is waking up, is the ideal time for division.
- Expose the Roots: Carefully dig around the base of the plant and expose the root ball. You might need to gently wash away some soil to see what you’re doing.
- The Split: Using a clean spade or sturdy knife, divide the clump into sections. Each section should have a good portion of roots and some healthy shoots.
- Replant Immediately: Plant the divided sections in their new homes as soon as possible. Water them in well.
The “Secret Sauce” (Pro Tips)
Here are a couple of little tricks I’ve learned over the years that can really boost your success rates:
- Bottom Heat is Your Friend: For stem cuttings, placing your pots on a gentle heat mat can make a world of difference. It encourages root development from below, speeding things up considerably.
- Don’t Drown Them: When misting or watering your cuttings, always err on the side of caution. Excess moisture is the enemy and can lead to rot, especially before roots have formed. A light misting is usually enough to keep the humidity up.
- Be Patient with Division: When dividing, sometimes it looks like you’ve made a brutal cut, but Aralia spinosa is a tough cookie. As long as each piece has adequate roots and at least one eye (where new shoots emerge), it has a good chance of survival.
Aftercare & Troubleshooting
Once you see tiny roots poking out of the drainage holes or new leaf growth, you’re in business!
- Acclimatize Gradually: If you’ve used a plastic bag or lid, start slowly removing it for longer periods each day to help the new plant adjust to normal humidity.
- Watering: Keep the soil consistently moist but not waterlogged. As the plant grows stronger, you can reduce the frequency of watering.
- Light: Continue to keep them in bright, indirect light. Once they are well-established, you can slowly introduce them to more sunlight.
The most common problem you’ll encounter is rot. This is usually a sign of overwatering or poor air circulation. If a cutting turns mushy and black, or if a divided section seems to be wilting beyond recovery, it’s usually a lost cause. Don’t get discouraged! Just learn from it and try again with a bit more attention to moisture levels.
A Encouraging Closing
There you have it! Propagating Aralia spinosa might take a little finesse, but the joy of watching a new plant emerge from a stem cutting or a divided root is truly special. Be patient with the process; nature has its own rhythm. Enjoy the journey, and soon you’ll have more of these magnificent plants to admire and share. Happy gardening!
Resource:
https://identify.plantnet.org/k-world-flora/species/Aralia%20spinosa%20L./data