Hey there, fellow plant lovers! It’s so good to see you in my little corner of the internet. Today, we’re diving into the world of a plant that brings such sunny joy to any garden: Oenothera mollissima, or as we often fondly call it, the Soft-leaved Evening Primrose.
A Torch of Sunshine for Your Garden
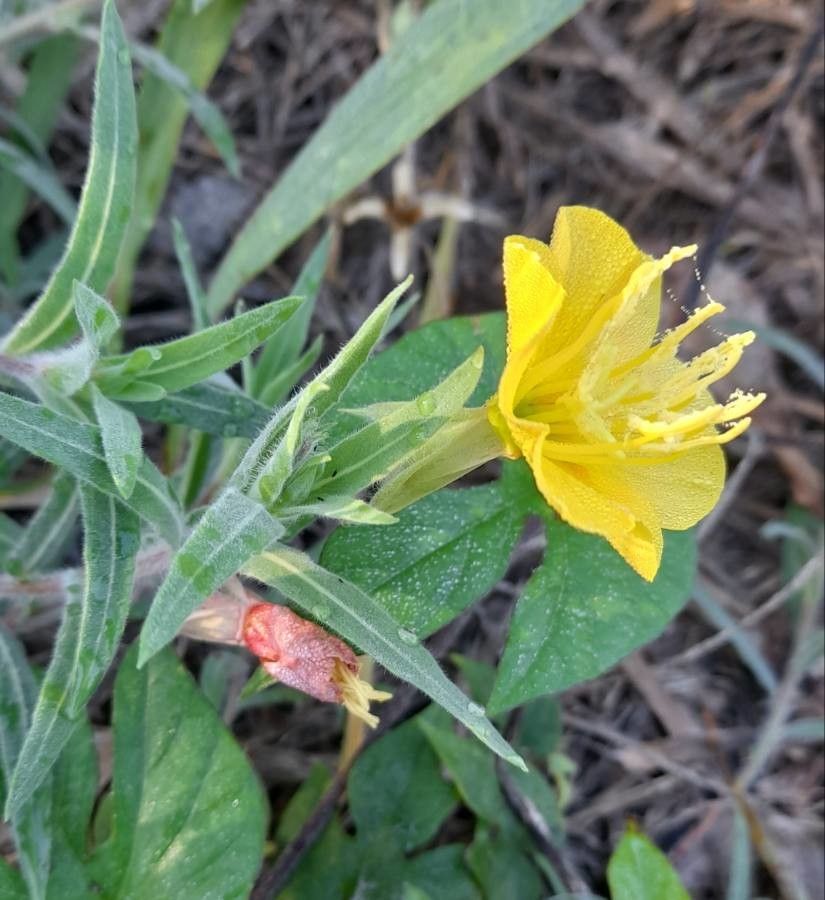
There’s something magical about Oenothera mollissima’s large, buttery yellow flowers. They unfurl in the late afternoon and evening, filling the air with a delicate fragrance. It’s a plant that rewards you with continuous blooms throughout the summer, attracting pollinators and providing a cheerful splash of color. Propagating it yourself is not only incredibly satisfying but also a fantastic way to fill your garden with more of this sunshine, or to share these beauties with friends. And for those of you just dipping your toes into the gardening pond, I’m happy to tell you that Oenothera mollissima is quite forgiving and relatively easy to propagate, making it a great choice for beginners!
When the Sun is Just Right: The Best Time to Start
The sweet spot for propagating Oenothera mollissima is generally late spring to early summer. This is when the plant is actively growing, and its stems are still somewhat soft and pliable, making them ideal for cuttings. You want to catch it before it gets too woody. If you miss this window, you can also have success with divisions in early spring when the plant is just waking up.
Gather Your Garden Companion Tools
Before we get our hands dirty, let’s make sure we have everything ready. A little preparation goes a long way!
- Sharp Pruning Shears or a Craft Knife: For clean cuts that heal well.
- Small Pots or Seed Trays: Clean ones are a must to prevent disease.
- Well-Draining Potting Mix: A good general potting mix is fine, but I often add a bit of perlite or coarse sand to ensure excellent drainage.
- Rooting Hormone (Optional but Recommended): This can give your cuttings a little boost.
- Watering Can with a Fine Rose: For gentle watering.
- Plastic Bags or a Propagator Lid: To create a humid environment for your cuttings.
- Labels: So you don’t forget what you planted where!
Letting New Life Bloom: Propagation Methods
Oenothera mollissima is quite obliging, and you have a couple of wonderful ways to increase your stock.
Stem Cuttings: The Most Common Approach
This is my go-to method for Oenothera mollissima.
- Take Cuttings: In late spring or early summer, select healthy, non-flowering stems that are about 4-6 inches long. Make a clean cut just below a leaf node (where a leaf attaches to the stem). Remove the lower leaves, leaving just a few at the top.
- Prepare the Cutting: If you’re using rooting hormone, dip the cut end into it. Don’t overdo it; a light dusting is all you need.
- Plant Your Cuttings: Fill your small pots or trays with your prepared potting mix. Make a small hole with your finger or a pencil. Gently insert the cut end of the stem into the hole and firm the soil around it.
- Water Gently: Water the soil thoroughly but carefully, ensuring it’s moist but not waterlogged.
- Create Humidity: Cover the pots loosely with a plastic bag or place them inside a propagator with a lid. This keeps the humidity high, which is crucial for preventing the cuttings from drying out before they can root. Place them in a bright spot, but out of direct sunlight.
Division: A “Cut-and-Come-Again” Method
If your Oenothera mollissima has grown into a nice clump, dividing it is a quick and effective way to get more plants.
- Prepare the Plant: In early spring, before new growth really takes off, dig up the entire plant. You might want to water it lightly the day before to make the soil easier to work with.
- Divide the Clump: Gently shake off some of the excess soil. Using your hands or a clean spade, carefully pull or cut the root ball into sections. Each section should have a good portion of roots and at least one or two growing points or stems.
- Replant Immediately: Dig new planting holes in your garden beds or in pots filled with fresh soil. Plant the divisions at the same depth they were previously growing.
- Water Well: Water the newly planted divisions thoroughly to help settle the soil and encourage root establishment.
The “Secret Sauce”: My Insider Tips
Having gardened for a while, I’ve picked up a few tricks that really make a difference.
- Bottom Heat is Your Friend: For stem cuttings, if you can, place the pots on a heated propagator mat. This gentle warmth encourages root development from below, significantly speeding up the process and increasing your success rate. It’s like a warm blanket for your little plant babies.
- Don’t Be Afraid to Pinch: Once your stem cuttings have developed roots and started to grow, pinch out the very tip of the main stem. This will encourage the plant to branch out and become bushier, leading to a more attractive and robust specimen.
- Mist, Don’t Drown: While humidity is vital, avoid letting the leaves of your cuttings sit in water. If using the plastic bag method, try to keep the leaves from directly touching the plastic. Excess moisture on the leaves can lead to fungal issues.
Nurturing New Growth and What to Watch For
Once your cuttings have started to show new growth, you know they’ve taken root!
- Gradual Acclimation: When you see good root development (you can gently tug on a cutting – if there’s resistance, they’re rooting!), it’s time to gradually introduce them to normal conditions. Start by removing the plastic covering for a few hours each day, slowly increasing the time until they are fully established.
- Transplanting: Once they have a strong root system and are actively growing, you can transplant them into their own larger pots or directly into the garden.
- Troubleshooting: The Dreaded Rot: The most common issue you might face is rot. This usually happens if the soil is too wet and doesn’t drain well, or if the humidity is too high without enough air circulation, leading to fungal problems. If you see a cutting turning black or mushy, it’s usually a sign of rot. Unfortunately, once this happens, it’s hard to save. Prevention is key: use well-draining soil and don’t overwater.
Happy Rooting and Enjoy the Journey!
Propagating Oenothera mollissima is a wonderfully rewarding process. It connects you even more deeply with your plants and allows you to multiply their beauty. Be patient with your little cuttings; some might take a little longer than others. The joy of seeing a tiny stem transform into a blooming plant is truly special. So grab your tools, embrace the sunshine, and enjoy the magic of growing more Oenothera! Happy gardening!
Resource:
https://identify.plantnet.org/k-world-flora/species/Oenothera%20mollissima%20L./data