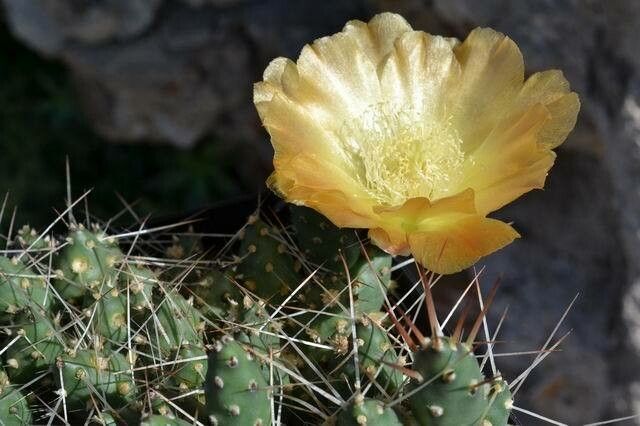
Hello, fellow plant lovers! It’s so lovely to have you here today. We’re diving into the fascinating world of Maihueniopsis ovata, often called the “jumping cholla” or “bunny ears cactus.” Isn’t it just the cutest? Its segmented stems, covered in delicate spines, create such a unique and playful look in any succulent collection. Propagating this little gem is incredibly rewarding. You get to watch new life emerge from a piece of your existing plant – it’s truly magical! Now, I won’t lie, while Maihueniopsis ovata is generally forgiving, it demands a little more attention than, say, a common sedum. But don’t let that deter you! With a few pointers, you’ll be well on your way to success.
The Best Time to Start
When it comes to getting the best results, the spring and early summer are your golden ticket. This is when the plant is actively growing and has the most energy to put into developing new roots. You want to work with healthy, mature segments that have a bit of weight to them. Avoid taking cuttings from stressed or newly repotted plants.
Supplies You’ll Need
Before we get our hands dirty, let’s gather our tools:
- Sharp, clean pruning shears or a very sharp knife: Essential for making clean cuts that heal well.
- Succulent or cactus potting mix: This is crucial for good drainage. You can also make your own by mixing equal parts potting soil, perlite, and coarse sand.
- Rooting hormone (optional but recommended): This gives your cuttings an extra boost of confidence and speeds up the root development process.
- Small pots or trays: Terracotta pots are great because they breathe.
- Watering can with a fine rose or spray bottle: For gentle watering.
- Gloves: Those spines can be surprisingly prickly!
- A sunny, warm spot: For your new propagations to start their journey.
Propagation Methods
Maihueniopsis ovata is a champion of vegetative propagation, meaning we can grow new plants from its “limbs.” The most straightforward method is through stem cuttings.
- Take Your Cuttings: Gently twist or use your clean shears to detach a healthy, mature segment from your parent plant. Aim for segments that are at least 2-3 inches long.
- Let Them Callus: This is a SUPER important step for cacti! Place your cuttings on a dry surface, away from direct sun, for 2-7 days. You’ll notice the cut end will dry and callous over. This prevents rot when you plant them. Don’t skip this!
- Rooting Hormone (Optional): Once callused, dip the cut end into your rooting hormone powder, tapping off any excess.
- Planting: Fill your small pots with your well-draining succulent mix. Make a small hole in the center with your finger or a pencil.
- Insert the Cutting: Gently insert the callused end of the cutting into the hole, about an inch deep. Firm the soil gently around it to provide support.
- Initial Watering: Wait a few days after planting before the very first watering. This gives the cutting a little more time to settle in and further reduces rot risk. When you do water, do it sparingly.
The “Secret Sauce” (Pro Tips)
Here are a couple of things I’ve learned over the years that make a big difference:
- The Bottom Heat Trick: If you have a heat mat designed for seedlings, place your pots on it. This gentle warmth from below can significantly speed up root formation. It mimics the warmth of the soil in their natural habitat and really encourages those little roots to get going.
- Don’t Drown Them in the Beginning: When you’re watering your new cuttings, err on the side of under-watering. The goal is to encourage roots to seek out moisture. If the soil stays soggy, rot is your enemy. I usually wait until the soil is completely dry an inch or two down before watering again, and even then, I’m quite conservative.
Aftercare & Troubleshooting
Once you start to see signs of life, like slight plumping of the stem or even a tiny new sprout, you’re on your way! Continue to water sparingly, only when the soil is dry. As your new plant gets more established, you can gradually introduce it to brighter light, but avoid intense, direct sun initially.
The most common problem you’ll encounter is rot. If your cutting turns mushy, yellow, or black at the base, it’s likely rotted. Unfortunately, there’s usually no coming back from this. Prevention is key here – good drainage, not overwatering, and that crucial callusing step. If you have multiple cuttings, and one succumbs to rot, immediately remove it to prevent it from affecting others.
Your Green-Thumb Journey
Propagating Maihueniopsis ovata is a lovely, patient endeavor. It’s a wonderful way to expand your collection and share the joy of these charming plants. Don’t be discouraged if your first attempt isn’t perfect. Gardening is all about learning and adapting. Just keep trying, enjoy the process, and celebrate every little success! Happy planting!
Resource: