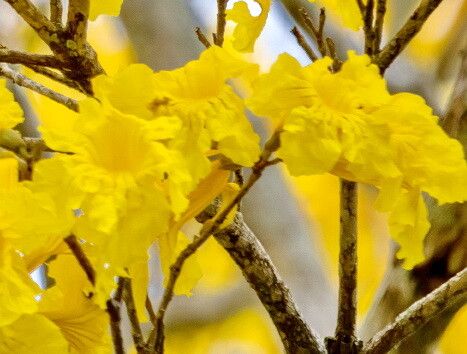
Oh, hello there, fellow plant enthusiast! Grab a cup of your favorite brew, and let’s talk about one of my absolute favorite trees: the magnificent Handroanthus umbellatus. You know, the one that explodes into a cloud of brilliant yellow blossoms each spring, truly painting the landscape with sunshine? It’s a showstopper, isn’t it? And the best part? You can bring that magic to your own garden by propagating it. It’s a deeply rewarding experience, watching a tiny cutting transform into a potential future beauty. Now, I’ll be honest, Handroanthus umbellatus isn’t always the easiest plant for absolute beginners to propagate from scratch, but with a little patience and the right approach, it’s absolutely achievable.
When is the Best Time to Start?
For the highest chance of success, I always recommend propagating Handroanthus umbellatus during its active growth period. Think late spring or early summer, after the main blooming flush has passed. This is when the plant is full of vigor and has plenty of energy to put into rooting. You’re looking for stems that are semi-hardwood, meaning they are not brand new and soft, but also not old and woody. They should have a little give when you bend them, but not snap easily.
Your Propagation Toolkit
Here’s what you’ll want to have on hand:
- Sharp, clean pruning shears or a sharp knife: Essential for clean cuts that heal well.
- Rooting hormone powder or gel: This is a lifesaver! It significantly boosts the chances of your cuttings developing roots.
- A well-draining potting mix: I like a blend of equal parts peat moss or coco coir, perlite, and coarse sand. This prevents waterlogging, which is a killer for cuttings.
- Small pots or seedling trays: Clean, with drainage holes, of course!
- A plastic bag or propagator lid: To create a humid environment for your cuttings.
- A spray bottle filled with water: For gentle misting.
- Optional: A heating mat: This can really speed up the rooting process, especially if your ambient temperature isn’t consistently warm.
Let’s Get Growing: Stem Cuttings
This is hands down the most reliable method for Handroanthus umbellatus.
- Take Your Cuttings: Using your clean shears, select healthy, upright stems from a mature plant. Aim for cuttings that are about 6-8 inches long. Make a clean cut just below a leaf node (where a leaf attaches to the stem). Remove the lower leaves, leaving just a few at the top.
- Prepare the Cutting: Dip the cut end into your rooting hormone, tapping off any excess.
- Plant Your Cuttings: Fill your pots with your prepared potting mix. Make a hole with a pencil or dibber large enough to insert the cutting. Gently place the cutting into the hole, ensuring the nodes where you removed the leaves are buried. Firm the soil gently around the stem.
- Create a Humid Environment: Water the soil thoroughly until it’s evenly moist but not soggy. Then, place a clear plastic bag over the pot, securing it around the rim with a rubber band, or use a propagator lid. This traps humidity, which is crucial for preventing the cuttings from drying out.
- Find the Right Spot: Place your pots in a bright location with indirect sunlight. Avoid direct sun, which can scorch the delicate cuttings.
My “Secret Sauce” for Success
After years of getting my hands dirty, I’ve picked up a few tricks.
- Don’t Let Those Leaves Touch the Water: If you opt for water propagation (though I find cuttings in soil more successful for Handroanthus), make absolutely sure the leaves are well above the waterline. Any submerged leaf will quickly rot and take your cutting down with it.
- Bottom Heat is Your Friend: Especially if you’re propagating in cooler months or your home tends to be a bit chilly, using a heating mat under your pots can make a world of difference. It encourages root development from the base of the cutting, giving you faster and stronger results.
- The “Scratch Test”: Periodically, you can carefully scratch a tiny bit of bark away from the stem base with your fingernail. If you see a healthy green layer underneath, the stem is still alive and trying to root. If it’s brown and dry, that cutting might be a goner.
Aftercare and What to Watch For
Once you start seeing new leaf growth on your cuttings, that’s a fantastic sign! It means roots are forming. You can gently tug on the cutting; if there’s resistance, roots have likely developed.
- Gradually Acclimatize: Begin to gradually remove the plastic bag or lid for increasing periods each day to let the new plant get used to normal humidity.
- Watering: Keep the soil consistently moist but not waterlogged. Let the top inch of soil dry out slightly between waterings.
- Transplanting: Once your new plant has a good root system and a few sets of leaves, you can carefully transplant it into a slightly larger pot.
Now, what about when things don’t go as planned? The most common culprit is rot. You’ll notice leaves turning yellow and mushy, or the stem itself becoming soft and black. This is almost always due to overwatering and poor drainage. If you see this, unfortunately, that cutting is likely lost. Learn from it, adjust your watering, and try again!
Keep Nurturing
Propagating plants is a journey, and sometimes it takes a few tries to get it just right. Be patient with your little Handroanthus babies. Even if not every cutting takes, the process itself is a joy, and the garden rewards those who keep experimenting and learning. Happy propagating!
Resource: