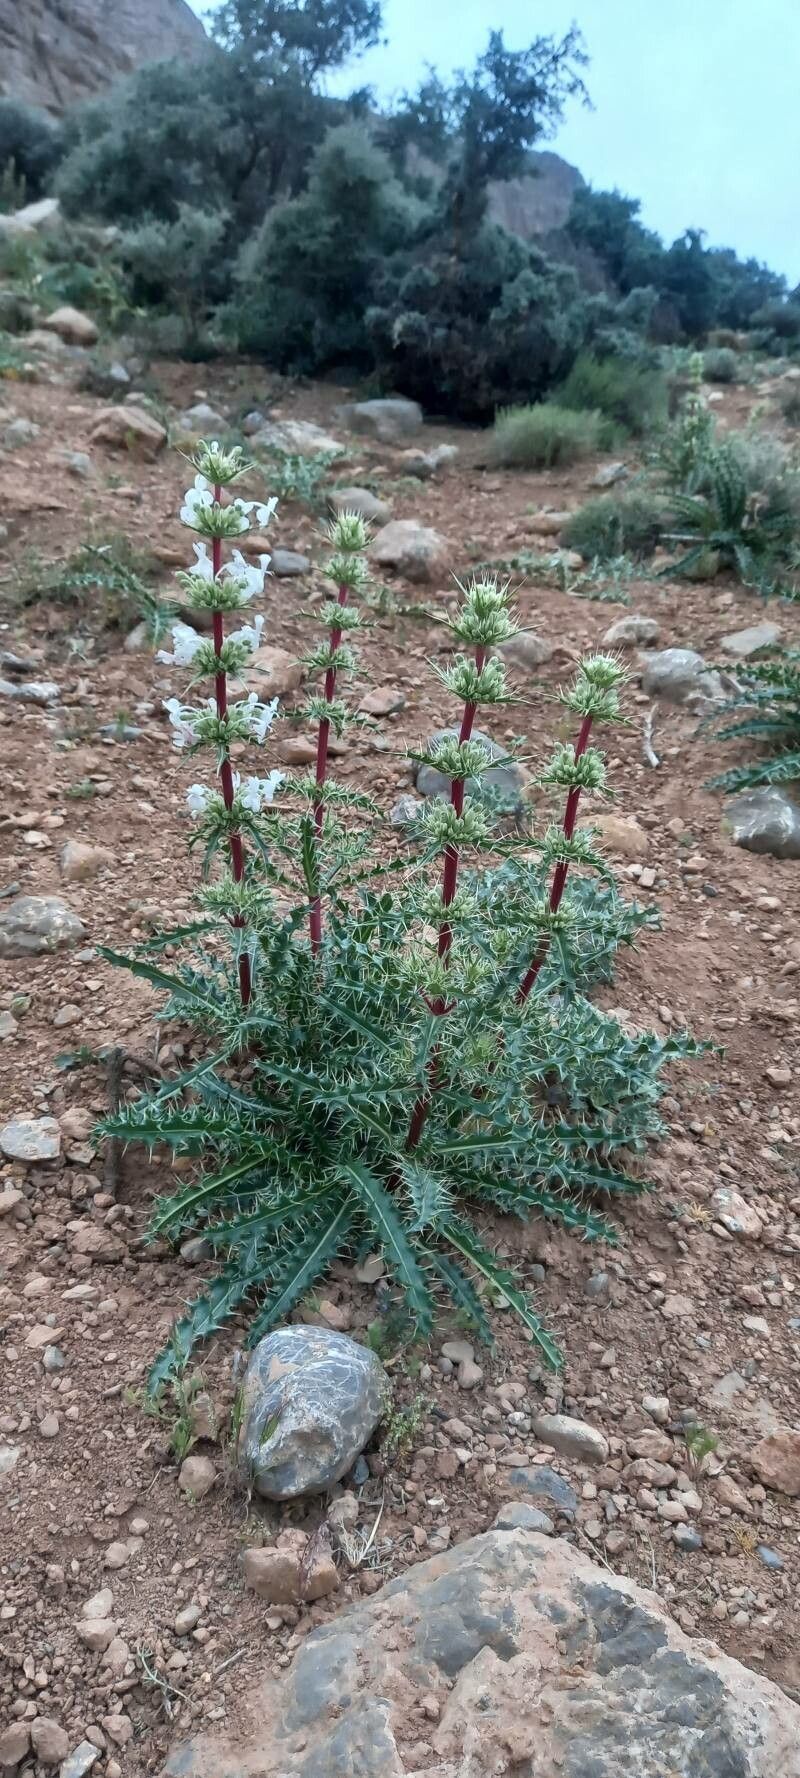
Oh, Morina persica! If you’ve ever seen one of these beauties in full bloom, you know exactly why I’m so excited to talk about it today. Those spiky, thistle-like flowers, often in shades of a mesmerizing pale pink or creamy white, have a unique charm that really draws you in. They have this wonderfully architectural presence in the garden, and the way the bees seem to adore them is just the icing on the cake.
If you’re looking to expand your collection of these special plants, or perhaps share them with gardening friends, propagating Morina persica is a fantastic and rewarding endeavor. Now, let’s be honest, Morina can be a little particular, and for absolute beginners, it might present a slight learning curve. But don’t let that deter you! With a little patience and the right approach, you’ll be well on your way to success.
The Best Time to Start
For Morina persica, the sweet spot for propagation is usually late spring to early summer. This is when the plant is actively growing and has a good store of energy. You’ll want to work with healthy, vigorous new growth, just as it’s starting to firm up a bit but hasn’t become too woody. Think of it as catching your Morina at its peak vitality.
Supplies You’ll Need
Gathering your supplies beforehand makes the whole process so much smoother. Here’s what I typically have on hand:
- Sharp Pruning Shears or a Clean Knife: For making clean cuts to avoid crushing the plant tissue.
- Rooting Hormone: This is crucial! I prefer a powder or gel form for stem cuttings. It helps encourage root development.
- Well-Draining Potting Mix: A blend of peat moss, perlite, and a little coarse sand works wonders. Avoid heavy garden soil.
- Small Pots or Seed Trays: Clean pots are a must to prevent disease.
- Watering Can with a Fine Rose: For gentle watering.
- Plastic Bags or a Propagator: To maintain humidity around your cuttings.
- Labels and a Marker: To keep track of what you’ve planted and when.
Propagation Methods
While you can sometimes get seeds to germinate, the most reliable and satisfying way to propagate Morina persica is through stem cuttings. It’s my go-to method, and I find it gives the best results for this particular plant.
- Take Your Cuttings: On a bright, pleasant day in late spring or early summer, select healthy, non-flowering stems. You’re looking for stems that are about 4-6 inches long. Using your sharp shears, make a clean cut just below a leaf node. A leaf node is a small bump on the stem where a leaf or bud grows. This is where the magic of rooting often happens!
- Prepare the Cuttings: Gently remove the lower leaves, leaving just a few at the top. This prevents them from rotting when buried in the soil. If the leaves are particularly large, you can even cut them in half to reduce water loss.
- Apply Rooting Hormone: Dip the cut end of each stem into your rooting hormone. Give it a gentle tap to remove any excess – you want a light coating, not a thick clump.
- Plant Your Cuttings: Fill your small pots with your well-draining potting mix. Make a small hole in the center with your finger or a pencil. Carefully insert the prepared cutting into the hole, ensuring the leaf nodes are below the surface of the soil. Gently firm the soil around the base of the cutting.
- Water Gently: Water the soil thoroughly but gently. You want the soil to be moist but not waterlogged.
- Create a Humid Environment: To keep your cuttings happy and prevent them from drying out, I like to place the pots inside plastic bags or a propagator. Ensure the leaves don’t touch the sides of the bag if possible – this can lead to rot. Seal loosely or poke a few small holes for ventilation.
The “Secret Sauce”
Here are a couple of little tricks I’ve learned over the years that really give Morina cuttings a boost:
- Bottom Heat is Your Friend: If you can, place your pots on a heated propagator mat. Morina persica roots seem to respond exceptionally well to gentle bottom warmth. It encourages root development from below, essentially giving them a little jumpstart.
- Don’t Be Afraid to Take More Than You Think You Need: Nature is unpredictable, and not every cutting will take. It’s always better to take a few extra. This way, if a couple don’t make it, you’ll still have plenty to work with. Patience is key!
Aftercare & Troubleshooting
Once your cuttings are planted and settled, keep them in a bright, indirect light location. Avoid direct, harsh sun, which can scorch those tender new cuttings. The key word here is consistent moisture. Keep the soil lightly moist, but never soggy.
You’ll know your cuttings are developing roots when you see new leaf growth appearing, or if you gently tug on a cutting and feel some resistance. This usually takes anywhere from 4 to 8 weeks, sometimes a bit longer for Morina.
The most common issue you might encounter is rot. If you see a cutting turning brown and mushy, or developing black spots, it’s usually a sign of too much moisture or a lack of air circulation. If this happens, try to improve ventilation and reduce watering slightly, and remove any rotten material quickly to prevent it from spreading.
A Encouraging Closing
Propagating plants, especially ones as unique as Morina persica, is a journey of observation and learning. Don’t get discouraged if your first attempt isn’t perfect. Each time you try, you’ll gain a little more insight. Be patient, enjoy the process of nurturing these new life forms, and soon you’ll be rewarded with your very own Morina babies to admire and share! Happy gardening!
Resource:
https://identify.plantnet.org/k-world-flora/species/Morina%20persica%20L./data