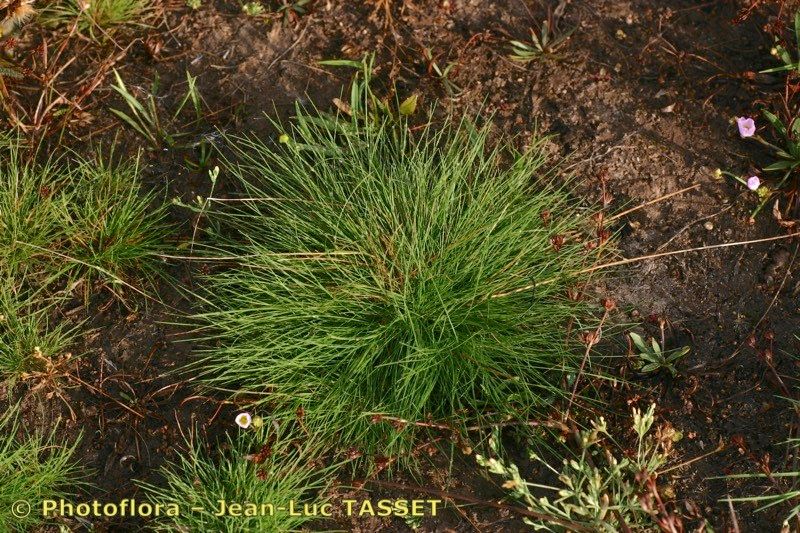
Hello there, my fellow plant lovers! Today, we’re diving into the delightful world of Deschampsia setacea, or as many of us affectionately call it, Tufted Hair-grass. Isn’t it a beauty? Its elegant, fine-textured foliage dances in the slightest breeze, adding a touch of delicate movement and airy charm to any garden. Watching those feathery plumes catch the light is simply magical. And the best part? Propagating this lovely grass yourself is incredibly rewarding. It’s a process that lets you multiply that garden magic, all without breaking the bank. For those of you just starting out with plant propagation, Deschampsia setacea is a wonderfully forgiving subject. You’ll likely find it quite approachable!
The Best Time to Start
When it comes to getting the most bang for your buck with propagation, timing is everything. For Deschampsia setacea, the absolute sweet spot is early spring. Think of it as coaxing the plant awake after its winter slumber. You want to catch it as new growth is really getting going, but before it’s putting all its energy into flowering. This vigorous stage means the plant has plenty of reserves to share, making root development much more successful. Waiting until after the main flowering period in late summer or early autumn can also work, but you might find the success rate dips a little.
Supplies You’ll Need
Gathering your supplies beforehand makes the whole process so much smoother. Here’s what you’ll want to have on hand:
- Sharp, clean pruning shears or a sharp knife: For making clean cuts.
- A well-draining potting mix: I find a good blend of peat moss, perlite, and a bit of compost works wonders. You want it to hold moisture but not become waterlogged.
- Small pots or trays: Clean ones, of course! Yogurt cups with drainage holes poked in the bottom are perfectly fine in a pinch.
- Rooting hormone (optional but recommended): This is particularly helpful if you’re taking cuttings. It gives them a little boost.
- A watering can or spray bottle: For gentle watering.
- A plastic bag or propagator lid: To create a humid environment.
- Labels and a marker: To keep track of what you’ve planted and when!
Propagation Methods
Deschampsia setacea is a clumping grass, which means its primary and easiest method of propagation is through division while the plant is actively growing.
Division (The Most Reliable Method)
This is where we essentially split a mature plant into smaller, independent pieces, each with its own roots and shoots.
- Dig it Up: In early spring, gently dig up your Deschampsia setacea plant. You can do this with a trowel, being careful not to disturb the root ball too much. The key is to get the whole clump out of the ground.
- Clean the Roots: Once it’s out, gently shake off as much of the excess soil as you can. This allows you to see the root structure more clearly and helps prevent introducing soil-borne diseases to your new divisions.
- Divide and Conquer: Now for the exciting part! You can either use your fingers to tease the root ball apart or use your clean pruning shears or knife to make clean cuts through the clump. Aim to separate it into smaller sections, each containing a good amount of roots and at least one healthy-looking shoot. Don’t be afraid to be a bit firm here if needed – the plant is tough!
- Replant: Immediately plant your divisions into their new pots filled with your well-draining potting mix. Make sure the crown of the plant (where the leaves emerge from the roots) is at soil level.
- Water Gently: Water the newly planted divisions thoroughly but gently. You don’t want to wash away the soil.
The “Secret Sauce” (Pro Tips)
Here are a couple of things I’ve learned over the years that really make a difference:
- Don’t Overcrowd Your Divisions: When you’re dividing, resist the urge to make your new sections too tiny. While you want to maximize your yield, leaving them a bit larger with more root mass gives them a much better chance of establishing themselves quickly. A division about the size of your fist or slightly smaller is usually ideal.
- Embrace the Humidity Tent: After planting your divisions, I highly recommend covering them with a clear plastic bag or using a propagator lid. This creates a mini-greenhouse effect, maintaining high humidity. Deschampsia setacea loves a moist environment as it establishes new roots, and this dramatically reduces water stress on the plant. Just make sure some of the leaves aren’t pressed directly against the plastic, as this can encourage rot.
Aftercare & Troubleshooting
Once your divisions are planted, they’ll need a little TLC. Keep the soil consistently moist but not soggy. Think of it like a wrung-out sponge. Place the pots in a bright location out of direct, scorching sunlight for the first week or two.
You’ll know your divisions are happy when you start to see new, vigorous leaf growth. This can take anywhere from a few weeks to a couple of months.
Troubleshooting: The most common issue you might encounter is rot, often caused by overwatering or poor drainage. If you notice leaves turning mushy and yellowing, or if the soil feels constantly waterlogged, your division might be drowning. In this case, try to reduce watering and ensure excellent drainage. It’s always better to err on the side of slightly drier rather than waterlogged for grasses.
So there you have it! Propagating Deschampsia setacea is a wonderfully accessible way to bring more of that graceful beauty into your garden. Be patient, enjoy the process of nurturing these tiny new plants, and you’ll be rewarded with more of that lovely, airy texture to enjoy. Happy gardening!
Resource:
https://identify.plantnet.org/k-world-flora/species/Deschampsia%20setacea%20(Huds.)%20Hack./data