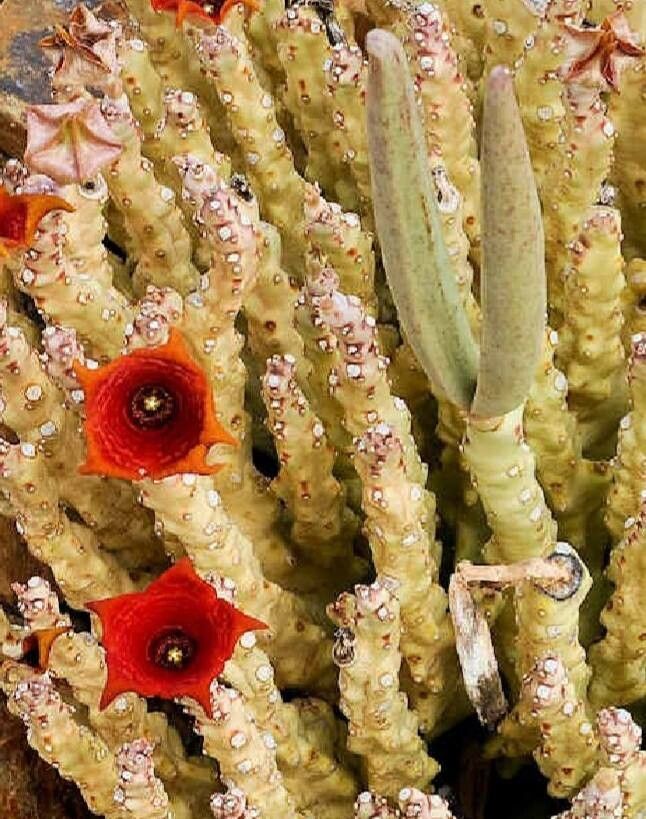
Hey there, fellow plant lovers! Today, we’re diving into the wonderfully unique world of Monolluma socotrana. If you’re captivated by its architectural, almost alien-like form and the promise of a new baby plant, you’re in for a treat. Getting your own Monolluma clone is incredibly satisfying, sort of like unlocking a botanical secret! Now, is it a beginner-friendly plant to propagate? Honestly, it leans a little towards the adventurous side. It’s not impossible, by any means, but it does appreciate a bit of know-how and a gentle touch. Don’t let that deter you, though; with a little patience, you’ll be successful!
The Best Time to Start
For Monolluma socotrana, the sweet spot for propagation is when the plant is actively growing. Think of late spring through early to mid-summer. This is when the plant has the most energy reserves to put into developing new roots. Trying to propagate during its dormant period, usually in the cooler months, is like asking it to run a marathon after a long nap – it’s just not ready!
Supplies You’ll Need
To give your cuttings the best chance, gather these essentials:
- Well-draining potting mix: A cactus and succulent mix is perfect. You can even enhance it with perlite or pumice for extra aeration.
- Sharp, clean pruning shears or a knife: A clean cut is crucial to prevent disease.
- Rooting hormone (optional, but recommended): For Monolluma, a powder or gel can give a nice boost.
- Small pots or seed trays: Choose containers with drainage holes.
- Watering can or spray bottle: For gentle watering.
- A sunny, warm spot: Indirect bright light is ideal.
- Optional: A heat mat: This can really speed up root development.
Propagation Methods
The most reliable way to propagate Monolluma socotrana is through stem cuttings.
- The Cut: With your clean shears, select a healthy stem. You’ll want a piece that’s at least 3-4 inches long. Make a clean cut between the joints of the stem. Some people like to get a piece that includes some of the older stem and some newer growth.
- The Drying Phase (Critical!): This is probably the most important step for succulents and caudiciforms like Monolluma. Let the cut end of the stem dry and callus over. You can do this by placing it on a paper towel in a dry, well-ventilated spot out of direct sunlight for several days to a week. You’ll know it’s ready when the cut surface looks dry and slightly leathery. This prevents rot when you plant it.
- The Hormone Dip (Optional): If you’re using rooting hormone, lightly dip the callused end into the powder or gel, tapping off any excess.
- Planting Time: Fill your pots with your well-draining mix. Make a small hole in the center with your finger or a pencil.
- Insert the Cutting: Gently place the callused end of your cutting into the hole. You want it to be stable, but don’t bury it too deep.
- Initial Watering: After planting, wait a few days before watering. This gives the cut end another chance to firm up in the soil. When you do water, water moderately. You want the soil to be slightly moist, not soggy.
The “Secret Sauce” (Pro Tips)
Here are a few things I’ve learned over the years that can really make a difference:
- “Don’t let the leaves touch the water” isn’t applicable here, but remember the principle! For Monolluma, the key is avoiding excess moisture right around the cut wound, especially in the early days. That’s why the callusing step is so vital. Excess humidity can still encourage rot, so good air circulation is your friend.
- Bottom heat is your best friend! Placing your newly potted cuttings on a gentle heat mat can significantly speed up root formation. It mimics the warm soil temperatures that encourage growth. Just be sure it’s set to a low, consistent warmth, not scorching hot.
- Be patient with watering. Resist the urge to water constantly. Think of it as “drought and recover.” Only water when the soil has dried out considerably. Overwatering is the quickest way to lose a cutting.
Aftercare & Troubleshooting
Once your cutting has been in the soil for a few weeks, you might start to see signs of life! Gently tugging on the cutting – if it offers resistance, you’ve got roots! You can then treat it much like a mature plant, though still with a gentler hand. Continue to water judiciously and provide bright, indirect light.
Now, about those pesky problems:
- Rotting: If your cutting turns mushy, black, or starts to slime, that’s rot. It’s usually a sign of too much moisture and not enough aeration. If you catch it early, you might be able to salvage it by cutting away the rotten parts and re-drying it, but often, it’s a loss. This is why the callusing and careful watering are so important.
- No action: If after several weeks or even a couple of months, there’s still no sign of roots, don’t despair! Some plants just take their sweet time. Ensure it’s in a warm spot with adequate light, and continue with your patient watering schedule.
A Encouraging Closing
Propagating plants, especially unique treasures like Monolluma socotrana, is a rewarding journey. It teaches you to observe, to be patient, and to trust the natural process. Don’t get discouraged if your first attempt isn’t a runaway success. Each plant we try to grow teaches us something new. So, gather your supplies, find a cozy spot for your cuttings, and enjoy the magic of watching new life emerge. Happy propagating!
Resource: