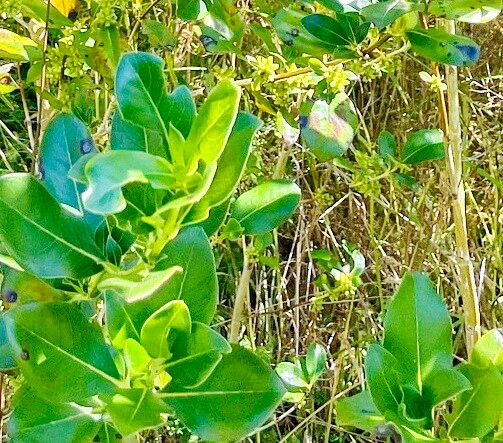
Hello there, fellow plant enthusiasts! Today, I want to talk about a plant that’s been a quiet achiever in my garden for years, and one that I think deserves a bit more love: Coprosma robusta, often called the Taupata or Mirror Bush. Its glossy, leathery leaves give it a lovely, structural presence, and it’s incredibly tough once established. But the real joy? Growing more of them from your existing plants. It’s a wonderfully rewarding process, and I’m thrilled to guide you through it.
Now, if you’re new to the gardening game, you’ll be pleased to know that Coprosma robusta is quite forgiving. It’s one of those plants that says, “Go on, give it a try!” and usually, it’ll reward your efforts.
The Best Time to Start
For the highest chance of success, I always reach for my secateurs in the late spring or early summer. This is when the plant is in its active growing phase. You’re looking for healthy, non-flowering shoots that are still a bit soft and flexible – what we horticulturists call semi-ripe cuttings. Avoid woody, old stems or brand-new, tender growth.
Supplies You’ll Need
Gathering your tools beforehand makes the whole process much smoother. Here’s what you’ll want to have on hand:
- Sharp pruning shears or secateurs: Cleanliness is key to preventing disease.
- Rooting hormone powder or gel: This isn’t strictly essential for Coprosma, but it can give your cuttings a helpful boost.
- Small pots or seed trays: With good drainage holes, of course.
- A well-draining potting mix: A good blend of perlite or grit mixed with a general-purpose potting compost works wonders. About a 50/50 ratio is usually perfect.
- A spray bottle: For misting.
- Small plastic bags or a propagator: To create a humid environment.
- A dibber or pencil: For making planting holes.
Propagation Methods
There are a couple of ways you can go about this, but my go-to for Coprosma robusta is stem cuttings. It’s straightforward and generally yields excellent results.
Stem Cuttings
- Take your cuttings: Find those lovely, semi-ripe shoots I mentioned. Using your clean secateurs, take cuttings that are about 10-15 cm (4-6 inches) long. Make the cut just below a leaf node – that’s where the roots will emerge.
- Prepare the cuttings: Gently remove the lower leaves from your cuttings. You want to expose at least two nodes where roots can form. You can even trim any larger leaves in half to reduce water loss. This is a crucial step!
- Apply rooting hormone: Dip the cut end of each cutting into your rooting hormone powder or gel. Tap off any excess.
- Pot them up: Make small holes in your well-draining potting mix using a dibber or pencil. Carefully insert the prepared cuttings into the holes, ensuring the nodes where you removed the leaves are below the soil surface. Gently firm the soil around them.
- Create humidity: Water them gently and then cover the pots with clear plastic bags or place them in a propagator. This will create a mini greenhouse effect, keeping the humidity high and preventing the cuttings from drying out. Secure the bag with a rubber band.
- Provide the right conditions: Place your pots in a bright location out of direct sunlight. A greenhouse or a warm windowsill is ideal.
The “Secret Sauce” (Pro Tips)
Over the years, I’ve picked up a few tricks that I’m happy to share. These little nuances can make all the difference.
- Don’t let leaves touch the water: If you end up with any condensation sitting directly on the leaves inside the plastic bag, it can encourage rot. Gently brush it off or ensure there’s good airflow.
- Consider bottom heat: If you have a heated propagator, using gentle bottom heat can significantly speed up root development. Think of it as giving your cuttings a cozy warm bed to get their roots growing.
- Be patient with trimming: You might be tempted to tug on your cuttings to see if they’ve rooted. Resist the urge! Instead, look for signs of new growth – tiny leaves emerging from the top. This is your best indicator that roots are forming.
Aftercare & Troubleshooting
Once your cuttings have successfully rooted (which can take anywhere from 4 to 8 weeks, or sometimes a bit longer), it’s time for their next stage.
You’ll know they’re ready when you see new leafy growth, or when they resist a gentle tug. Carefully remove the plastic bag or propagator lid and gradually introduce them to more normal air. Water them regularly but avoid waterlogging. Keep them in their pots for a few more weeks, allowing them to establish a good root system before considering planting them out into their final positions.
The most common issue you might encounter is rot. If you see your cuttings turning mushy and black, it’s usually a sign of too much moisture combined with poor airflow. In this case, unfortunately, they’re unlikely to recover, and it’s best to start again with fresh cuttings and ensure your potting mix is well-draining.
A Encouraging Closing
Propagating Coprosma robusta is a beautiful way to multiply your garden or share these lovely plants with friends. Don’t be discouraged if your first attempt isn’t perfect – that’s part of the learning process! Enjoy the quiet satisfaction of nurturing new life, and before you know it, you’ll have a whole brood of healthy young Taupatas ready to grace your garden. Happy propagating!
Resource:
https://identify.plantnet.org/k-world-flora/species/Coprosma%20robusta%20Raoul/data