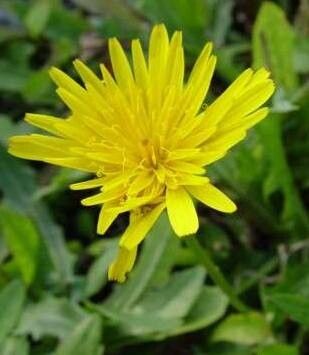
Well hello there, fellow plant enthusiasts! Grab a mug of your favorite brew, because today we’re diving into something truly special: propagating Scorzoneroides helvetica. This charming plant, with its cheerful yellow blossoms that often remind me of sunshine on a spring day, is a delight in the garden or a bright spot indoors. And the best part? Bringing more of that joy into your life by propagating it yourself is incredibly rewarding. Many find Scorzoneroides helvetica to be a wonderfully approachable plant for beginners, so don’t feel intimidated!
The Best Time to Start
For the most success, I always recommend starting your propagation efforts in late spring or early summer. This is when the plant is actively growing and has plenty of energy to spare for new beginnings. You’re looking for healthy, new growth – not the woody, established stems of an older plant. Think of it as catching your Scorzoneroides helvetica at its most vigorous and optimistic!
Supplies You’ll Need
Gathering your tools beforehand makes the whole process smoother. Here’s what I usually have on hand:
- Sharp, clean pruning shears or a sharp knife: For making clean cuts. Sterilize them with rubbing alcohol between uses!
- A good quality potting mix: A blend designed for seedlings or a mix of peat moss, perlite, and a little compost works beautifully. It needs to drain well.
- Small pots or trays: With drainage holes, of course.
- Rooting hormone (optional but recommended): This can give your cuttings an extra boost. I prefer a powdered form.
- Watering can with a fine rose or a spray bottle: To mist and water gently.
- Plastic wrap or a clear plastic bag: To create a humid environment.
- Labels and a marker: So you don’t forget what you’ve propagated and when!
Propagation Methods
Scorzoneroides helvetica is a gem because it’s generally quite straightforward to propagate, most commonly by division or from stem cuttings.
Division
This is my go-to method, especially in spring.
- Gently unearth your Scorzoneroides helvetica from its pot or garden bed. Try to disturb the roots as little as possible initially.
- Inspect the root ball. You’re looking for distinct clumps of roots and stems that can be gently separated.
- Using your hands or a clean trowel, carefully pull apart the root ball into smaller sections. Each section should have at least one healthy stem and a good portion of roots.
- If the roots are tangled, you might need to use your clean knife or shears to make a clean cut through them.
- Pot up each division into its own pot filled with your prepared potting mix.
- Water gently and place in a spot with bright, indirect light.
Stem Cuttings
This method is excellent for increasing your plant population quickly.
- Select a healthy stem from your Scorzoneroides helvetica that has started to firm up a bit but is still relatively soft. About 4-6 inches long is ideal.
- Make a clean cut just below a leaf node (the point where a leaf attaches to the stem).
- Remove the lower leaves from the cutting, leaving only a couple of leaves at the very top. This prevents them from rotting in the soil.
- Dip the cut end into your rooting hormone powder (if using), tapping off any excess.
- Insert the cutting about an inch deep into a pot filled with pre-moistened potting mix.
- Gently firm the soil around the cutting.
- Mist the leaves and the surface of the soil lightly with water.
- Cover the pot loosely with a clear plastic bag or plastic wrap to create a humid environment. You can prop it up with skewers if needed.
- Place in a warm location with bright, indirect light.
The “Secret Sauce” (Pro Tips)
Here are a few little tricks I’ve learned over the years that make a big difference:
- Don’t let the leaves touch the water if you’re opting for water propagation (though I find soil methods more reliable for this particular plant). If water is too stagnant and leaves are submerged, it’s an invitation for rot.
- Bottom heat is your friend! For stem cuttings, placing the pots on a propagator mat set to a low temperature (around 70-75°F or 21-24°C) can significantly speed up root development. It encourages roots to form from the bottom up.
- Be patient with dormancy. If you’re dividing in fall or taking cuttings very late in the season, your plant might be slowing down. Sometimes cuttings or divisions will just sit for a while before showing signs of life. Don’t give up too soon!
Aftercare & Troubleshooting
Once your divisions are potted or your cuttings have started to show signs of rooting (you’ll see new leaf growth or feel a gentle resistance when you tug lightly on the cutting), it’s time for a little pampering.
- Gradually acclimatize your new plants to normal conditions. If they’ve been under plastic, start by lifting the cover for an hour or two each day, slowly increasing the time over a week.
- Water when the top inch of soil feels dry. Avoid overwatering, as this is the most common culprit for failure.
- Keep them in bright, indirect light. Direct sun can scorch delicate new growth.
The main thing to watch for is rot. This often looks like mushy, black stems or leaves. If you see this, act fast! Remove the affected parts immediately with clean shears. It’s often a sign of too much moisture and not enough air circulation. Sometimes, a cutting is just a dud, and that’s okay. It happens to all of us!
A Little Encouragement
Propagating Scorzoneroides helvetica is a wonderfully satisfying way to connect with your garden and enjoy more of this lovely plant. Remember, gardening is a journey, and sometimes it’s about learning as much from the plants that don’t make it as from the ones that thrive. So, be patient, enjoy the process, and celebrate every new sprout! Happy propagating!
Resource: