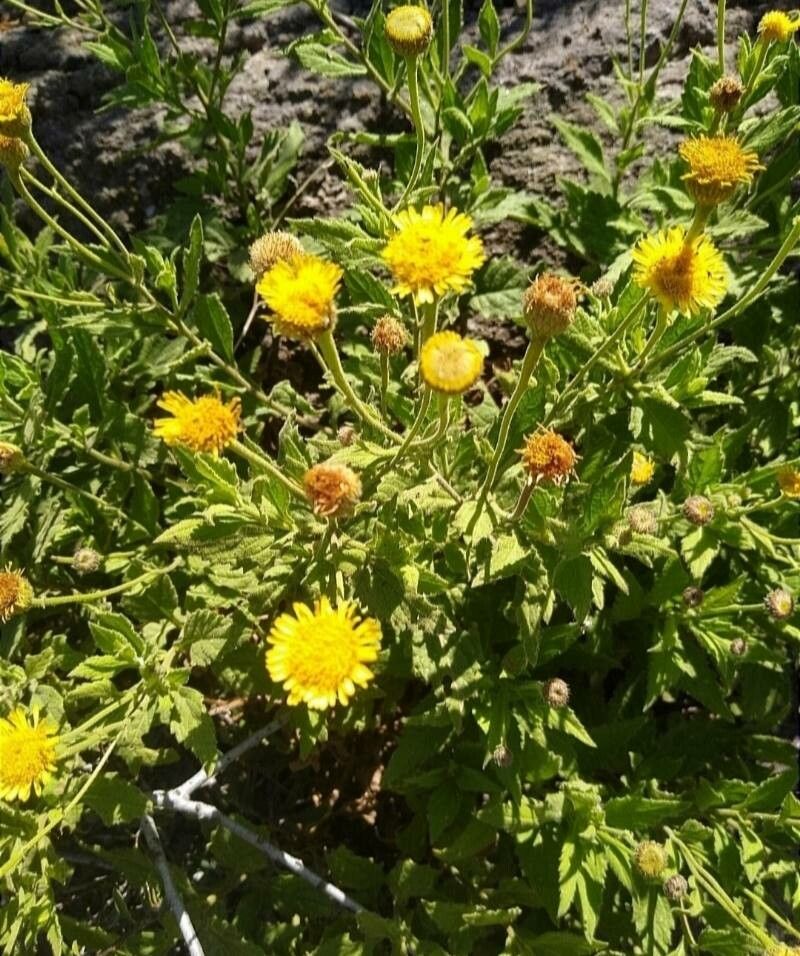
Hello fellow garden enthusiasts! I’m so excited to talk to you today about a plant that has really captured my heart: Pulicaria petiolaris, also known as fleabane. Its delicate, daisy-like flowers are a cheerful sight, and they bloom for such a long time, often from summer right into fall. Plus, it’s a magnet for beneficial insects – always a win in my book!
The best part? Propagating Pulicaria petiolaris is a wonderfully rewarding endeavor. And for those of you just dipping your toes into the world of plant propagation, I’ve got good news: this one is quite forgiving. You’ll likely find success even if you’re relatively new to the game.
The Best Time to Start
For the highest success rate with Pulicaria petiolaris, I find that late spring to early summer is your golden window. This is when the plant is actively growing, full of vigor, and ready to send out new shoots. You want to work with healthy, new growth rather than old, woody stems. Waiting until the weather has warmed up consistently will also help your cuttings establish themselves more quickly.
Supplies You’ll Need
Here’s what I like to have on hand before I get started. It might seem like a lot, but these are tools you’ll reach for again and again in your gardening journey:
- Sharp pruning shears or a clean knife: For making precise cuts to avoid crushing stems.
- A well-draining potting mix: I often use a 50/50 blend of peat moss (or coco coir) and perlite or coarse sand. This ensures good aeration and prevents soggy soil.
- Small pots or seedling trays: Clean, with drainage holes, of course!
- Rooting hormone (optional but recommended): A powder or gel can give your cuttings a helpful boost.
- A watering can with a fine rose or a spray bottle: For gentle watering.
- Clear plastic bags or a propagation dome: To create a humid environment.
- Labels and a waterproof marker: To keep track of what you’ve planted and when.
Propagation Methods
Pulicaria petiolaris is a champion at multiplying, and I find that stem cuttings are generally the most reliable and straightforward method.
Stem Cuttings:
- Take your cuttings: Choose healthy, non-flowering stems. Using your sharp pruners or knife, cut stems about 4-6 inches long. Make the cut just below a leaf node (where a leaf joins the stem), as this is where roots are most likely to form.
- Prepare the cuttings: Gently remove the lower leaves, leaving just two or three at the top. This prevents them from rotting in the soil and reduces water loss.
- Apply rooting hormone (optional): If you’re using it, dip the cut end of the stem into the rooting hormone powder or gel. Tap off any excess.
- Plant your cuttings: Fill your small pots with the prepared potting mix. Make a small hole in the center of the soil with a pencil or your finger. Insert the cut end of the stem into the hole, ensuring the leaf nodes you removed are below the soil surface. Firm the soil gently around the stem.
- Water gently: Water thoroughly after planting, allowing excess water to drain away.
- Create humidity: Cover the pot with a clear plastic bag, securing it with a rubber band, or place it under a propagation dome. This creates a mini-greenhouse effect, keeping humidity high, which is crucial for successful rooting. If you use a bag, you might need to prop it up with a few twigs so it doesn’t touch the leaves.
The “Secret Sauce” (Pro Tips)
Over the years, I’ve picked up a few tricks that seem to make all the difference.
- Don’t let the leaves touch the soil! This sounds simple, but soggy leaves are an invitation to rot. Always trim off any leaves that would be submerged in the potting mix.
- Bottom heat is your friend. If you have a seedling heat mat, placing your pots on it provides gentle warmth that really encourages root development. It’s like a cozy blanket for your cuttings.
- Be patient with the watering. Once your cuttings are covered, you want the soil to stay consistently moist but not waterlogged. Check the soil moisture by gently pressing your finger into it. If it feels dry an inch down, it’s time to water. Too much can lead to rot, too little and the cutting will dry out.
Aftercare & Troubleshooting
Once you’ve potted up your cuttings, place them in a bright location with indirect light. Direct sun can scorch those tender new shoots.
You’ll know your cuttings have rooted when you see new leaf growth. You can also give the stem a very gentle tug; if there’s resistance, roots have formed. This can take anywhere from 2 to 6 weeks, so don’t get discouraged if you don’t see immediate results.
Troubleshooting:
- Wilting: This usually means the cutting is too dry. Check your watering schedule and ensure the humidity is high enough.
- Rotting at the base: This is the most common problem, and it’s almost always due to overwatering and poor drainage. Make sure your soil mix is airy and that your pots have good drainage. If you see signs of rot (a mushy, black stem), it’s usually best to discard that cutting and start again, ensuring better conditions.
A Closing Thought
Propagating Pulicaria petiolaris is such a wonderful way to expand your garden and share the beauty of this plant with friends. Be patient, trust the process, and enjoy the magic of watching a tiny cutting transform into a thriving new plant. Happy gardening!
Resource:
https://identify.plantnet.org/k-world-flora/species/Pulicaria%20petiolaris%20Jaub.%20&%20Spach/data