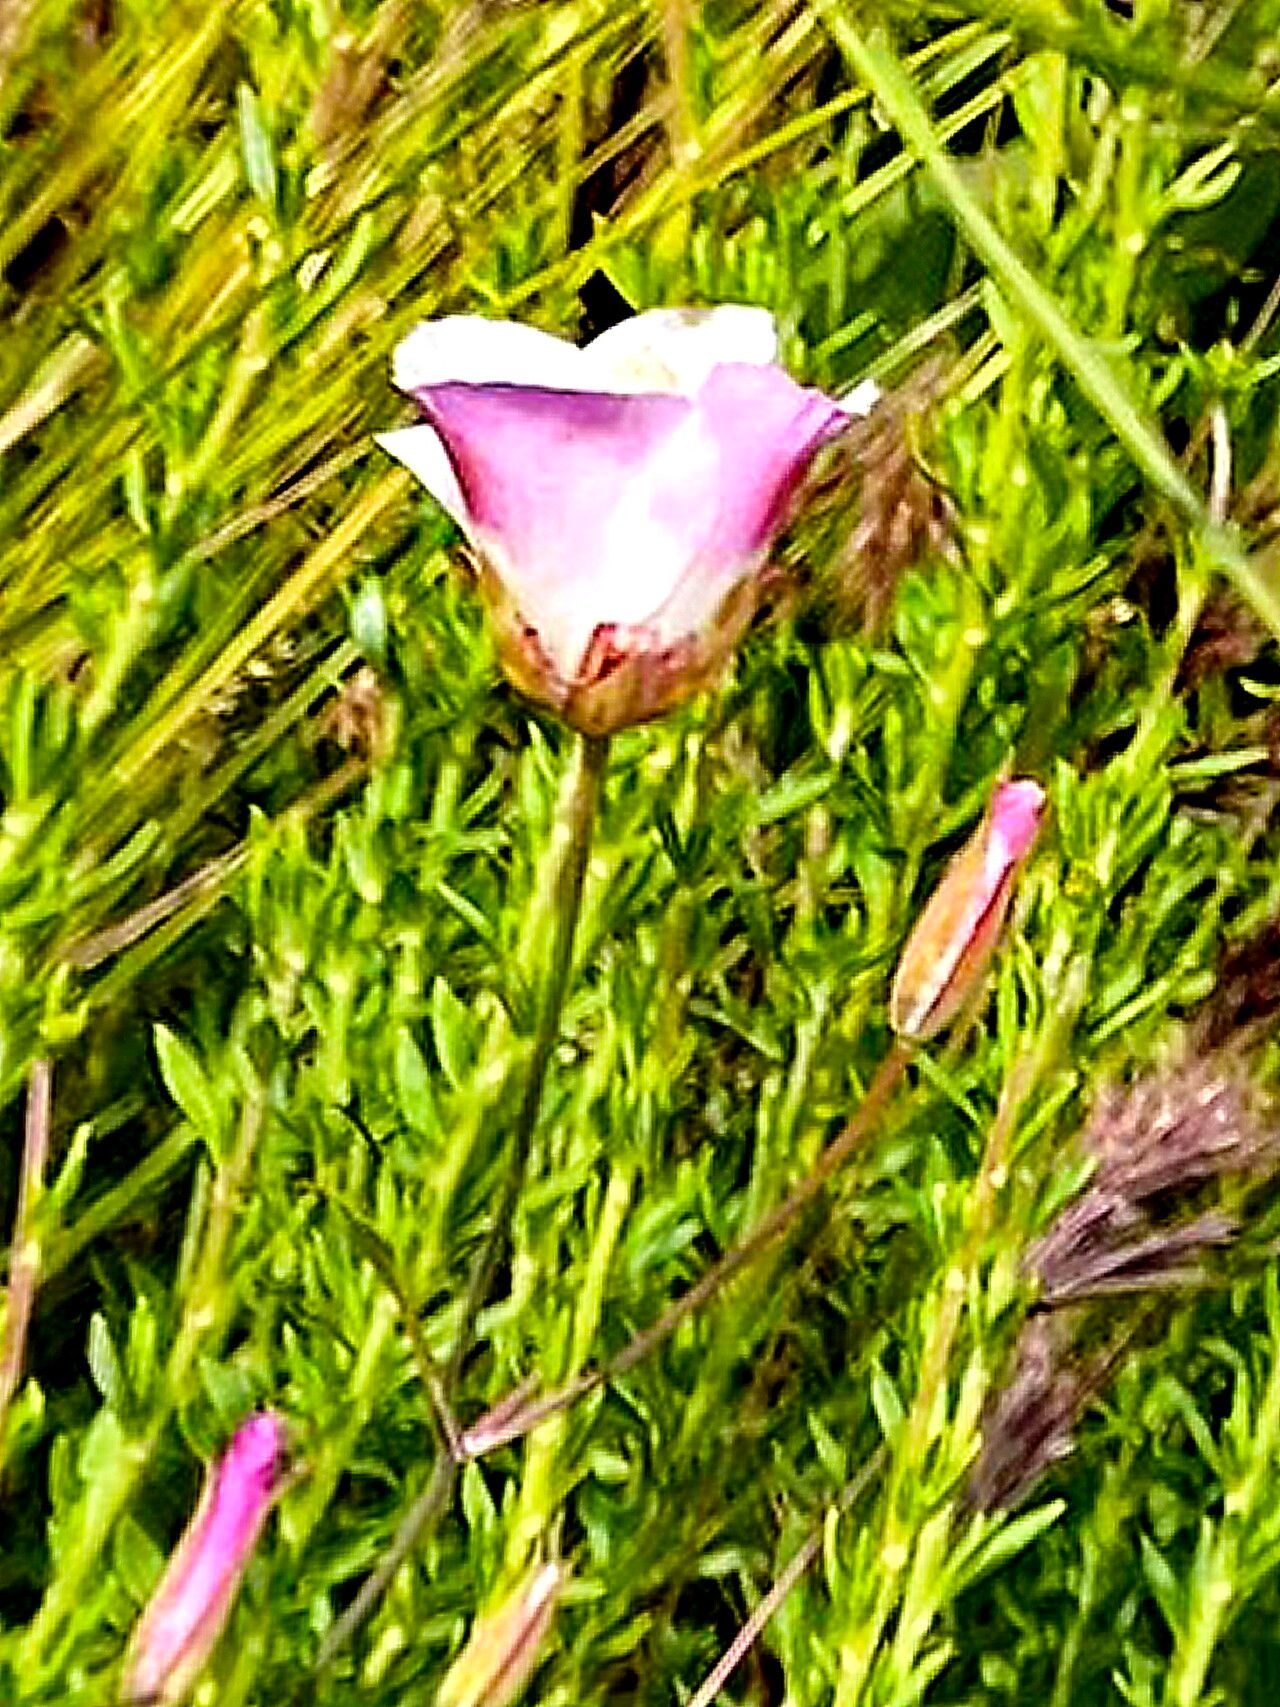
Hello, fellow plant lovers! Today, we’re diving into the enchanting world of Calochortus venustus, often called the Mariposa Lily. These California natives are truly special. Their delicate, often colorful petals unfurl like miniature skirts, gracing the garden with a shy elegance. Their beauty is undeniable, and the satisfaction of creating new life from an existing one is a reward in itself. Now, be forewarned, Calochortus venustus can be a bit of a diva. She’s not the easiest plant for absolute beginners, but with a little care and attention, you can absolutely succeed. Let’s get started!
The Best Time to Start
For Calochortus venustus, the magic happens after flowering. Once the blooms have faded and the seed pods are starting to mature, or as the plant enters its dormant phase in late summer or fall, is your prime window. This is when the plant is conserving energy and preparing for its next growth cycle, making it more receptive to propagation.
Supplies You’ll Need
Here’s a handy list to get you prepped:
- Sharp, clean pruning shears or a sharp knife: For making clean cuts.
- Well-draining potting mix: A blend of potting soil, perlite, and coarse sand is excellent. Think gritty!
- Small pots or seed trays: With drainage holes, of course.
- Rooting hormone (optional but recommended): Especially helpful for cuttings.
- Watering can with a fine rose or spray bottle: Gentle watering is key.
- Labels and a pen: To keep track of your efforts!
- Patience! This is your most important tool.
Propagation Methods
While Calochortus venustus can be grown from seed, which can take several years to bloom, for those wanting a quicker reward, division is often the most successful and rewarding method.
Division: Creating New Lilies from Existing Treasures
This technique involves carefully separating the underground bulbs.
- Wait for Dormancy: As mentioned, the best time is when the plant is dormant, typically in late summer or fall. You’ll notice the foliage has yellowed or died back.
- Gently Excavate: Carefully dig around the base of the plant, being mindful not to damage the bulbs. You want to lift the entire clump and its accompanying root ball.
- Inspect and Separate: Gently loosen the soil around the cluster of bulbs. You’ll likely find offsets attached to the main bulb. With clean hands or a small, sharp tool, carefully twist or cut these offsets away from the mother bulb. Be sure each offset has at least one small bulb and a few healthy roots.
- Allow to Dry (Briefly): Let the separated bulbs sit for a day or two in a dry, shaded spot. This helps any cuts heal and reduces the risk of rot.
- Repot: Fill your small pots with your well-draining mix. Plant each offset at the same depth it was previously growing, usually about an inch or two deep.
- Water Sparingly: Water lightly after planting, and then only when the soil feels dry to the touch. Overwatering is the enemy of these bulbs!
The “Secret Sauce” (Pro Tips)
Here are a couple of my go-to tips that have made all the difference for me and my Calochortus:
- Think “Dry Summer Rest”: This is crucial! Calochortus bulbs need a dry period during the summer when they are dormant. Mimic their native dry Mediterranean climate. If you keep them too moist during this time, they are prone to rot. So, stop watering entirely once the foliage yellows and dies back.
- Bottom Heat for Seeds (If You Go That Route): If you decide to try from seed (a true test of patience!), placing your seed trays on a heat mat can significantly improve germination rates. They like a little warmth to get those tiny roots going.
Aftercare & Troubleshooting
Once your newly divided Calochortus are planted, they need a little TLC. Keep them in a bright spot but out of harsh direct sun until they establish. Water only when the soil is dry. You’ll know they are happy when you see new green growth emerge in the fall or early spring.
The most common issue you’ll face is rot. If you see a bulb turn mushy, dark, and smelly, it’s likely a goner. This is almost always due to overwatering, especially during dormancy. If a leaf starts to yellow prematurely, check your watering habits and ensure good air circulation around the plant.
A Little Patience Goes a Long Way
Growing Calochortus venustus is a journey, not a race. Be patient, observe your plants, and learn from each step. The reward of seeing those exquisite blooms emerge from your own propagated bulbs is truly a joy. Happy gardening!
Resource: