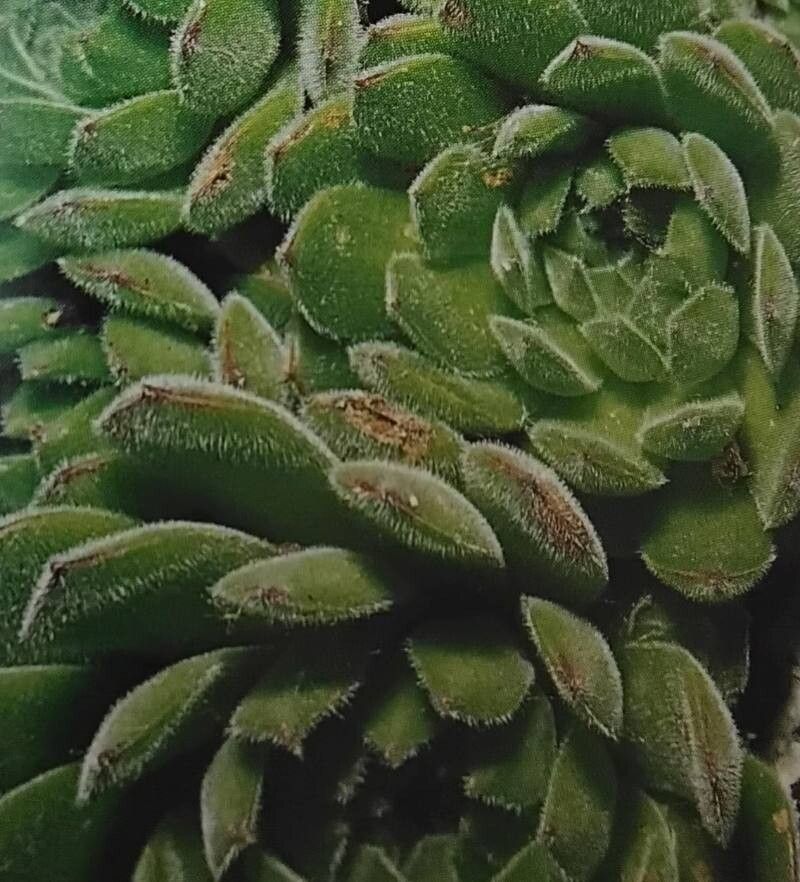
Oh, hello there! Pull up a chair and grab yourself a cuppa. I’m so glad you’re interested in Sempervivum leucanthum. These little charmers, often called Hens and Chicks, are just delightful. With their fuzzy, silvery leaves and their tendency to produce a whole brood of babies, they’re incredibly forgiving and just bursting with personality. And the best part? They’re ridiculously easy to multiply! If you’re new to the plant world, you’ve picked a fantastic one to start with. It’s like getting a guaranteed win right out of the gate.
The Best Time to Start
When you’re looking to grow more of these beauties, spring and early summer are your golden windows. This is when Sempervivum leucanthum are in their most vigorous growth phase. They’re actively sending out those adorable offsets (the “chicks”) and have plenty of energy to spare. Trying to propagate in the dead of winter is like asking a sleepy bear to knit you a sweater – not going to happen! You’ll get the best results when the temperatures are warming up and the days are getting longer.
Supplies You’ll Need
Gathering your tools is the first step to a successful propagation session. It’s all about setting yourself up for success!
- Sharp pruning shears or a clean knife: For making clean cuts, which helps prevent disease.
- Well-draining potting mix: A cactus and succulent mix is ideal. You can also make your own by mixing potting soil with perlite or pumice in a 1:1 ratio.
- Small pots or trays: Terracotta pots are great because they breathe and help dry out the soil.
- Rooting hormone (optional but helpful): This can give your cuttings a little boost.
- Spray bottle: For a gentle misting.
- Labels or markers: So you remember what you planted where!
Propagation Methods
Sempervivum leucanthum are wonderfully generous with their offspring. The most common and easiest way to propagate them is through their offsets.
Method 1: Offsets (Chicks)
This is really the stars of the show when it comes to Sempervivums. The “hen” is the mature plant, and it sends out little “chicks” that grow on runners.
- Gently detach the offsets: Wait until the offset is a decent size and has started to form its own tiny roots. You can usually just gently tug on them, and they’ll separate from the mother plant. If it’s being stubborn, use your clean pruning shears or knife to make a clean cut at the base of the offset, where it connects to the runner.
- Let them callus: This is a crucial step! Place the separated offsets on a dry surface (like a paper towel or a clean tray) in a bright spot but out of direct, scorching sun for 2-3 days. This allows the cut end to dry out and form a protective callus. This callus acts like a bandage, preventing rot when you plant them.
- Plant them: Once callused, you can plant your offsets. Fill your small pots with your well-draining succulent mix. Gently press the callused end of each offset into the soil. You don’t need to bury them too deeply – just enough so they stand upright. If you’re using rooting hormone, dip the callused end into it before planting.
- Water sparingly: After planting, wait a day or two before watering to allow any tiny nicks from planting to heal. Then, water gently. You want the soil to be lightly moist, not soggy. A spray bottle can be useful here.
Method 2: Leaf Cuttings (Less Common, More Experimental)
While offsets are the primary and most reliable method, you can sometimes get a new plant from a single leaf!
- Select healthy leaves: Choose plump, healthy leaves from the mother plant. Twist them off carefully at the base, ensuring you get the entire leaf, including the tiny bit where it attaches to the stem.
- Callus: Just like with the offsets, let these leaves callus for a few days in a dry, bright location.
- Lay on soil: Place the callused leaves on top of your well-draining succulent mix in a shallow pot or tray. Don’t bury them.
- Mist lightly: Mist the surface of the soil every few days, keeping it just barely moist. You’re not watering them directly, but encouraging the soil to be humid enough to promote root growth. You might see tiny roots or a baby plantlet emerge from the base of the leaf after several weeks.
The “Secret Sauce” (Pro Tips)
Here are a few things I’ve learned over the years that really make a difference:
- Airflow is your friend: Don’t overcrowd your new plants. Good airflow around them helps keep the soil from staying damp too long, which is the biggest culprit for rot. I often leave a fan on a low setting nearby when I’m propagating.
- Bottom warmth can speed things up: If you’re propagating in cooler weather, a seedling heat mat placed under your trays can be a game-changer. That gentle warmth encourages root development a lot faster. Just make sure the temperature doesn’t get too hot – think lukewarm bathwater.
- Patience with the “babies”: Sometimes, the offsets will look a little sad and saggy for a few days after planting. Don’t panic! They’re just settling in and figuring out their new home. As long as the soil isn’t constantly wet, they usually perk up.
Aftercare & Troubleshooting
Once your offsets have happily settled in and you start seeing signs of new growth or the start of roots (you might see a little tug resistance when you gently try to move them), you can start treating them a bit more like established plants.
- Watering: Continue to water sparingly. Let the soil dry out between waterings. Don’t let them sit in soggy soil – this is the quickest route to root rot. For young plants, a deep watering followed by a long dry spell is better than frequent, shallow sips.
- Light: Gradually introduce them to brighter light. They can handle a good amount of sun, but avoid intense, direct afternoon sun immediately after planting, as young plants can scorch.
- Troubleshooting: The dreaded rot: The most common sign of failure is mushy, black stems or leaves, especially at the base. This means rot has set in. If you see this, gently remove the affected plant immediately to prevent it from spreading to others. Check your watering habits – you’re likely overwatering. You might need to repot the remaining healthy ones in fresh, dry soil and restart the callusing process if the rot isn’t too advanced. Another sign of distress can be shriveled leaves, which could mean they are not getting enough water or are in too much direct sun.
Happy Growing!
So there you have it! Propagating Sempervivum leucanthum is a truly rewarding experience. It’s a chance to connect with your plants, learn their little secrets, and fill your garden or home with even more of these cheerful succulents. Don’t be afraid to experiment, and most importantly, take joy in the process. Watch those little chicks grow, and know that you nurtured them every step of the way. Happy propagating!
Resource:
https://identify.plantnet.org/k-world-flora/species/Sempervivum%20leucanthum%20Pančić/data