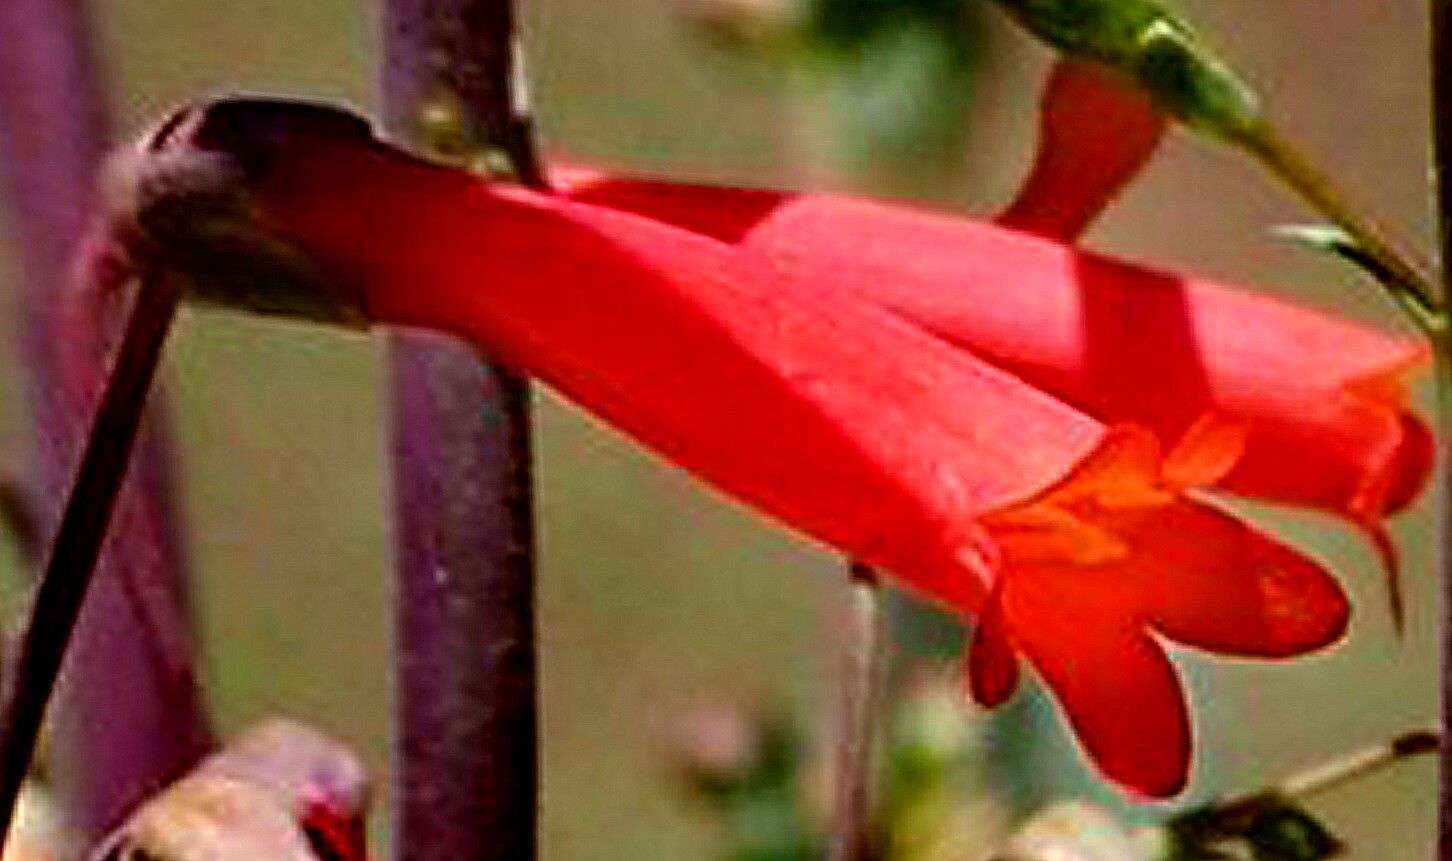
Hello fellow garden enthusiasts! I’m so excited to chat with you today about a truly special plant: Penstemon centranthifolius, also known as Scarlet Bugler. Its vibrant, trumpet-shaped flowers create a stunning display, particularly beautiful when planted en masse, attracting hummingbirds and beneficial insects to your garden. It’s a real jewel of the California native landscape.
Now, if you’re wondering about the difficulty level for beginners, I’d say propagating Scarlet Bugler is moderately easy. It won’t try to trick you, but a little attention to detail goes a long way. The reward of growing your own from scratch? Absolutely immense! It’s a wonderful way to fill your garden or share the beauty with friends.
The Best Time to Start
For the highest success rate with Penstemon centranthifolius, I always recommend starting in late spring or early summer. This is when the plant is actively growing, and the stem cuttings will have the most energy to put into developing roots. You’re looking for new, but not overly soft, growth from the current season.
Supplies You’ll Need
Gathering your supplies beforehand makes the whole process so much smoother. Here’s what I usually have on hand:
- Sharp pruning shears or a clean knife: Essential for making clean cuts.
- A well-draining potting mix: I like a blend of 50% perlite and 50% seed starting mix or cactus/succulent mix. This is crucial because Penstemons hate soggy feet.
- Rooting hormone (optional but highly recommended): This gives your cuttings a little boost. Look for one with a fungicidal component to help prevent rot.
- Small pots or seed trays: Clean ones are best! Tiny terracotta pots or simple plastic starter pots work wonderfully.
- Watering can with a fine rose or a spray bottle: For gentle watering.
- Labels: You’ll thank yourself later for remembering what you planted where!
- A tray or shallow dish: To catch excess water when you water from the bottom.
Propagation Methods
Scarlet Bugler is best propagated through stem cuttings. It’s quite reliable, and I’ve had great success with this method over the years.
Step-by-Step Stem Cuttings:
- Take Your Cuttings: On a nice morning, select a healthy stem from a mature Penstemon centranthifolius. Look for a stem that is about 4-6 inches long and has developing leaves but isn’t woody yet.
- Make the Cut: Using your sharp pruning shears or knife, make a clean cut just below a leaf node. A leaf node is where a leaf attaches to the stem – this is where roots love to emerge.
- Prepare the Cuttings: Gently remove the lower leaves from the cutting, leaving just a few pairs of leaves at the top. This prevents them from rotting in the soil. If your cutting has any flowers or flower buds, pinch them off.
- Apply Rooting Hormone (if using): Dip the cut end of the stem into the rooting hormone powder or gel. Tap off any excess.
- Plant Your Cuttings: Fill your clean pots with your well-draining potting mix. Moisten the mix slightly.
- Insert the Cuttings: Use a pencil or your finger to make a small hole in the soil. Gently insert the bottom inch or so of your cutting into the hole. Firm the soil gently around the stem.
- Water Gently: Water the pot thoroughly but gently, so you don’t disturb the cuttings.
- Create a Humid Environment: This is important! You can do this by:
- Placing the pots inside a clear plastic bag (like a mini-greenhouse). Open it up daily for a few minutes to allow for air circulation.
- Or, using a clear plastic dome over your seed tray.
The “Secret Sauce” (Pro Tips)
Here are a few little tricks I’ve learned that can really make a difference:
- Don’t let the leaves touch the water (if you were considering water propagation, which I don’t recommend for this particular Penstemon): This might sound obvious, but for stem cuttings in soil, ensure the remaining leaves are well above the soil line. If they touch the damp soil, they’re more prone to rot.
- Bottom heat is your friend: Penstemons root best when the soil is kept slightly warm. A heated propagator mat placed under your pots can significantly speed up root development. It’s a game-changer, especially if your house tends to be on the cooler side.
- Be patient with the watering: In the early stages, you want the soil to be consistently moist but never waterlogged. Check the soil moisture by sticking your finger in about an inch. If it feels dry, it’s time to water. Watering from the bottom, by placing pots in a tray of water for about 15-20 minutes, is often best as it encourages roots to grow downwards.
Aftercare & Troubleshooting
Once you see signs of new growth – tiny leaves emerging from the top – it’s a good indication that roots have formed! This usually takes anywhere from 4 to 8 weeks, sometimes longer depending on the conditions.
Here’s what to do next:
- Gradually Acclimate: If you used a plastic bag or dome, start hardening off your new plants. Remove the covering for longer periods each day over a week to get them used to the drier air.
- Transplant: Once your cuttings have a good root system (you can gently tip a pot to check, or you’ll see roots at the drainage holes), it’s time to transplant them into larger pots with your regular well-draining garden soil.
- Continue Gentle Watering: Keep them moist but not soggy in their new pots.
Now, what if things go wrong? The most common culprit is rot. If your cuttings turn black and mushy at the base, that’s a sure sign of overwatering or poor drainage. Unfortunately, there’s no coming back from that, so it’s best to discard the rotten cutting and learn from it. Sometimes, cuttings simply fail to root. Don’t be discouraged! It happens to all of us. Just try again with new cuttings.
A Encouraging Closing
Propagating Penstemon centranthifolius is such a rewarding experience. It’s a chance to connect with nature, to understand the plants you love on a deeper level, and to expand your garden’s beauty. Remember to be patient. Not every cutting will succeed, but the ones that do will bring you immense joy. Happy gardening, and enjoy the magic of watching new life emerge!
Resource: