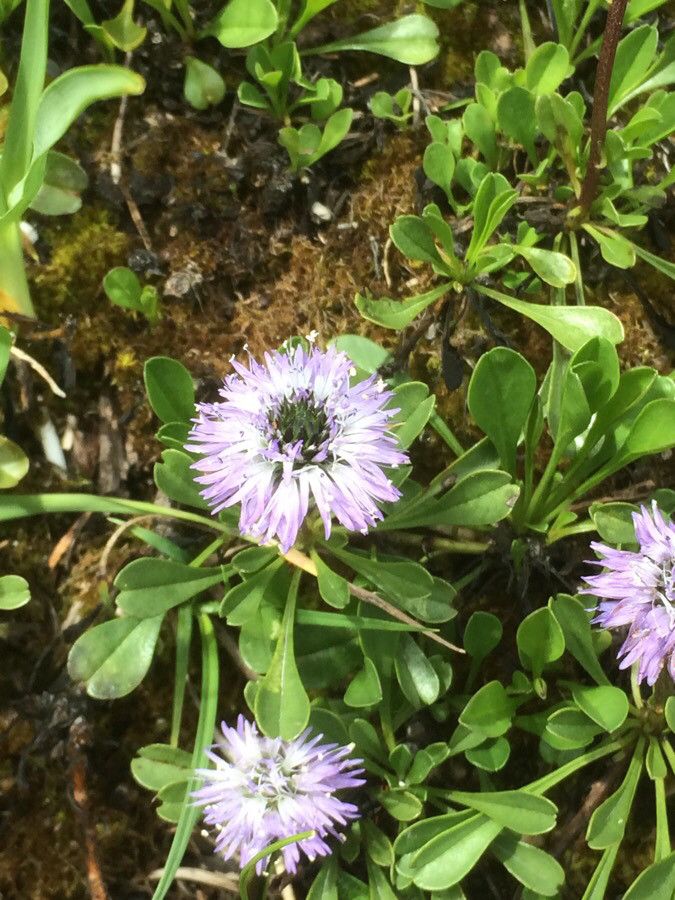
Oh, hello there! Come on in, pull up a chair. I’ve got a fresh pot of coffee brewing, and I’m so excited to chat with you about one of my favorite garden treasures: Globularia fuxeensis. If you’re looking for a plant that offers delicate, whimsical blooms and a rewarding propagation journey, this is it. Think of those lovely little blue pincushion flowers, nodding gently in the breeze. They bring such a touch of understated elegance to any garden border or container. And the best part? You can easily multiply this beauty yourself! While some plants can be a bit stubborn, Globularia fuxeensis is a delightful plant to propagate, making it a wonderful choice even if you’re relatively new to the gardening game.
The Best Time to Start
When it comes to getting your Globularia fuxeensis cuttings off to a good start, late spring to early summer is your golden window. This is when the plant is actively growing, and the stems are nice and pliable, but not yet woody. You’ll want to take cuttings from healthy, non-flowering shoots. Think of it as harvesting the best of the best for your new plant babies.
Supplies You’ll Need
Before we get our hands dirty, let’s gather our toolkit. It’s not fancy, but having these on hand will make the whole process smooth sailing:
- Sharp Pruning Shears or a Clean Knife: For making clean cuts and preventing damage.
- Small Pots or Seed Trays: Clean, of course! About 3-4 inches in diameter is perfect.
- Well-Draining Potting Mix: I like to use a blend of equal parts peat moss, perlite, and coarse sand. This ensures excellent aeration and prevents waterlogged roots.
- Rooting Hormone (Optional, but recommended): This little helper can really speed things up and encourage stronger root development.
- Plastic Bags or a Propagator Lid: To create a humid microclimate.
- Watering Can with a Fine Rose: For gentle watering.
- Labels and a Marker: To keep track of your precious cuttings!
Propagation Methods: Stem Cuttings
For Globularia fuxeensis, stem cuttings are my go-to method. It’s straightforward and consistently successful. Here’s how we’ll do it:
- Select Your Stems: Look for healthy, new growth that hasn’t flowered. You want stems that are a bit flexible, not stiff and woody. They should be about 3-4 inches long.
- Make the Cut: Using your clean shears or knife, make a clean cut just below a leaf node. This is where roots are most likely to form.
- Prepare the Cuttings: Gently remove the leaves from the lower half of the stem. This prevents them from rotting once they’re in the soil. You can leave a couple of leaves at the very top to help with photosynthesis.
- Dip in Rooting Hormone (if using): If you’ve got that magic rooting hormone, dip the cut end into it. Tap off any excess.
- Pot Them Up: Fill your small pots with your well-draining potting mix. Make a small hole in the center using a pencil or your finger.
- Insert the Cuttings: Gently place the prepared cuttings into the holes, ensuring the leaf nodes are buried in the soil. Firm the soil gently around them.
- Water Gently: Give them a light watering, just enough to moisten the soil thoroughly.
- Create Humidity: Place a clear plastic bag over each pot, securing it loosely with a rubber band, or pop them into a propagator with a lid. This creates that essential humid environment.
The “Secret Sauce” (Pro Tips)
Now, here are a few little tricks I’ve picked up over the years that can make all the difference:
- Don’t Let Those Leaves Touch the Water (if water propagating, which isn’t ideal here): While we’re using soil, this principle applies to keeping leaves dry. In soil, it means making sure no leaves are buried deep where they’ll sit in moisture. Keep falling leaves out of your pots; they can encourage rot.
- Bottom Heat is Your Friend: If you have a heat mat, popping your pots on it can really encourage faster root development. It mimics the warmth of spring and says “get growing!”
- Be Patient with the Pruning: When you go to take your cuttings, don’t be afraid to prune back any overly long or leggy stems from the parent plant. This encourages it to bush out and produce even more good material for future propagation.
Aftercare & Troubleshooting
Once your cuttings are potted, find them a spot with bright, indirect light. Avoid direct sun, which can scorch those tender new leaves. Keep the soil consistently moist but never soggy. You can check the humidity under the plastic bag – if you see a lot of condensation, you can briefly air it out.
The true test? Gently tugging on a cutting after a few weeks. If you feel resistance, roots have formed! You’ll see new growth starting to emerge as well. Once you’ve established a good root system, you can gradually acclimatize them to lower humidity before transplanting them into larger pots.
What if things go wrong? The most common culprit is rot. If your cuttings turn mushy and black, it’s usually a sign of too much moisture and not enough air circulation. This is where that well-draining mix and that bit of ventilation under the plastic come in handy. Don’t be discouraged if a few don’t make it; gardening is a learning process, and every attempt teaches you something new.
So, there you have it! A little step-by-step guide to bringing more of these beautiful Globularia fuxeensis into your garden. Remember, patience is key, and there’s a real joy in watching those tiny roots emerge and seeing your cuttings thrive. Happy propagating!
Resource:
https://identify.plantnet.org/k-world-flora/species/Globularia%20fuxeensis%20Giraudias/data