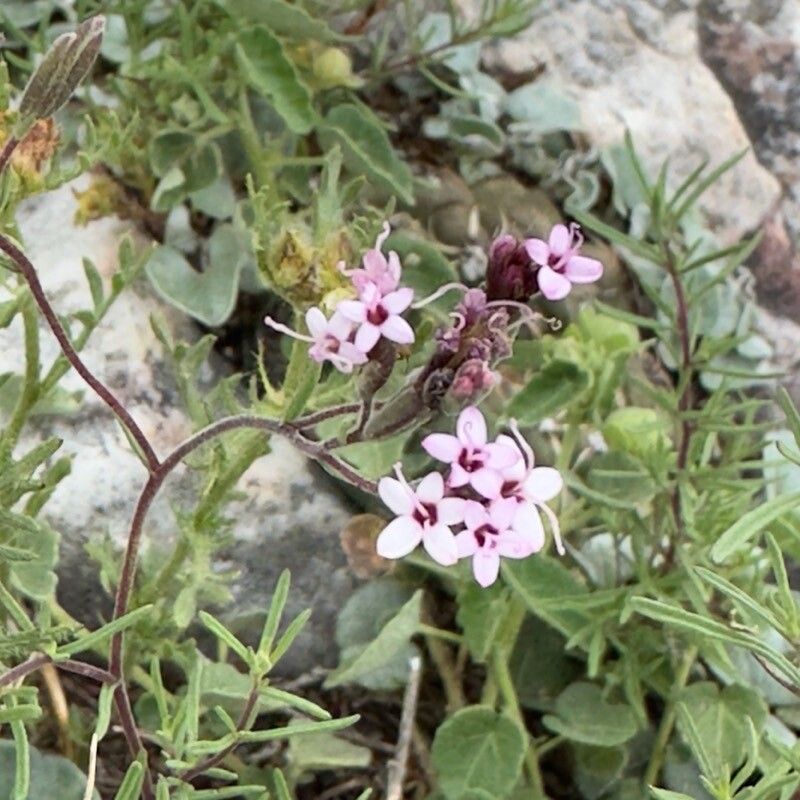
Hello fellow garden enthusiasts! It’s so lovely to connect with you again. Today, we’re diving into a plant that’s been a sweet whisper in my garden for years: Stevia viscida. Many people know its sweeter cousin, Stevia rebaudiana, but Stevia viscida offers its own subtle charm with delicate flowers and a whisper of sweetness. The real joy of growing it? Knowing you can easily make more of this delightful plant yourself. For beginners, I’d say propagating Stevia viscida is moderately easy, rewarding your efforts with a little patience.
The Best Time to Start
The absolute sweet spot for propagating Stevia viscida is late spring to early summer. This is when the plant is actively growing, fueled by longer days and warmer temperatures. You’ll want to take cuttings from healthy, non-flowering stems. If your plant has already started to bloom, you might have a slightly lower success rate. Think of it as trying to grow a baby when the parent is busy with a big event!
Supplies You’ll Need
Here’s what I usually have on hand when I’m ready to get my hands dirty with Stevia viscida:
- Sharp pruning shears or a clean razor blade: For making clean cuts.
- Seedling or potting mix: Something light and well-draining. I often use a blend of equal parts peat moss (or coir), perlite, and a little compost.
- Small pots or propagation trays: Clean containers are key!
- Rooting hormone (optional but helpful): A powder or gel specifically for plant propagation.
- Clear plastic bag or dome: To create a humid environment.
- Watering can with a fine rose attachment: For gentle watering.
- A sunny, bright spot: Out of direct, harsh sun.
Propagation Methods: Stem Cuttings
This is my go-to method for Stevia viscida. It’s straightforward and usually yields great results.
- Select Your Stems: Head out to your Stevia plant on a bright morning. Look for healthy, non-flowering stems that are about 4-6 inches long. They should be firm, not woody.
- Make the Cut: Using your clean shears or razor, make a clean cut just below a leaf node. A leaf node is where a leaf grows out of the stem. This is where the magic happens for root development.
- Prepare the Cutting: Gently remove the lower leaves from the cutting, leaving just 2-3 sets of leaves at the top. This prevents the submerged leaves from rotting.
- Apply Rooting Hormone (Optional): If you’re using rooting hormone, dip the cut end of the stem into the powder or gel, tapping off any excess.
- Plant Your Cuttings: Fill your pots or trays with your well-draining mix. Make a small hole with your finger or a pencil, and gently insert the cut end of the stem into the soil.
- Water Gently: Water thoroughly but do so gently. You want the soil to be moist, not waterlogged.
- Create Humidity: Cover the pots or trays with a clear plastic bag or a propagation dome. This traps moisture and creates the humid environment that cuttings crave. Make sure the leaves aren’t touching the sides of the bag if possible.
- Find the Right Spot: Place your propagation setup in a bright location that receives indirect sunlight. Avoid direct sun, as this can scorch your delicate cuttings.
The “Secret Sauce” (Pro Tips)
After years of playing with cuttings, I’ve learned a few tricks that consistently boost my success rates.
- Don’t let those lower leaves touch the soil! Seriously, this is a big one. Any leaf submerged in the moist soil is an invitation for rot. Trim them all off.
- Consider bottom heat. If you have a seedling heat mat, placing your propagation trays on it can really speed up root development. It mimics the warmth of the earth from which a seed would sprout. Stevia loves a little cozy warmth.
- Mist lightly, don’t soak. While humidity is key, overwatering your newly planted cuttings can lead to disaster. A gentle misting of the leaves every couple of days, especially if the plastic bag isn’t sealing perfectly, is usually enough.
Aftercare & Troubleshooting
Once you start seeing tiny white roots peeking out from the drainage holes or new leaf growth at the top of the cutting, that’s your cue! It usually takes about 2-4 weeks.
- Acclimatize Gradually: Your new little Stevia babies need to get used to life outside their humid bubble. Gradually remove the plastic bag over a few days, starting with an hour or two, then longer.
- Continue Gentle Watering: Keep the soil consistently moist.
- Transplant with Care: Once they have a decent root system and are looking robust, you can transplant them into individual, slightly larger pots.
Now, what if things go wrong? The most common culprit is rot. If your cutting turns mushy, black, or just looks completely lifeless and sad, it’s likely succumbed to rot. This is often due to overwatering or poor drainage. Don’t despair! Fresh cuttings from a healthy parent plant are your best bet for a do-over.
A Encouraging Closing
Propagating plants is a beautiful dance with nature. Be patient with your little Stevia viscida cuttings. They have their own timeline, and with a little care and attention, you’ll soon have a whole batch of sweet little plants to share, use in your tea, or simply admire. Enjoy the journey, and happy gardening!
Resource:
https://identify.plantnet.org/k-world-flora/species/Stevia%20viscida%20Kunth/data