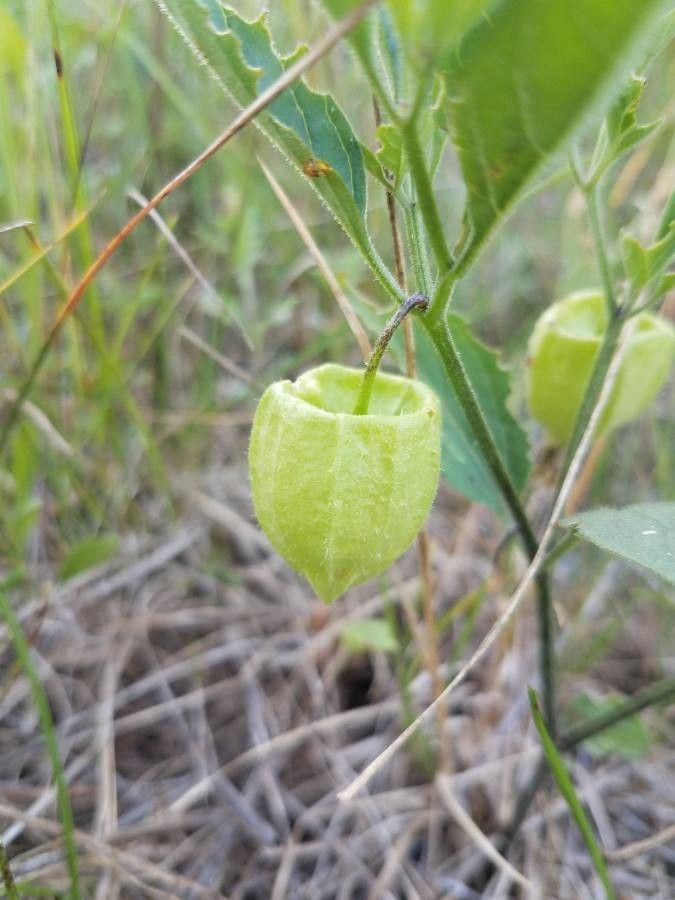
Oh, hello there! Come on in, grab a mug. Let’s chat about a truly delightful plant: Physalis virginiana, or as many of us fondly call it, Ground Cherry. If you haven’t grown these before, you’re in for a treat. The little papery husks, like tiny lanterns, protecting their sweet, tangy fruits… it’s just magical. And the best part? Propagating them is surprisingly straightforward, a true joy for any gardener wanting to expand their patch. Even if you’re just starting out, you’ll find this a very forgiving project.
The Best Time to Start
For the most success with Physalis virginiana, I always recommend starting in late spring or early summer. This is when the plant is actively growing and has plenty of energy to throw into developing new roots. You can also propagate from divisions in early spring, just as new growth is emerging, but cuttings really take off with that warm summer sun.
Supplies You’ll Need
A few simple things will have you well on your way:
- Clean, sharp pruning shears or a sharp knife: For making clean cuts.
- Small pots or trays: Cleaned thoroughly, of course. Yogurt cups with drainage holes poked in the bottom work in a pinch!
- A good potting mix: I prefer a mix that’s light and airy, often achieved by combining equal parts peat moss (or coco coir), perlite, and a bit of compost. It needs to drain well.
- Rooting hormone (optional but helpful): This isn’t strictly necessary for Physalis virginiana, but it can give your cuttings a little boost, especially if you’re a beginner.
- Watering can or mister: For gentle watering.
- Plastic bags or a propagation dome: To keep humidity high around your cuttings.
Propagation Methods
Let’s get our hands dirty! Physalis virginiana is lovely because it’s quite adaptable.
Stem Cuttings
This is my go-to method.
- Take your cuttings: In late spring or early summer, look for non-flowering, healthy stems that are about 4-6 inches long. Make a clean cut just below a leaf node (that little bump where a leaf attaches).
- Prepare the cuttings: Gently pinch off the lower leaves, leaving just a couple at the very top. This prevents them from rotting in the soil. If you’re using rooting hormone, dip the cut end into it now.
- Pot them up: Fill your clean pots with your prepared potting mix. Make a small hole with your finger or a pencil. Gently insert the cuttings into the holes, making sure the lowest leaf node is buried in the soil.
- Water and cover: Water them gently until the soil is evenly moist, but not soggy. Then, pop the pots into a plastic bag (blowing a little air into it first to create a mini-greenhouse) or cover them with a propagation dome.
- Place them in the right spot: Find a bright location out of direct sunlight. A sunny windowsill indoors or a bright spot in a greenhouse works perfectly.
Division
This is best done in early spring when the plant is just waking up.
- Dig up the plant: Carefully dig around the base of your established Physalis virginiana plant.
- Separate the clumps: Gently pull apart the root ball into smaller sections. You want each division to have plenty of healthy roots and some new growth shoots.
- Replant: Replant these divisions in their permanent spot in the garden or in new pots, watering them in well.
The “Secret Sauce” (Pro Tips)
Here are a few little tricks I’ve learned over the years:
- Avoid soggy bottoms: This is probably the most crucial tip. Cuttings hate sitting in water. Make sure your pots have excellent drainage and that your soil mix is airy. If your cuttings wilt slightly after potting up, that’s okay – it’s a sign they haven’t rooted yet and are relying on the moisture in their leaves.
- Bottom heat is your friend: For really speedy rooting, especially if the weather is a bit cool, a heat mat placed underneath your pots makes a world of difference. It encourages root development from below, giving your cuttings a real head start.
- Be patient with the leaves: If you’re doing water propagation (which I don’t recommend as much for Physalis as cuttings in soil, but it’s possible!), ensure no leaves are touching the water. They’ll rot quickly and can spread that rot to the stem, dooming your cutting.
Aftercare & Troubleshooting
Once your cuttings have started to put on new growth, it’s a good sign they’ve rooted! You’ll also notice they feel more resistant when you give them a gentle tug.
- Gradual acclimation: Once roots have formed, slowly start to acclimate them to the outside air. Open the plastic bag or propagation dome a little more each day for about a week before removing it entirely.
- Watering: Continue to water when the top inch of soil feels dry.
- Transplanting: Once they’re robust enough – usually when they have several sets of true leaves and are a decent size – you can transplant them into larger pots or their final garden location.
Now, what if things go wrong? The most common issue is rot. If your cutting turns black and mushy, or the leaves yellow and fall off despite being kept moist, it’s usually a sign of too much moisture or a fungal issue. Sometimes, it’s just that a particular cutting wasn’t vigorous enough to begin with. Don’t get discouraged! Just try again with fresh material.
A Encouraging Closing
So there you have it! Propagating Physalis virginiana is a wonderfully accessible way to fill your garden with these charming plants. The key is to be patient, provide consistent care, and learn from each attempt. Don’t be afraid to experiment a little. Enjoy the process, and soon you’ll have plenty of these little lantern-bearing beauties to share. Happy gardening!
Resource:
https://identify.plantnet.org/k-world-flora/species/Physalis%20virginiana%20Mill./data