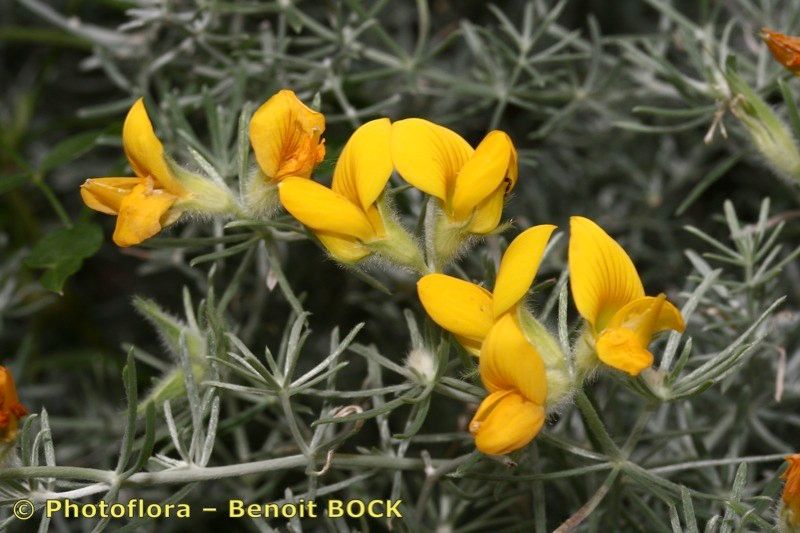
Oh, the lotus! That majestic bloom, unfurling its petals like a promise of pure beauty. If you’ve ever admired the elegance of Lotus mascaensis, you know how enchanting it is. And the good news? Bringing its magic into your own garden, or perhaps gifting that magic to a friend, through propagation is a truly rewarding endeavor. While it’s not the absolute easiest plant out there, with a little patience and the right approach, it’s definitely achievable for the dedicated beginner.
The Best Time to Start
For Lotus mascaensis, the absolute sweet spot for propagation is late spring to early summer. This is when the plant is in its most vigorous growth phase, pulsing with energy. You want to work with healthy, actively growing material. Trying to propagate when the plant is dormant or stressed is just setting yourself up for disappointment.
Supplies You’ll Need
Gathering your tools beforehand makes the whole process feel much smoother. Here’s what I typically have on hand:
- Sharp, clean pruning shears or a sharp knife: For making clean cuts.
- A suitable potting mix: For stem cuttings, you’ll want a well-draining mix. Something like a blend of coarse sand, perlite, and a bit of compost works well. For division, use your regular garden soil that contains some organic matter.
- Rooting hormone powder or gel: While not always strictly necessary for lotus, it can give your cuttings a good boost.
- Small pots or containers: Clean, with drainage holes.
- A clear plastic bag or propagation dome: To create a humid environment for cuttings.
- A watering can or misting bottle: For gentle watering.
- Labels and a permanent marker: To keep track of what’s what!
Propagation Methods
Lotus mascaensis can be propagated in a couple of reliable ways. I find these to be the most successful:
1. Stem Cuttings
This is often the quickest way to get new plants.
- Select your cutting: Look for a healthy, non-flowering stem that’s about 4-6 inches long. You want a stem that has at least two or three leaf nodes.
- Make the cut: Using your sharp pruning shears, make a clean cut just below a leaf node.
- Prepare the cutting: Gently remove any leaves from the lower half of the stem. You can leave one or two leaves at the top, but if they are very large, consider cutting them in half to reduce water loss.
- Apply rooting hormone (optional but recommended): Dip the cut end into rooting hormone powder or gel, tapping off any excess.
- Plant the cutting: Fill a small pot with your well-draining potting mix. Gently insert the cut end of the stem into the soil, ensuring at least one leaf node is buried. Firm the soil gently around the stem.
- Create humidity: Water the soil lightly. Then, cover the pot with a clear plastic bag or place it under a propagation dome. This keeps the humidity high, which is crucial for cuttings.
- Location: Place the pot in a bright location, but out of direct, scorching sunlight. A warm spot is ideal.
2. Division
This method is best done when you’re actively repotting or managing an established lotus.
- Gently excavate: Carefully remove your lotus from its pot or its spot in the pond. Try to disturb the root ball as little as possible initially.
- Inspect the rhizomes: You’ll see thick, fleshy rhizomes. Look for sections that have healthy buds or growing points. These are your potential new plants.
- Make the division: Using your sharp knife or pruning shears, carefully slice through the rhizome, ensuring each division has at least one viable bud and some healthy roots.
- Replant the divisions: You can either replant them directly into new pots or back into the pond. If planting in pots, use your regular garden soil, burying the rhizome just below the surface with the bud pointing upwards. Ensure the pot has good drainage.
- Water in: Water gently but thoroughly after replanting.
The “Secret Sauce” (Pro Tips)
After years of coaxing these beauties to multiply, I’ve picked up a few tricks that really make a difference:
- Don’t let the leaves touch the water (for cuttings): If you choose to root cuttings in water first, which I sometimes do for a visual check, make absolutely sure that the leaves are not submerged. Rot is a quick killer of cuttings in water, and the leaves are the primary culprits when they get soggy and decay.
- Bottom heat is your friend: For stem cuttings, especially if your environment is a bit cooler, providing a gentle bottom heat source can dramatically speed up root development. A seedling heat mat placed under your propagation tray can work wonders.
- Patience with the rhizome: When dividing, be gentle but firm. Don’t be afraid to make a clean cut. Over-handling or leaving ragged edges on the rhizomes can lead to rot. Think of it like amputating a limb cleanly; a sharp, decisive cut is better than a jagged tear.
Aftercare & Troubleshooting
Once you see signs of new growth – tiny leaves emerging or roots visible through the drainage holes – it’s time for slightly adjusted care.
- Gradual acclimatization: Slowly reduce the humidity for your cuttings. Gradually open the plastic bag or propagation dome a little each day over a week.
- Watering: Keep the soil consistently moist, but avoid waterlogging. You want it damp, not soggy.
- Fertilizing (later): Once the new plant is well-established and showing more robust growth, you can introduce a dilute liquid fertilizer.
- Signs of trouble: The most common issue is rot. This often shows up as a slimy, blackening stem or rhizome. It’s usually caused by too much moisture and poor air circulation. If you see rot, remove the affected part immediately with a clean, sharp tool and try to improve the drainage and airflow around your promising propagule. If a cutting completely wilts and turns mushy, it hasn’t made it.
A Encouraging Closing
Watching a new lotus unfurl from a tiny cutting or division is a truly special feeling. It’s a testament to nature’s resilience and your own green thumb at work. Remember, not every attempt will be successful, and that’s perfectly okay. Gardening is a journey, filled with lessons learned from both triumphs and setbacks. So, be patient, observe your little ones closely, and most importantly, enjoy the process of bringing more of that lotus magic into your world!
Resource:
https://identify.plantnet.org/k-world-flora/species/Lotus%20mascaensis%20Burchard/data