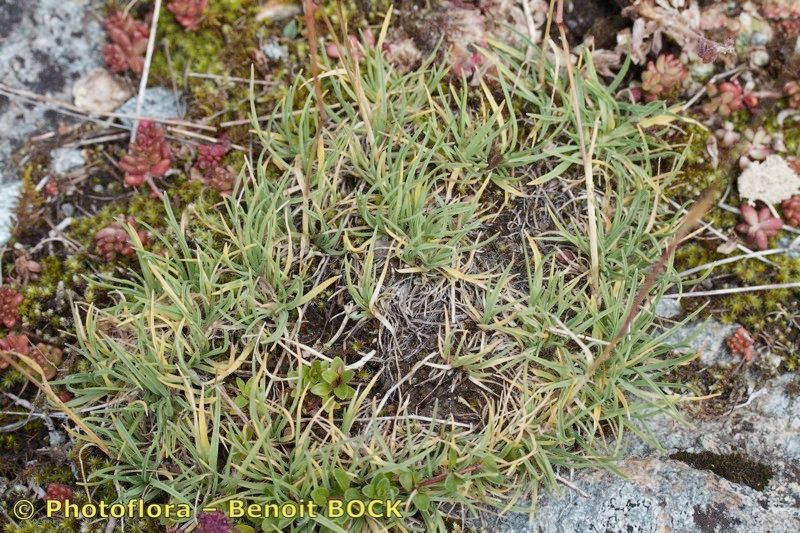
Hello, fellow garden lovers! Today, we’re diving into the delightful world of propagating Koeleria cenisia. If you’ve ever admired this elegant grass, with its fine, silvery-blue blades and delicate, airy flower spikes, you’re in for a treat. Growing more of it is not only possible but incredibly rewarding. It’s a bit like capturing a piece of that wild, windswept beauty to bring right into your own garden. And the good news? For those of you just dipping your toes into propagation, Koeleria cenisia is actually quite forgiving. You’ve got this!
The Best Time to Start
When it comes to Koeleria cenisia, your best bet for propagation is late spring or early summer. This is when the plant is actively growing and has plenty of energy to dedicate to developing new roots. Waiting until after its initial flush of growth, and before the hottest part of summer sets in, will give your new plants the best start.
Supplies You’ll Need
You don’t need a fancy lab to get this done, just a few familiar garden friends:
- Sharp pruning shears or a clean knife: For making precise cuts.
- Well-draining potting mix: I prefer a blend of coarse sand, perlite, and peat moss – about a 1:1:1 ratio works wonders for grasses.
- Small pots or seed trays: Enough to house your new little ones.
- Rooting hormone (optional but recommended): A powdered or liquid form to help speed things along.
- Watering can or spray bottle: For gentle hydration.
- Labels: So you don’t forget what you planted where!
Propagation Methods
Koeleria cenisia is best propagated through division. It’s the most straightforward and successful method for this lovely ornamental grass.
- Gently excavate: In late spring or early summer, carefully dig up the entire Koeleria cenisia clump. Use a spade or garden fork to loosen the soil around the base, and try to lift the whole plant without damaging the roots too much.
- Assess the clump: Once it’s out of the ground, you’ll see it’s made up of several smaller sections or tillers. Look for natural divisions where you can see distinct shoots and root systems starting to emerge.
- Separate with care: Using your hands, or a clean, sharp knife if the divisions are tight, carefully tease apart the clump. You want each new piece to have a good portion of roots attached and at least a few healthy shoots. Don’t worry if a few roots break; just aim for as many intact as possible.
- Prepare for planting: If the roots look a bit dry, you can give them a quick soak in water for about 15-20 minutes.
- Pot them up: Fill your small pots with the well-draining potting mix. Make a hole in the center of each pot large enough to accommodate the root ball of your division.
- Plant your new babies: Place each division into its hole, spreading the roots out gently. Backfill with soil, pressing down lightly to ensure good contact. The crown of the plant – where the leaves emerge from the roots – should be at soil level.
- Water thoroughly: Give each potted division a good, gentle watering to settle the soil around the roots.
The “Secret Sauce”
Here are a couple of little tricks I’ve learned over the years that can really boost your success:
- Don’t overwater initially: While you want the soil to be moist, waterlogged conditions are the enemy of young grass divisions. Let the top layer of soil dry out slightly between waterings. This encourages the roots to seek out moisture and grow stronger.
- Provide a little shade: Newly divided plants can be stressed by direct, hot sun. For the first week or two, I like to place my pots in a spot that gets morning sun but afternoon shade. It helps them settle in without getting scorched.
Aftercare & Troubleshooting
Once your divisions are happily nestled in their pots, continued observation is key.
- Keep moist, not soggy: Continue to water gently. You’ll notice the soil drying out faster as the plant establishes. Feel the soil with your finger; if the top inch feels dry, it’s time to water.
- Look for new growth: The surest sign of success is seeing new leaves emerging from the center of the shoots. This usually happens within a few weeks.
- The dreaded rot: If you notice any sections turning brown and mushy, or if the soil stays constantly wet and smells unpleasant, you might be dealing with root rot. This is usually due to overwatering or poor drainage. If this happens, try to carefully remove the affected part, ensure your soil drains well, and hold back on the watering. It’s a tough lesson, but one we’ve all learned!
Propagating Koeleria cenisia is a wonderful way to expand your collection of these beautiful grasses. Be patient with your new babies, and don’t get discouraged if a few don’t make it through the first attempt. The joy lies in the nurturing, and soon you’ll have a whole meadow of your own. Happy propagating!
Resource:
https://identify.plantnet.org/k-world-flora/species/Koeleria%20cenisia%20Reut.%20ex%20E.Rev./data