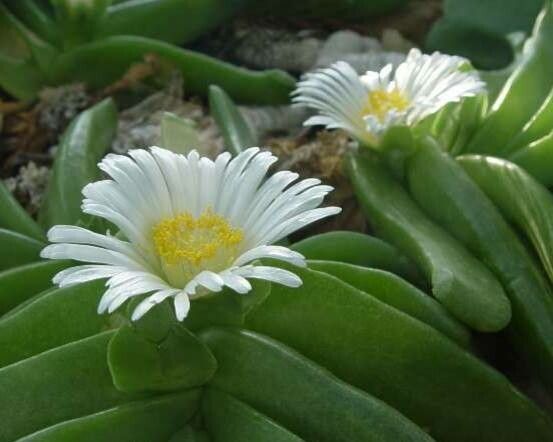
Hello, fellow plant lovers! Today, we’re diving into the wonderfully quirky world of Glottiphyllum oligocarpum. If you haven’t met this succulent yet, imagine a plant that looks like a perpetually smiling little cluster of fleshy, tongue-shaped leaves. It’s a real charmer for any collection, and the best part? Getting more of them is surprisingly straightforward! Propagating Glottiphyllum oligocarpum is a truly rewarding experience, and I’d say it’s a fantastic plant for beginners looking to dip their toes into propagation.
The Best Time to Start
For Glottiphyllum oligocarpum, spring and early summer are your golden ticket. This is when the plant is actively growing, and cuttings or divisions will have the best chance of rooting quickly and vigorously. Aim for a time when temperatures are warm but not scorching hot, and you have bright, indirect light available.
Supplies You’ll Need
Here’s what you’ll want to have on hand:
- Well-draining potting mix: A succulent and cactus mix is ideal. You can also create your own by mixing equal parts potting soil, perlite, and coarse sand.
- Clean, sharp pruning shears or a knife: For making clean cuts.
- Rooting hormone (optional but helpful): Especially for stem cuttings.
- Small pots or trays: With drainage holes! This is crucial.
- Spray bottle: For light misting.
- Gravel or small pebbles: For covering the soil surface if you choose.
- Patience: The most important ingredient!
Propagation Methods
Glottiphyllum oligocarpum is most easily propagated through two main methods: stem cuttings and division.
Stem Cuttings
This is my go-to for getting new plants quickly.
- Take the cutting: Gently twist or cut a healthy leaf or a small stem section with at least one or two leaves. Make sure you get a clean cut at the base of the cutting.
- Let it callus: This is super important for succulents. Place the cutting in a dry, airy spot away from direct sunlight for 2-3 days. You’ll see the cut end dry out and form a protective scab, or “callus.” This prevents rot when you plant it.
- Plant the cutting: Once calloused, you can either dip the cut end in rooting hormone (if using) or just place it directly into your prepared, dry potting mix. You can insert the base of the cutting about half an inch into the soil.
- Wait for roots: Now, resist the urge to water immediately! Keep the soil barely moist – just enough to deter wilting, perhaps a light misting every week or so. Place the pot in bright, indirect light. Roots can take anywhere from a few weeks to a couple of months to form. You’ll know it’s rooted when you feel a gentle tug and it stays put, or if you see new growth.
Division
If your plant has grown into a nice clump, division is a wonderful way to get larger, established plants right from the start.
- Remove from pot: Gently take your Glottiphyllum oligocarpum out of its pot.
- Clean the roots: Gently brush away as much of the old soil as you can from the root ball. This helps you see where the natural divisions are.
- Separate the divisions: Carefully pull apart the plant into smaller sections. Each section should have roots and at least a few leaves. If needed, you can use your clean knife to help separate stubborn pieces.
- Let them callus (optional but recommended): If any roots were damaged during separation, let those parts callus for a day or two as with cuttings.
- Pot them up: Plant each division in its own pot with well-draining soil, just as you would a cutting. Water them in lightly and place them in bright, indirect light.
The “Secret Sauce” (Pro Tips)
Okay, here are a couple of little tricks that have served me well over the years:
- Don’t let leaves touch the water (if tempting for water propagation): While some succulents can root in water, I find Glottiphyllum oligocarpum is much happier and less prone to rot when propagating in soil. If you are trying water propagation (though I don’t recommend it for this one), make sure only the very tip of the cutting touches the water, and change the water frequently.
- Bottom heat is your friend: If you have the setup, placing your pots on a seedling heat mat on a low setting can significantly speed up root formation, especially if you’re propagating outside of the peak summer months. Just a gentle warmth from below makes a world of difference.
Aftercare & Troubleshooting
Once your new Glottiphyllum oligocarpum has established roots (as described above), you can start watering it slightly more regularly. Water thoroughly when the soil is dry to the touch, and then let it dry out completely before watering again. Ensure it still has bright, indirect light.
The most common problem you’ll encounter is rot. This usually happens if the soil stays too wet or if you skipped the callusing step. If you see a cutting turn mushy or black, it’s likely rotted. Remove it immediately and check your propagation environment. Overwatering new, unrooted cuttings is the quickest way to disaster. If you see wilting that doesn’t resolve after a light watering, it’s more likely that it simply hasn’t rooted yet and the cutting is too dry, but check for any signs of mushiness first.
A Encouraging Closing
Propagating plants is a journey of observation and patience. Don’t be discouraged if your first try isn’t perfect. Each plant is a little experiment, and watching those tiny roots emerge is one of the most satisfying parts of gardening. So grab your shears, get your hands dirty, and enjoy the process of growing your own little Glottiphyllum oligocarpum family! Happy propagating!
Resource:
https://identify.plantnet.org/k-world-flora/species/Glottiphyllum%20oligocarpum%20L.Bolus/data