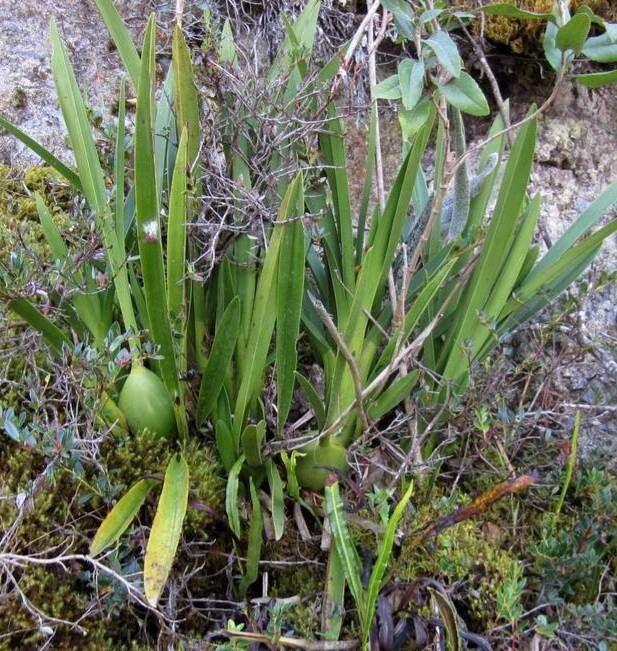
Hello fellow plant lovers! Today, we’re diving into the wonderful world of propagating Cyrtochilum revolutum. If you’ve ever admired the elegant, often dramatic blooms of this orchid, you know how special they are. But growing them from seed can be a long and complex journey. Fortunately, propagating them vegetatively offers a much more accessible way to welcome more of these beauties into your life and share them with friends. It’s a truly rewarding experience, though I’ll be straight with you – Cyrtochilum revolutum can be a bit of a diva when it comes to propagation compared to some of its easier orchid cousins. But don’t let that deter you! With a little patience and the right approach, you can absolutely succeed.
The Best Time to Start
For the highest success rate with Cyrtochilum revolutum, aim for late spring or early summer. This is when the plant is typically in an active growth phase after flowering and before the intense heat of midsummer sets in. You’re looking for new pseudobulbs or, ideally, new growths that are an inch or two tall. These young, vigorous shoots have the best chance of developing strong root systems quickly. I’ve also had some luck in early autumn, but the spring push is usually more reliable for me.
Supplies You’ll Need
Here’s what you’ll want to have on hand before you get started:
- Sharp, sterile pruning shears or a razor blade: Cleanliness is crucial to prevent disease. I always give mine a wipe with rubbing alcohol.
- Cinnamon or a commercial rooting hormone powder: Cinnamon acts as a natural fungicide, which is a lifesaver for orchids. Rooting hormone can give an extra boost, but it’s not always strictly necessary for Cyrtochilum.
- Chunky orchid mix: This should be well-aerated and fast-draining. A mix with bark, perlite, and charcoal is ideal.
- Small pots or trays: Choose ones that are appropriately sized for the divisions.
- Sphagnum moss (optional): Some growers like to use a bit of damp sphagnum around the base to retain humidity.
- Spray bottle: For gentle misting.
- Clear plastic bags or humidity domes: To create a mini-greenhouse environment.
Propagation Methods: Division is Key!
For Cyrtochilum revolutum, division is by far the most common and successful propagation method. These orchids tend to grow in clumps, and separating these clumps into smaller, self-sufficient units is how we get new plants.
- Inspect your plant: Gently remove your Cyrtochilum from its pot. Examine the root system and the way the pseudobulbs are clustered. You’re looking for natural divisions, where a healthy pseudobulb has its own set of roots.
- Clean the roots: Carefully tease away as much of the old potting mix as you can from the roots. This will help you see the connections between the pseudobulbs and where you can make a clean cut.
- Make the cut: Using your sterile shears or razor blade, carefully cut between the pseudobulbs. Aim to make a clean separation, ensuring that each division has at least 2-3 healthy pseudobulbs and a good portion of healthy roots. If a division doesn’t have many roots, don’t despair; it can often still grow them with the right care.
- Treat the cuts: Once you’ve made your divisions, sprinkle a bit of cinnamon powder or dip the cut ends in rooting hormone. This helps to seal the wound and prevent fungal infections.
- Potting up: Prepare your new pots with your chunky orchid mix. Place each division in its own pot, arranging the roots so they are spread out. The base of the pseudobulbs should be roughly level with the surface of the mix. Gently firm the mix around the roots.
The “Secret Sauce” (Pro Tips)
Here are a few tricks I’ve picked up over the years that can make a big difference:
- Don’t over-pot: It’s tempting to put a small division into a large pot, but this can lead to the mix staying too wet and causing rot. Use a pot that’s just big enough for the roots and a little bit of future growth.
- Embrace humidity, but avoid soggy feet: After potting, I like to place each new division in a clear plastic bag or under a humidity dome. This creates a cozy, humid environment that encourages new root growth. Make sure to “vent” the bag or dome daily for a few minutes to allow for air circulation and prevent mildew.
- Bottom heat can be a game-changer: Orchids love a bit of warmth from below, especially when they’re trying to establish roots. If you have a seedling heat mat, placing your pots on it (not directly, but with a layer of air or a tray in between) can really speed up root development. Just make sure it’s not too hot to the touch.
Aftercare & Troubleshooting
Once your divisions are potted and settled, it’s time for some gentle TLC.
- Initial watering: Wait a day or two after potting before the first watering. This gives any tiny nicks in the roots a chance to heal. When you do water, water thoroughly, letting excess drain away. Misting the surrounding air or the foliage lightly can help maintain humidity, but avoid letting water sit in the crown of the pseudobulbs.
- Light and temperature: Place your newly divided plants in a bright location with indirect light. Aim for temperatures similar to where you grow your mature Cyrtochilum.
- Patience is key: It can take several weeks to a few months for new roots to become noticeable. Don’t be tempted to dig them up and check constantly!
- Signs of failure: The most common problem is rot, which usually manifests as mushy, dark, or black pseudobulbs and roots. This is often a sign of the mix staying too wet or insufficient air circulation. If you see this, you may need to unpot the affected division, cut away all the rotted parts, and repot with fresh, dry mix after treating with cinnamon. Another sign of stress might be shriveled or yellowing leaves that don’t seem to be related to active growth. This could indicate the plant isn’t getting enough water, or its root system hasn’t established well enough to absorb moisture.
Happy Growing!
Propagating Cyrtochilum revolutum is a journey that rewards patience and observation. Don’t be discouraged if your first attempt isn’t perfect. Each plant and each division is a learning opportunity. Enjoy the process of nurturing these new orchids, and soon you’ll be admiring their beautiful blooms all over again, this time from plants you helped create! Happy gardening!
Resource: