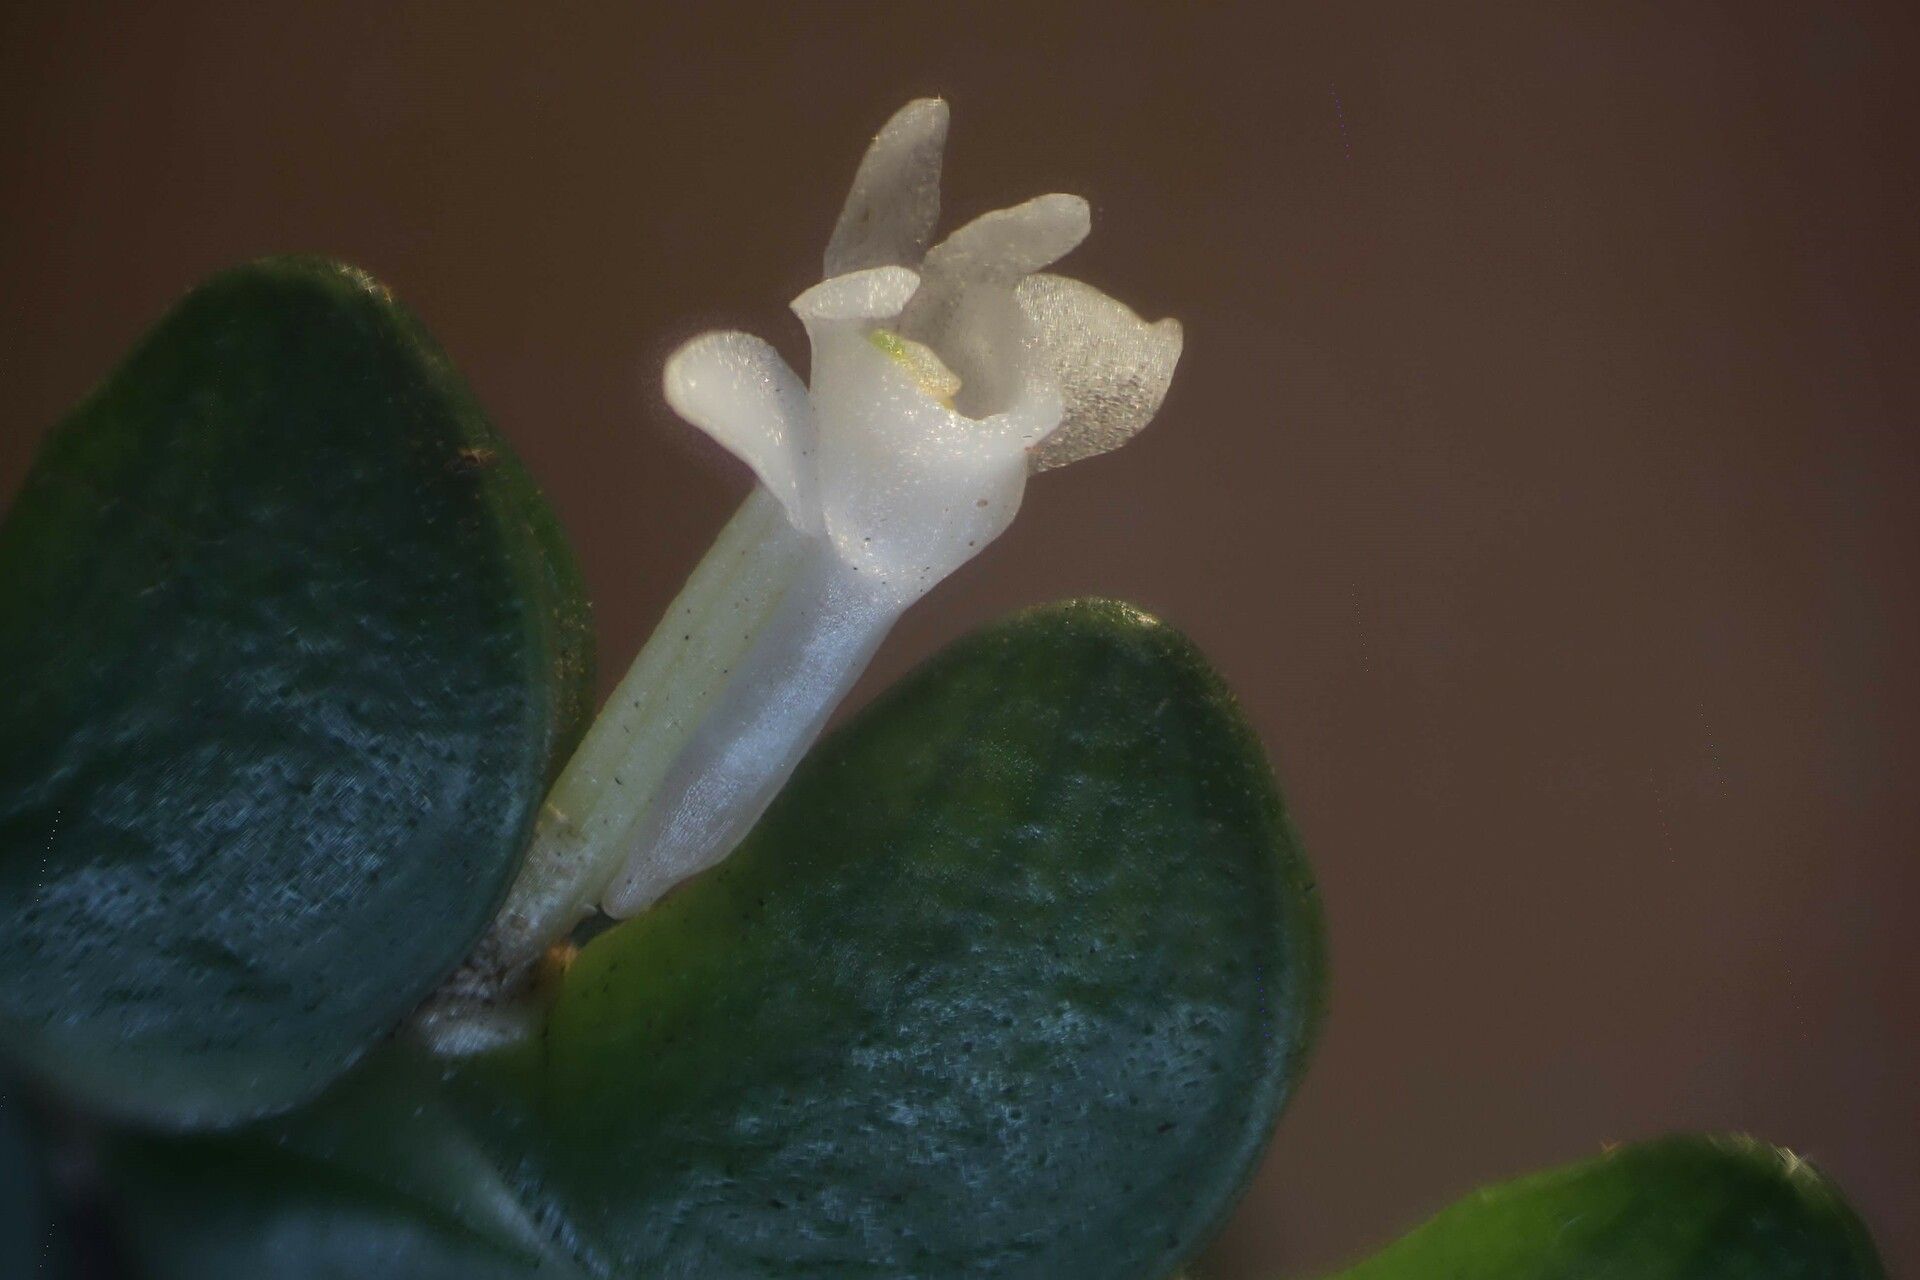
Hey there, fellow plant lovers! I’m so excited to chat with you today about a truly special orchid: the Angraecum bancoense. If you’ve ever seen one of these beauties, you’ll know why I’m captivated. Their elegant, starry white blooms, often with a sweet, perfume-like fragrance, are just breathtaking. And the idea of creating more of them from your own existing plant? Pure gardening magic!
Now, about its ease for beginners… I’ll be honest, Angraecum bancoense isn’t the very first orchid I’d recommend to someone completely new to the hobby. It has a few specific needs. But don’t let that deter you! With a little focused attention and the tips I’m about to share, you can absolutely succeed. The reward of seeing a tiny keiki (that’s orchid-speak for a baby plant!) unfurl its first leaves is truly unmatched.
The Best Time to Start
For Angraecum bancoense, the sweet spot for propagation is during its active growing season. This generally falls from late spring through early summer. You’ll notice the plant is putting out new leaves and looking robust. This is when it has the most energy to dedicate to new growth, making it much more likely for your propagation efforts to take root. If you see new pseudobulbs forming or vigorous leaf growth, that’s your cue!
Supplies You’ll Need
Here’s what you’ll want to have on hand before we dive in:
- Sharp, sterile pruning shears or a clean knife: Essential for making clean cuts to prevent disease. Sterilize with rubbing alcohol.
- Potting medium: A special orchid mix is crucial. For Angraecum bancoense, I like a blend that’s airy and drains well. Think a mix of medium-grade orchid bark, perlite, and a little sphagnum moss. Some growers even find success with a very coarse, free-draining mix.
- Small pots or containers: Clean, small pots with good drainage holes are perfect for your new babies.
- Rooting hormone (optional but recommended): A good quality rooting hormone powder or gel can give your cuttings that extra boost.
- Spray bottle: For misting your new propagations.
- Clear plastic bags or a propagation box: To create a humid environment.
- Zip ties or clips: To secure bags if needed.
Propagation Methods
Angraecum bancoense typically propagates through division or by encouraging basal keikis. Fortunately, these aren’t overly complicated.
1. Division (for mature plants with multiple growths):
If your Angraecum bancoense has started to form multiple pseudobulbs or growths growing from the base, you can carefully divide it.
- Step 1: Remove from pot. Gently take your orchid out of its current pot.
- Step 2: Inspect the roots. Gently tease away some of the old potting mix to expose the rhizome (the creeping stem that connects the growths). Look for natural divisions where you can easily separate the plant without damaging too many roots.
- Step 3: Make the cut (if necessary). If the growths are tightly connected, use your sterilized shears or knife to make a clean cut, ensuring each section has at least two healthy pseudobulbs and a good root system. If they pull apart easily, even better!
- Step 4: Pot up. Pot each divided section into its own new pot using your prepared orchid mix. Ensure the base of the plant is at the same level it was before.
- Step 5: Water sparingly. Water lightly after potting, and then hold off for a few days to allow any small wounds to heal.
2. Encouraging Basal Keikis:
Sometimes, Angraecum bancoense will naturally produce baby plants, called keikis, from its base or along the stem. You can encourage this or encourage them to root once they appear.
- Step 1: Identify a promising spot. Look for tiny buds or small growths developing at the base of the main plant. Sometimes, a slight nick to the bark near a promising node can encourage keiki formation, but I usually let nature take its course first.
- Step 2: Wait and watch. Be patient! Keikis need time to develop their own tiny leaves and roots.
- Step 3: Detach when ready. You’ll know it’s ready to detach when it has at least two to three small, healthy leaves and a few little roots that are about an inch long. This is crucial for successful rooting.
- Step 4: Make the cut. Using your sterilized shears, cut the keiki away from the mother plant, leaving a small portion of the stem attached to the keiki.
- Step 5: Pot it up. Pot the keiki in a small pot with your orchid mix, burying the tiny roots slightly.
- Step 6: Create humidity. This is where the magic happens! Place the potted keiki in a clear plastic bag or a mini propagation box. You want to create a little greenhouse effect. Keep the humidity high for the first few weeks.
The “Secret Sauce” (Pro Tips)
Here are a few things I’ve learned over the years that can make a real difference:
- The “Air Layering” Trick: If you have a keiki that’s growing well but its roots are taking their sweet time, try a bit of air layering. Wrap some moist sphagnum moss around the base of the keiki (where it’s trying to root) and then cover that with plastic wrap. This creates a super-humid microclimate right at the root zone, encouraging faster development. Just be sure to check it regularly for moisture.
- Don’t Overwater the Babies: This is probably the most common mistake. New propagations, especially divisions, can be very susceptible to rot. Err on the side of underwatering. Allow the potting mix to dry out slightly between waterings. You’re aiming for consistent moisture, not sogginess.
- Bottom Heat is a Game Changer: For orchids like Angraecum bancoense, a little bit of gentle bottom warmth can really accelerate root development and encourage keikis to grow. If you have a seedling heat mat, place your pots on it. Just make sure the mat isn’t too hot – think cozy, not cooking!
Aftercare & Troubleshooting
Once your keiki or division has a good set of roots, or your division has settled in, you can start treating it more like a mature plant, but still with a gentle hand.
- Watering: Water when the potting medium is almost dry. For newly potted plants, check the moisture more frequently.
- Light: Provide bright, indirect light. Avoid direct sun, which can scorch tender new leaves.
- Humidity: Continue to maintain good humidity, especially for young plants. Misting can be helpful, but avoid getting water trapped in the crowns of the leaves.
- Fertilizing: Wait a few weeks after potting before starting a very dilute fertilizer solution (like ¼ strength). Gradually increase as the plant grows.
Troubleshooting:
- Rot: This is the big one. If you see mushy, brown stems or leaves, or a black, pungent smell, you’ve likely got rot. Act fast! Trim away all rotted tissue with your sterile tool, apply Cinnamon powder (it’s a natural fungicide) to the cut surfaces, and repot in fresh, dry medium. You might need to reduce watering even further.
- No root growth: Patience is key here. Sometimes it just takes time. Ensure humidity is high and they are getting consistent light. Check for any signs of rot, as that can arrest root development.
- Yellowing leaves: This can indicate overwatering, underwatering, or insufficient light. Re-evaluate your watering schedule and light exposure.
A Encouraging Closing
Watching a new Angraecum bancoense start its life from a piece of your own beloved plant is an incredibly rewarding journey. It truly connects you more deeply with your plants. Don’t be discouraged if your first attempt isn’t perfect. Gardening is all about learning and adapting. Be observant, be patient, and most importantly, enjoy the process of nurturing these wonderful orchids. Happy propagating!
Resource:
https://identify.plantnet.org/k-world-flora/species/Angraecum%20bancoense%20Burg/data