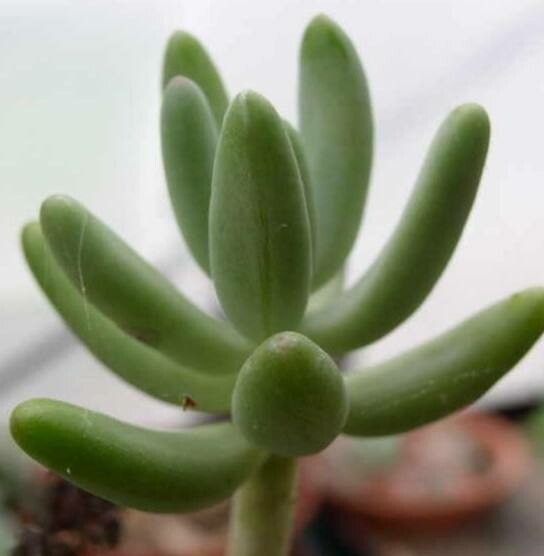
Oh, hello there! Pull up a chair and let’s chat about a little succulent that truly brightens my world: Sedum corynephyllum. You might know it more commonly as the Donkey’s Tail Sedum, and for good reason! Its trailing stems, laden with plump, teardrop-shaped leaves, are just darling spilling out of pots or creeping along garden edges. And the best part? This beauty is surprisingly generous, practically begging to be propagated. It’s a fantastic plant for beginners, truly a confidence booster for anyone dipping their toes into the world of succulents.
When’s the Magic Moment?
For the highest success rate, I like to start my Sedum corynephyllum propagation in the late spring or early summer. This is when the plant is in its active growing phase. The days are getting longer and warmer, giving your cuttings the best chance to establish roots before the cooler weather arrives. You can also take cuttings in the fall, but you’ll need to be a bit more mindful of indoor conditions.
What You’ll Need to Get Started
Here’s a little stash of goodies that will make propagating your Sedum a breeze:
- Sharp, clean pruning shears or a knife: Sanitation is key to preventing disease.
- A well-draining potting mix: I swear by a cactus and succulent blend, or you can easily make your own by mixing equal parts potting soil and perlite or coarse sand.
- Small pots or trays: For starting your cuttings. Terra cotta pots are my favorite because they breathe well.
- Optional: Rooting hormone: While Sedum is pretty good at rooting on its own, a little rooting hormone can give it a helpful nudge.
- Optional: Spray bottle: For gently misting.
- A sheltered spot: Out of direct, harsh sun, at least initially.
Let’s Get Propagating!
Sedum corynephyllum is a champion of propagation, and the easiest way to get more plants is through stem cuttings.
- Take Your Cuttings: Using your sharp shears, snip off sections of stem that are at least 3-4 inches long. Try to get pieces with plenty of leaves.
- Let Them Callus: This is a crucial step! Do not pot them up immediately. Lay your cuttings on a dry surface, like a paper towel or a clean tray, in a bright, indirect light spot for 2-3 days, or even up to a week. You want the cut end to dry and form a protective callus. This prevents rot when you plant them.
- Plant Your Cuttings: Once callused, you have a couple of options:
- In Soil: Gently insert the callused end of each cutting into your prepared potting mix. You can plant several cuttings in the same pot, spacing them an inch or so apart.
- In Water: My second favorite method! Place the callused ends of your cuttings into a jar or glass of clean water. Make sure only the stem is submerged, not the leaves. This lets you watch the magic of roots forming!
- Patience is a Virtue: Now, we wait!
The “Secret Sauce” – My Insider Tips
- Handle with Care: When taking cuttings, try to get them to break off cleanly. If you tear a leaf off accidentally, no worries – you can often plant those fallen leaves too! Just lay them on top of the soil and mist occasionally.
- Don’t Overwater (Especially in Water Propagation): If you’re using the water method, change the water every few days to keep it fresh. And remember, no leaves in the water! They’ll just rot.
- A Little Warmth Goes a Long Way: While not strictly necessary for Sedum, if you’re propagating in cooler months or a chilly spot, placing your pots on a seedling heat mat can really speed up root development.
Aftercare and What to Watch For
Once you see those little roots! Whether you planted in soil or water, it’s time to give them a bit more focused attention.
- For Water Cuttings: Once you have a good inch or two of roots, it’s time to gently transplant them into your well-draining potting mix. Water them lightly once after planting.
- For Soil Cuttings: Begin lightly watering when you see signs of new growth or when the soil feels completely dry about an inch down. Don’t drench them; succulents prefer to dry out between waterings.
- Light: Place your new plants in a spot that gets bright, indirect light. Gradually introduce them to more direct sun as they get stronger.
- Troubleshooting: The most common issue you’ll encounter is rot. This usually happens if cuttings are planted without callusing or if they’re kept too wet. If you see mushy, discolored stems, it’s best to discard that cutting and learn from it. Another sign of stress can be leaves that are shriveled or falling off excessively, which might indicate underwatering or too much sun too soon.
Keep Planting, Keep Growing!
See? It’s really quite straightforward. Propagation is one of the most rewarding parts of gardening. It’s like giving the gift of life to your favorite plants, and it’s immensely satisfying to watch those tiny cuttings transform into lush, trailing beauties. So gather your supplies, be a little patient, and enjoy the journey of growing your own Sedum corynephyllum family. Happy gardening!
Resource:
https://identify.plantnet.org/k-world-flora/species/Sedum%20corynephyllum%20Fröd./data