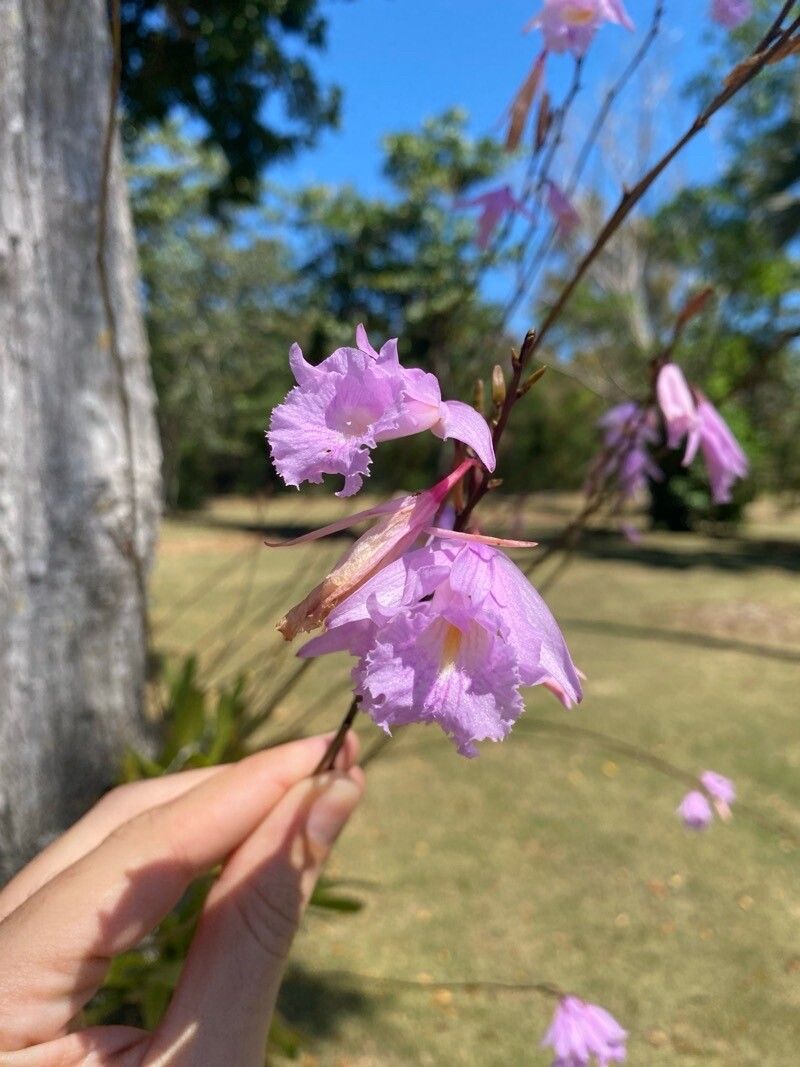
Hello, fellow plant lovers! I’m so excited to talk to you today about one of my absolute favorites: Broughtonia domingensis. This gorgeous orchid is a true gem, known for its vibrant, often fiery blooms that can bring a burst of color to any home or greenhouse. Watching it flower is such a treat, and propagating it means you get to share that joy, or simply expand your own collection of these beauties. If you’re new to orchid propagation, you might find Broughtonia domingensis a bit of a rewarding challenge, but don’t let that deter you! With a little patience and these tips, you’ll be well on your way.
The Best Time to Start
For Broughtonia domingensis, I’ve found the sweet spot to be in late spring or early summer. This is when the plant is actively growing after its rest period. You’ll often see new roots or pseudobulbs forming. This energy surge is exactly what we want when we’re asking our plant to put its efforts into creating new life.
Supplies You’ll Need
Here’s a handy list of what you’ll want to have on hand:
- Sharp, sterilized pruning shears or a clean knife.
- A rooting hormone product (optional, but can give a nice boost).
- A well-draining orchid potting mix. I like a blend of bark, perlite, and maybe a bit of charcoal.
- Small pots or containers that offer good drainage.
- A spray bottle for misting.
- A clean water source.
- Optional: A seedling heat mat for bottom heat.
Propagation Methods
Broughtonia domingensis is most commonly propagated through division. It’s a straightforward method once you get the hang of it.
- Inspect Your Plant: Gently remove your Broughtonia domingensis from its current pot. You’re looking for clumps of healthy pseudobulbs, usually with at least two or three pseudobulbs per division. Healthy roots should be plump and firm, not mushy or brittle.
- Prepare Your Tools: Make sure your shears or knife are sterilized. A quick wipe with rubbing alcohol works wonders. This prevents spreading any diseases between divisions.
- Make the Cut: Carefully examine where the pseudobulbs are connected. You want to cut between mature pseudobulbs, ensuring each new division has at least two or three healthy ones and some good roots. It’s okay if you break off a few delicate roots – just try to minimize it.
- Apply Rooting Hormone (Optional): If you have it, you can dip the cut end (where you separated the divisions) into a rooting hormone powder or gel. This can encourage faster root development.
- Pot Up Your Divisions: Plant each division into its own pot filled with your chosen orchid mix. Make sure the base of the pseudobulbs is at or slightly above the surface of the mix. Don’t pack the mix too tightly; you want good air circulation.
- Watering: Water the newly potted divisions gently. You don’t want to drown them, but you want the medium to be moist.
The “Secret Sauce”
Here are a couple of things I’ve learned over the years that make a big difference:
- Don’t Waterlog: After division, these beauties can be a little sensitive. Avoid overwatering for the first few weeks. Let the potting mix almost dry out between waterings. Too much moisture can lead to rot, and that’s the quickest way to lose a new division.
- Give Them a Warm Hug: Broughtonia domingensis loves warmth. If you have the space, placing your newly divided plants on a seedling heat mat set to a low temperature (around 70-75°F or 21-24°C) can significantly speed up root formation. It’s like giving them a cozy little spa treatment.
Aftercare & Troubleshooting
Once your divisions are potted, place them in a spot with bright, indirect light. Keep them consistently moist but not soggy. You can mist the leaves lightly every few days, especially if the humidity is low, but avoid letting water sit in the crown of the pseudobulbs.
The most common problem you might encounter is rot. If you see pseudobulbs turning black and mushy, it’s a sign of too much moisture. If you catch it early, you might be able to save the division by removing the rotted parts and repotting in fresh, drier medium. Patience is key – it can take several weeks to months for new roots or pseudobulbs to appear. Don’t give up if you don’t see immediate results!
Happy Propagating!
See? It’s not as daunting as it might seem. Propagating Broughtonia domingensis is a wonderfully rewarding experience. It takes a little care and attention, but the payoff of seeing new plants thrive is well worth it. Be patient with your new babies, enjoy the process, and soon you’ll have even more of these stunning orchids to admire. Happy growing!
Resource: