Oh, hello there! Come on in, pull up a chair. I’ve got a fresh pot of coffee brewing, and I’m so excited to chat with you about a truly delightful plant: Ammannia senegalensis. This little beauty brings such vibrant color and lushness to wherever it’s planted. And the best part? It’s surprisingly easy to multiply!
Why You’ll Love Propagating Ammannia senegalensis
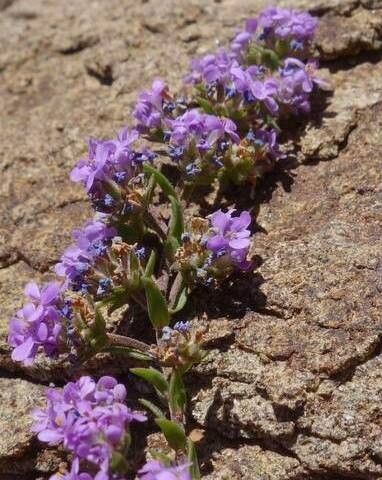
Ammannia senegalensis, also known as Swamp Loosestrife, is a fantastic plant for adding a splash of green and sometimes even reddish hues to moist garden pockets or edges of water features. Its delicate, lance-shaped leaves are quite charming. Honestly, if you’ve ever admired its fullness and thought, “I wish I had more of that!” – well, you’re in luck. Propagating it is incredibly rewarding. It’s a great plant for beginners to try their hand at, so don’t hesitate if you’re new to this kind of plant magic.
The Best Time to Start
For the highest success rate, I always find that spring and early summer are your golden months. The plant is actively growing then, which means it’s full of energy and ready to put out new roots. You can also take cuttings in late summer, but you’ll want to give them plenty of time to establish before the cooler weather sets in. If you’re an indoor gardener, any time of year can work, but you’ll likely have better luck if you can provide a little extra warmth.
Supplies You’ll Need
To get started, you won’t need much. Here’s what I usually have on hand:
- Sharp Pruning Shears or a Clean Knife: For making clean cuts.
- Small Pots or Seed Trays: For housing your new cuttings.
- Well-Draining Potting Mix: A blend of peat moss, perlite, and a bit of compost works wonderfully. For Ammannia, I often use a mix that retains some moisture but doesn’t get waterlogged.
- Rooting Hormone (Optional): While Ammannia roots readily, a little hormone can speed things up.
- Patience: This is the most important tool!
Propagation Methods: Step-by-Step
There are a couple of ways to go about this, but my favorite for Ammannia senegalensis is stem cuttings. It’s straightforward and usually very successful.
Stem Cuttings:
- Select a healthy stem: Look for a vibrant, non-flowering stem that’s at least 4-6 inches long.
- Make the cut: Using your sharp shears or knife, make a clean cut just below a leaf node (where a leaf attaches to the stem). This is where the magic happens for root formation.
- Prepare the cutting: Gently remove the lower leaves from the bottom 2-3 inches of the stem. This prevents them from rotting once planted. You can leave a few leaves at the top for photosynthesis.
- Dip in rooting hormone (optional): If you’re using rooting hormone, dip the cut end into it, tapping off any excess.
- Plant your cutting: I like to fill small pots with my well-draining mix. Make a small pilot hole with your finger or a pencil, then gently insert the cutting. Firm the soil around the base to ensure good contact.
- Water gently: Water the pot thoroughly but gently so as not to disturb the cutting.
Water Propagation (Another Easy Option):
If you’re feeling adventurous or just want to watch the roots grow (which I admit is pretty fun!), you can try water propagation.
- Follow steps 1-3 above for preparing your stem cutting.
- Place the cutting in a jar of water: Make sure no leaves are submerged below the waterline. The leaf nodes are what you want in the water, as this is where roots will emerge.
- Change the water regularly: Every few days, replenish the water to keep it fresh.
It’s truly amazing how quickly you’ll start to see tiny white roots appearing!
The “Secret Sauce” (Pro Tips)
Here are a couple of my little tricks that I’ve picked up over the years that really help:
- Don’t let those lower leaves touch the water! I can’t stress this enough for water propagation. Any leaf submerged is a potential source of rot, and that’s the quickest way to lose your cutting.
- A bit of warmth goes a long way. If you have the option, placing your pots on a heated propagator mat or just in a warm, bright spot in your house will significantly encourage root development. It mimics that lovely summer warmth the plant loves.
- Humidity is your friend. Cuttings have no root system to take up water, so they can dry out quickly. Covering your pots with a clear plastic bag or using a propagator lid creates a humid microclimate that helps them survive until roots form. Just make sure to ventilate it occasionally to prevent mold.
Aftercare & Troubleshooting
Once you see a good amount of root growth (typically after a few weeks for stem cuttings, and once roots are an inch or so long for water propagation), it’s time to get them into their own pots or a designated spot in the garden.
- For stem cuttings: Carefully transplant them into their own small pots filled with your potting mix. Water them well and continue to keep the soil consistently moist but not soggy.
- For water-propagated plants: Gently transplant them into pots just as you would with stem cuttings, taking care not to damage those delicate new roots.
Now, what if things aren’t going as planned? The most common issue you’ll encounter is rot. If your cutting turns mushy and black, it’s usually a sign of too much moisture or a lack of air circulation. If you see this, it’s best to discard the rotted cutting and try again, ensuring better drainage and a bit more air. Sometimes, cuttings just don’t take, and that’s part of gardening too! Don’t get discouraged.
Keep Growing!
Propagating Ammannia senegalensis is such a satisfying process. It’s a wonderful way to expand your collection, share with friends, or simply enjoy the miracle of new life. Be patient, observe your little cuttings, and celebrate every tiny root that appears. Happy growing!
Resource:
https://identify.plantnet.org/k-world-flora/species/Ammannia%20senegalensis%20Lam./data