Oh, hello there! It’s so lovely to have you join me on the porch. I’ve got the kettle just about to whistle, and I’ve been itching to share something I’m truly passionate about: propagating Serviceberry, or as I lovingly call them, Amelanchier alnifolia.
Your Own Beautiful Serviceberry, From Scratch!
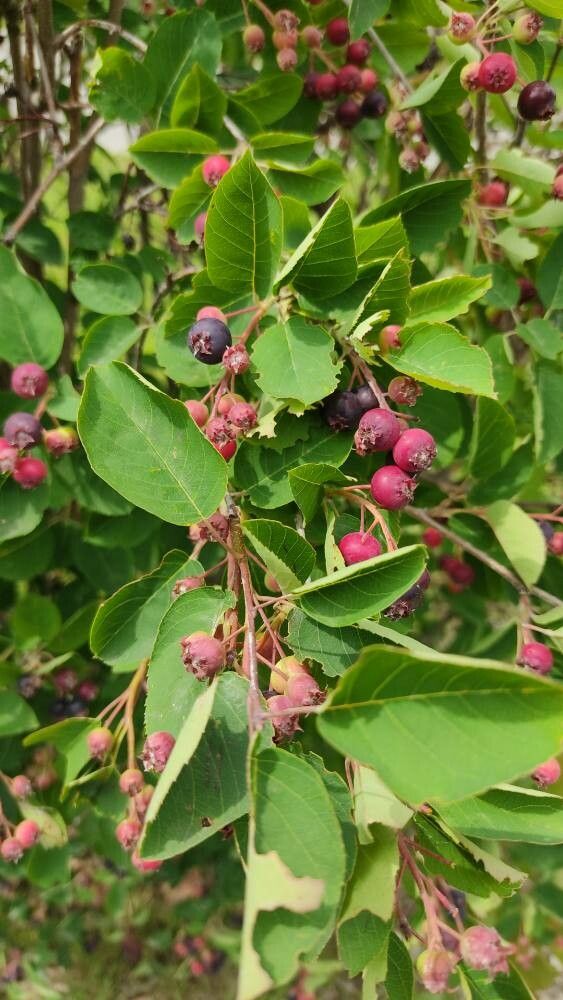
If you’re a fan of those gorgeous, early blooms that herald spring, or the sweet, edible berries that follow, then you know the charm of a Serviceberry. They’re just such adaptable, generous plants, offering so much beauty and bounty with, dare I say it, not too much fuss. And the reward of growing them yourself, from a tiny cutting or a division? It’s pure garden magic. For beginners, Serviceberry is wonderfully forgiving. You’ll likely have success with a few of these methods, which is always a confidence booster when you’re starting out.
When to Get Your Hands Dirty
Generally, the best time to think about propagating your Serviceberry is when the plant is actively growing, but not stressed. I’ve found the sweet spot to be late spring to early summer for taking stem cuttings. This is when the new growth is still a bit soft and pliable, but has started to firm up a little. If you’re thinking about dividing, fall is your friend. That’s once the heat of summer has passed and the plant is preparing for dormancy.
Your Propagation Toolkit
Before we dive in, let’s gather our supplies. It’s always best to be prepared!
- Sharp Pruning Shears or a Knife: Cleanliness is key to preventing disease.
- Rooting Hormone: This is a little booster that can really help your cuttings find their feet. I prefer a powder form, but a gel works too.
- Potting Mix: A good blend for cuttings is crucial. I like a mix of 1 part peat moss or coco coir, and 1 part perlite or coarse sand. This ensures good drainage and aeration.
- Small Pots or Trays: For starting your cuttings. Make sure they have drainage holes!
- Watering Can or Spray Bottle: For gentle watering.
- Plastic Bags or a Propagation Dome: To create a humid environment.
- Labels and a Marker: So you don’t forget what you’ve planted!
- Gloves: Protect your hands. (Optional)
- Warm Mat: (For stem cuttings, an optional but helpful addition)
Getting Started: Your Propagation Methods
There are a couple of tried-and-true ways to get new Serviceberry plants going. We’ll focus on the most reliable ones.
Method 1: Stem Cuttings (The Classic)
This is my go-to for a reason! We’re essentially taking a piece of healthy stem and encouraging it to grow roots.
- Select Your Stems: Look for healthy, current-year’s growth that is semi-hardwood. This means it’s not floppy and green, but also not old and woody. You want stems that snap cleanly when bent a little.
- Take the Cuttings: Using your sharp shears, take cuttings that are about 4 to 6 inches long. Make your cut just below a leaf node (where a leaf attaches to the stem).
- Prepare the Cuttings: Gently strip off the lower leaves, leaving only one or two at the very top. This is important! If you leave too many leaves, they’ll draw moisture from the cutting before it can establish roots. You can also dip your bottom end into the rooting hormone, tapping off any excess.
- Plant the Cuttings: Fill your small pots with your prepared potting mix. Make a hole with your finger or a pencil, then insert the cutting. Gently firm the soil around it.
- Create Humidity: Water the soil gently. Then, I like to cover the pots with a clear plastic bag to create a mini-greenhouse. If you have a heat mat, place the pots on it now – it makes a world of difference!
Method 2: Division (When You Have an Established Plant)
If you have a mature Serviceberry that has started to form clumps or suckers at its base, division is a fantastic way to get new plants and also rejuvenate your existing one.
- Dig Carefully: In the fall, after the leaves have dropped, dig around the base of your plant. You want to carefully lift the entire root ball out of the ground.
- Examine the Roots: Once it’s out, you’ll be able to see where the plant has naturally formed multiple sections. Look for areas where you can clearly see separate root systems and stems.
- Divide the Plant: Using a sharp spade or a sturdy, clean knife, carefully separate the clumps. You want to ensure each division has a good portion of roots and at least one healthy stem.
- Replant: Immediately replant your divisions in their new homes, whether that’s back in your garden or into pots for later transplanting. Water them in well.
The “Secret Sauce”: Little Tricks for Big Success
Here are a few things I’ve learned over the years that really make a difference.
- Don’t Let Those Leaves Touch the Water: If you’re experimenting with water propagation (it’s less reliable for Serviceberry than cuttings, but some people do it), make sure none of the leaves are submerged. Leaves in water will rot and can kill your cutting before it even thinks about making roots.
- Bottom Heat is Your Best Friend: For stem cuttings, that little bit of warmth from below, from a heat mat, really encourages root development. It mimics the warmth of the soil in spring.
- When in Doubt, Take More: Cuttings can be a bit of a numbers game. Not every single one will take, and that’s perfectly normal. So, if you’ve got a healthy parent plant, don’t be shy about taking a few extra cuttings!
Aftercare and What to Watch For
Once your cuttings have been planted, you’ll want to keep them in a bright, indirect light location. Keep the soil consistently moist, but not soggy. If you’re using the plastic bag method, open the bag for about an hour each day to allow for some air circulation.
You’ll know your cuttings are taking root when you see new leaf growth and when you gently tug on a cutting and feel slight resistance. This usually takes anywhere from 4 to 8 weeks, sometimes longer.
If you see mushy, black stems or wilting that doesn’t perk up even when watered, you might be dealing with rot. This is often from too much moisture and not enough air circulation, or if your soil mix isn’t draining well. Sometimes, unfortunately, a cutting just doesn’t make it. Don’t get discouraged!
Go Forth and Grow!
Propagating Serviceberry is such a rewarding journey. It takes a little patience, a bit of observation, and a whole lot of hope that you’ve given your little plant the best start. Don’t be afraid to get your hands dirty. Enjoy the process, celebrate every tiny sign of success, and soon you’ll have more of these wonderful plants to share! Happy gardening!
Resource: