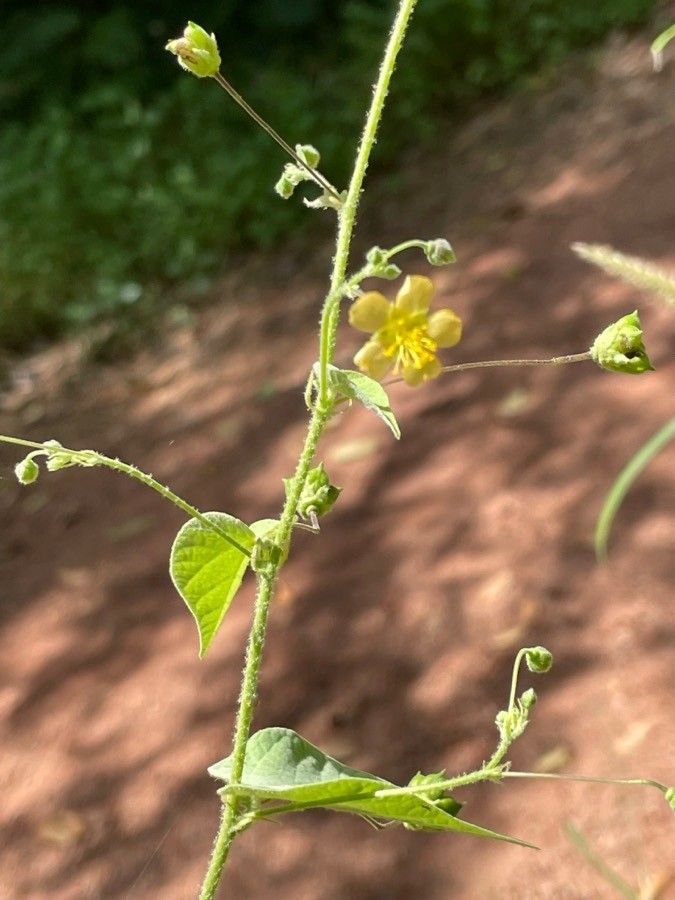
Hey there, fellow plant lovers! It’s so good to have you here. Today, we’re diving into something truly special: propagating Abutilon abutiloides, often called Flowering Maple or Indian Mallow. If you’ve ever admired its delicate, bell-shaped flowers and lovely, maple-like leaves, you’re not alone. These plants bring such a gentle beauty to any garden or porch. And the best part? Bringing more of these beauties into your life through propagation is incredibly rewarding.
Now, if you’re a beginner, I’ll be honest – Abutilon abutiloides can be a little bit fussy sometimes, but with a few key things in mind, you’ll be well on your way. It’s not an impossible task, far from it! Think of it like learning a new recipe; once you understand the steps, it becomes second nature. And trust me, that feeling when you see a tiny new plant thriving from your own efforts? Pure magic.
The Best Time to Start
For the highest success rate when propagating Abutilon abutiloides, my absolute favorite time is late spring to mid-summer. This is when the plant is actively growing, full of energy, and has plenty of healthy, new shoots to work with. You want to take cuttings from stems that are neither brand new, floppy growth nor old, woody stems. Aim for something in between – firm, but not tough. Think of a strong stem that’s just starting to mature.
Supplies You’ll Need
Here’s what I recommend gathering before you start:
- Sharp Pruning Shears or a Clean Knife: For making clean cuts. This is crucial to prevent damage and disease.
- Rooting Hormone (Optional, but highly recommended): A powder or gel can significantly boost your success rate.
- Small Pots or Seed Starting Trays: Clean ones, please! I like using 3-4 inch pots.
- Well-Draining Potting Mix: A good blend is key. I often use a mix of equal parts perlite, peat moss, and compost. A specific cuttings mix also works beautifully.
- Watering Can with a Fine Rose: For gently moistening the soil without disturbing the cuttings.
- Plastic Bags or a Clear Plastic Dome: To create a humid environment for the cuttings.
- Labels and a Marker: To keep track of what you’ve planted and when.
Propagation Methods
We’ll focus on the most reliable method for Abutilon abutiloides: stem cuttings. It’s quite straightforward once you get the hang of it.
Stem Cuttings:
- Select Your Stems: As mentioned, look for healthy, semi-hardwood stems. Gently bend a shoot; if it snaps cleanly rather than bending limply, it’s a good candidate.
- Make the Cut: Using your sharp pruners or knife, make a clean cut just below a leaf node (where a leaf attaches to the stem). We’re aiming for cuttings that are about 4-6 inches long.
- Prepare the Cutting: Remove the lower leaves from the cutting, leaving just a few at the very top. This prevents them from rotting in the soil. If the remaining top leaves are very large, you can carefully clip them in half. This reduces water loss.
- Apply Rooting Hormone (if using): Dip the cut end of the stem into the rooting hormone, tapping off any excess.
- Plant Your Cuttings: Fill your clean pots with your prepared potting mix. Make a hole with your finger or a pencil in the center of the soil. Insert the cutting into the hole, ensuring the leaf nodes you removed are below the soil surface. Gently firm the soil around the cutting.
- Water Gently: Water the soil thoroughly with your fine-rose watering can until it’s evenly moist.
- Create a Humid Environment: Place the pot inside a clear plastic bag, securing it around the rim with a rubber band, or cover it with a clear plastic dome. Make sure the leaves don’t touch the plastic if possible. This traps moisture and creates the humid microclimate the cuttings need.
The “Secret Sauce” (Pro Tips)
Now, let me share a couple of things I’ve learned over the years that really make a difference:
- Bottom Heat is Your Friend: Abutilon cuttings absolutely love a little warmth from below. Placing your pots on a heat mat designed for seedlings can drastically speed up root development. It mimics the warmer soil conditions they’d find in their natural growing season.
- Don’t Drown Them! While humidity is essential, standing water is the enemy. Make sure your succulent mix drains extremely well, and avoid overwatering. The soil should be consistently moist, not soggy. Checking the moisture level by gently poking a finger into the soil is always the best way.
Aftercare & Troubleshooting
Once your cuttings are potted, place them in a bright location with indirect light. Avoid direct sun, which can scorch the tender cuttings. Keep that plastic bag or dome on to maintain humidity.
You’ll know roots are forming when you see new leaf growth. This can take anywhere from 3 weeks to a couple of months, so patience is key! You can also give a very gentle tug on the cutting – if there’s resistance, roots have likely formed.
Common signs of failure? Wilting or yellowing leaves that don’t bounce back, and if the stem turns mushy and black at the soil line, that’s usually rot, often from too much moisture. If you see rot, it’s best to discard the affected cutting and check your watering habits for the others.
A Gentle Closing
So there you have it! Propagating Abutilon abutiloides is a wonderful way to expand your collection and share these beautiful plants with friends. Don’t get discouraged if your first few attempts aren’t perfect. Gardening is a journey, and every single experience teaches us something new. Be patient, observe your cuttings, and most importantly, enjoy the process. Happy propagating!
Resource: