Hello there, fellow plant lovers!
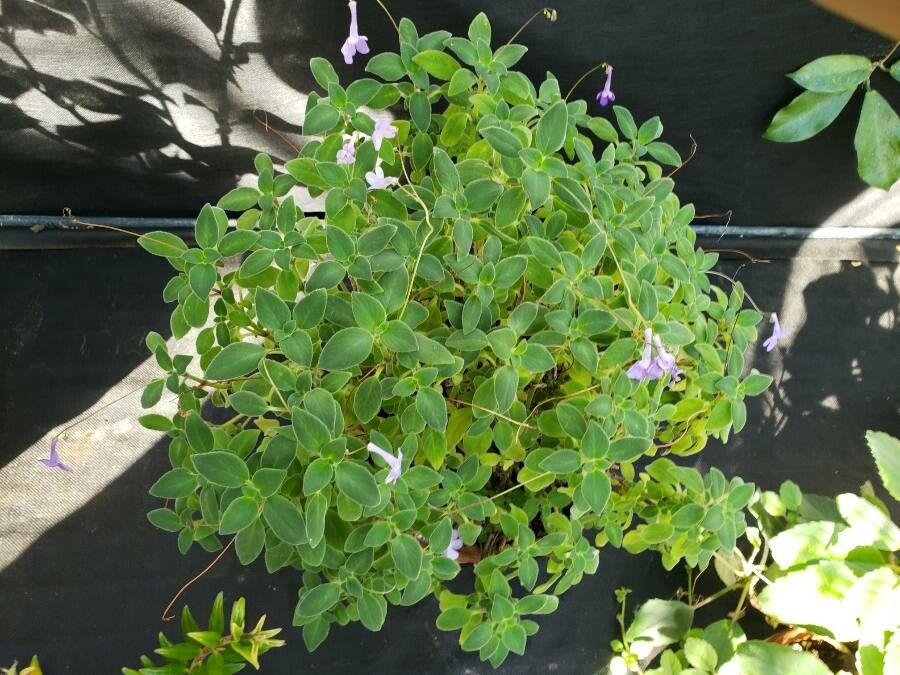
There’s something truly magical about multiplying your favorite plants, isn’t there? Watching a tiny piece of a beloved plant transform into a whole new life is such a rewarding experience. Today, we’re diving into the wonderful world of Streptocarpus caulescens, also affectionately known as the “Cape Primrose” or “Twisted Cape Primrose.” It’s a plant that brings such cheerful blooms and lush foliage to any shady spot, and the good news? Propagating it isn’t nearly as daunting as some might think! It’s a fantastic plant for beginners to try their hand at multiplying.
The Best Time to Start
My personal favorite time to get propagating is in the late spring or early summer. The days are getting longer, the plant is in active growth, and things just seem to be buzzing with life. That said, if you have a bright, warm spot indoors, you can often have success year-round. Just keep an eye on your plant’s energy levels.
Supplies You’ll Need
To give your Streptocarpus a helping hand, you’ll want a few essentials:
- Sharp, clean pruning shears or a craft knife: For taking clean cuts.
- Sterile potting mix: A mix with good drainage is key. I often use a blend of peat moss, perlite, and a bit of compost. A specialized African violet mix also works beautifully.
- Small pots or propagation trays: With drainage holes, of course!
- Rooting hormone (optional): A little boost can speed things up, especially for stem cuttings.
- A clear plastic bag or propagator: To maintain humidity.
- Water spray bottle: For gentle misting.
- Patience! Always the most important tool.
Propagation Methods
Streptocarpus caulescens offers a couple of delightful ways to multiply itself. Let’s explore them.
Stem Cuttings
This is my go-to method for this lovely plant.
- Select a healthy stem: Look for a mature, but not woody, stem that has a few leaves.
- Take the cutting: Using your clean shears or knife, make a clean cut just below a leaf node. You want a piece that’s about 3-4 inches long. Remove any lower leaves, making sure you have at least two leaf nodes exposed.
- Dip in rooting hormone (optional): If using, gently dip the cut end into the rooting hormone, tapping off any excess.
- Plant the cutting: Make a small hole in your prepared potting mix and insert the cut end, ensuring at least one leaf node is below the soil surface. Gently firm the soil around it.
- Water and cover: Water the soil gently until it’s moist but not soggy. Then, cover the pot with a clear plastic bag or place it in a propagator. This creates a mini-greenhouse effect.
- Place in bright, indirect light: Avoid direct sun, as it can scorch the delicate cutting.
Division
If you have a mature plant that’s looking a bit crowded, division is a great option.
- Gently remove from pot: Ease the plant out of its container.
- Loosen the root ball: Gently tease apart the soil and the root system. You might need to use your hands or a chopstick to help.
- Identify natural divisions: Look for clumps that have their own root systems and potential to grow as separate plants.
- Separate carefully: With clean hands or a sharp knife, gently separate the divisions. Each piece should have roots and at least one growing point.
- Pot up the divisions: Plant each division into its own pot with fresh, well-draining potting mix.
- Water and care: Water them in and treat them as you would a newly potted plant.
The “Secret Sauce” (Pro Tips)
Here are a couple of little tricks I’ve picked up over the years that really make a difference:
- Crisp air is your friend, not your enemy… mostly: While we create humidity for the cuttings, it’s crucial that the leaves don’t stay constantly wet. If you see water droplets sitting on the leaves for too long, gently pat them dry or slightly vent the propagator. Excess moisture can lead to rot.
- A touch of warmth from below: For stem cuttings, placing the pot on a gentle heat mat can significantly speed up root development. Just a little warmth helps those roots get going!
Aftercare & Troubleshooting
Once your cuttings have calloused over and you see signs of new growth – tiny leaves emerging from the nodes or the central growth – it means roots are forming! You can gently tug on the cutting; if there’s resistance, that’s a good sign.
- Gradual acclimation: Slowly wean your new plant off the humidity cover. Start by removing it for a few hours a day, gradually increasing the time until it’s no longer needed.
- Watering: Water when the top inch of soil feels dry. Make sure the pot drains well.
- Light: Continue to provide bright, indirect light.
- Common culprits: The most common issues are rot (usually from overwatering or poor drainage) and failure to root (often due to insufficient humidity, too little light, or taking cuttings from an unhealthy plant). If you see mushy stems or leaves, sadly, that cutting is likely lost, but don’t despair! Take another try.
A Little Note of Encouragement
Propagating plants is a journey, and like any good journey, it requires patience and a willingness to learn as you go. Not every cutting will make it, and that’s perfectly okay! The successes are all the sweeter for it. So, get your hands dirty, enjoy the process, and soon you’ll have even more gorgeous Streptocarpus to share or simply to admire. Happy propagating!
Resource:
https://identify.plantnet.org/k-world-flora/species/Streptocarpus%20caulescens%20Vatke/data