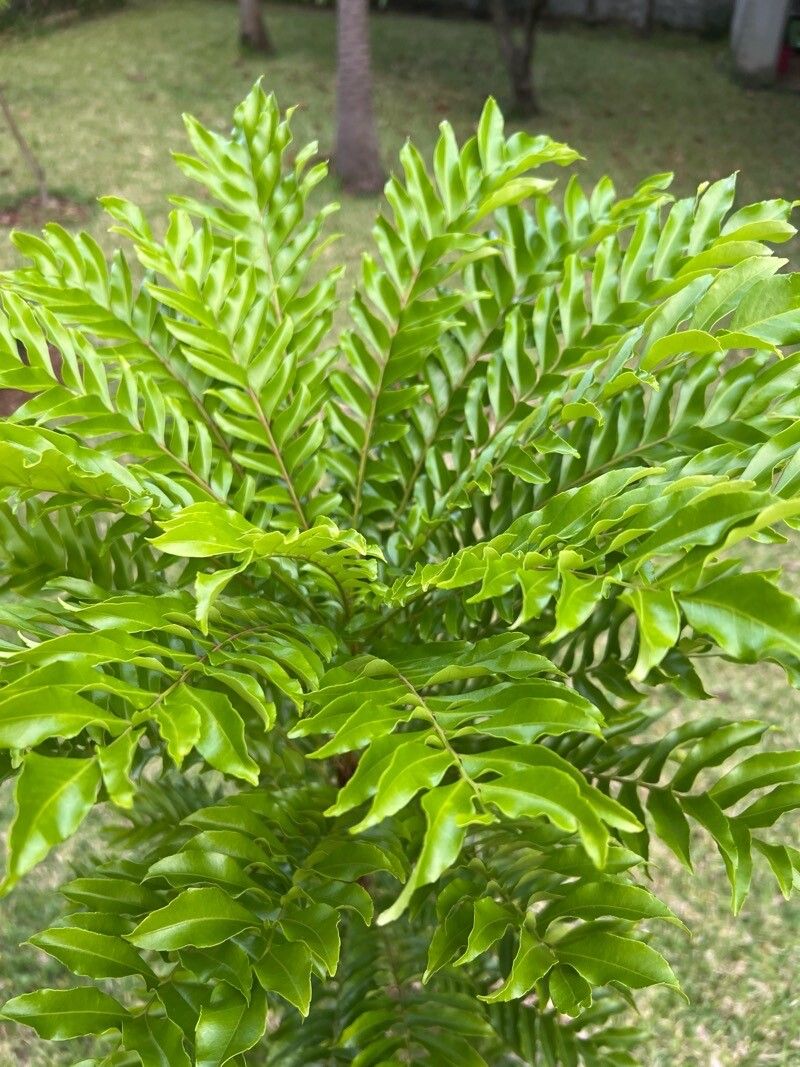
Oh, hello there! I’m so glad you’re curious about propagating Pseudopteris ankaranensis. Isn’t this plant just a stunner? Its delicate, fern-like foliage brings such a lush, airy feel to any space. And the joy of watching a tiny cutting transform into a thriving plant? Pure magic. If you’re wondering if it’s a good beginner project, I’d say it’s moderately easy. It’s not quite as forgiving as a pothos, but with a little attention, you’ll be rewarded with success.
When is the Sweet Spot for Starting?
For Pseudopteris ankaranensis, the absolute best time to get propagating is when the plant is actively growing. Think spring and early summer. This is when the plant is putting on new growth, and those younger stems have the energy and vigor to root much more readily. Avoid trying to propagate during the plant’s dormant period in winter; you’ll likely end up with disappointed cuttings.
What You’ll Need to Gather
Before we dive in, let’s get our toolkit ready. Having everything on hand makes the whole process so much smoother:
- Sharp Pruning Shears or a Clean Knife: For making clean cuts.
- Potting Mix: A well-draining mix is crucial. I often use a blend of perlite and peat moss, or a good quality houseplant potting mix amended with extra perlite.
- Small Pots or Containers: Seedling trays or small plastic pots work wonderfully. Make sure they have drainage holes!
- Rooting Hormone (Optional but Recommended): A good quality rooting hormone powder or gel can significantly boost your success rate.
- Clear Plastic Bag or a Propagator: To create a humid environment.
- Water: Preferably room-temperature or slightly warm.
- Labels (Optional): To keep track of your cuttings if you’re doing multiple.
Bringing New Life: Propagation Methods
Let’s talk about how we get those beautiful new plants started. For Pseudopteris ankaranensis, stem cuttings are my go-to method.
Stem Cuttings:
- Select Your Cuttings: Look for healthy, actively growing stems. You want pieces that are at least 4-6 inches long and have at least 2-3 sets of leaves. Avoid woody or very old stems.
- Make the Cut: Using your clean shears or knife, make a clean, angled cut just below a leaf node (where a leaf attaches to the stem). This is where roots will most likely emerge.
- Prepare the Cutting: Gently remove the lower leaves from the bottom half of the cutting. This prevents them from rotting when placed in the soil or water. You can leave the top two sets of leaves.
- Apply Rooting Hormone (If Using): Dip the cut end of the stem into your rooting hormone powder or gel, tapping off any excess.
- Planting the Cuttings:
- In Potting Mix: Fill your small pots with your prepared well-draining potting mix. Make a small hole with your finger or a pencil, and gently insert the cut end of the stem. Firm the soil around it. Water lightly so the soil is moist but not soggy.
- In Water (Though I Prefer Soil for This One): If you do choose water, place the prepared cutting in a clean glass of water, ensuring no leaves are submerged. Change the water every few days to keep it fresh.
- Create Humidity: Place the potted cuttings (or the glass of water) in a warm spot out of direct sunlight. Cover them loosely with a clear plastic bag or pop them into a propagator. This creates a mini-greenhouse effect, keeping the humidity high, which is vital for encouraging rooting.
My Top “Secret Sauce” Tips
Over the years, I’ve learned a few little tricks that make all the difference. These aren’t always in the basic guides, but they’re worth their weight in gold:
- Bottom Heat is Your Friend: If you can, sit your pots on a propagation mat or a slightly warm surface. This gentle bottom heat encourages root development far better than just ambient room temperature. It mimics the warmth of spring soil.
- Watch for the “Wiggle Test”: It’s tempting to tug on your cuttings to see if they’ve rooted, but please resist! Instead, gently wiggle the cutting. If there’s slight resistance, or you feel it’s anchored, you’ve got roots! Usually, this takes anywhere from 3-6 weeks.
- Don’t Overwater! This is the big one for preventing rot. The soil should feel moist, not waterlogged. It’s better to let it dry out slightly between waterings than to drown your precious new plants.
Aftercare and What to Watch For
Once you see roots appearing – either by gently pulling up a cutting to inspect (only do this once, with caution!), or if roots are poking out of drainage holes – it’s time for them to transition.
- Gradual Acclimation: If your cuttings have been under a plastic bag, gradually remove the bag over a week to let them adjust to normal humidity levels.
- Repotting: Once they have a good root system, you can pot them up into slightly larger pots with fresh, well-draining potting mix.
- Troubleshooting: The most common issue you’ll encounter is rot. If your cutting turns black and mushy, it’s a sign of too much moisture and not enough air circulation. If leaves start to yellow and drop, it could be a sign of not enough light, or that the cutting wasn’t healthy to begin with. Don’t despair if one or two don’t make it; that’s part of the learning curve!
There you have it! Propagating Pseudopteris ankaranensis is a wonderfully rewarding experience. Be patient, observe your cuttings, and enjoy the process of nurturing new life. Happy propagating!
Resource:
https://identify.plantnet.org/k-world-flora/species/Pseudopteris%20ankaranensis%20Capuron/data