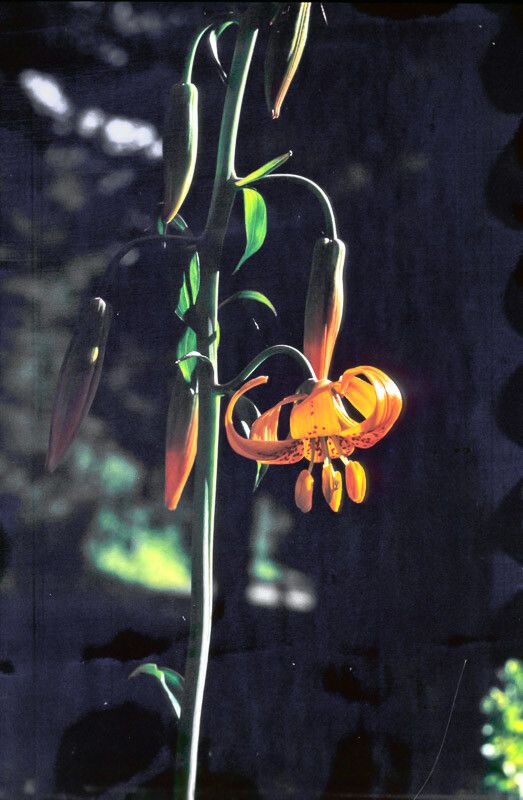
Oh, hello there, fellow garden enthusiast! Pull up a chair, let’s chat about one of my favorite finds: the lovely Lilium columbianum, or as some affectionately call it, the Columbia Lily. These elegant beauties, with their nodding, orange-red trumpets speckled with dark spots, bring such a wild, natural charm to any garden bed. If you’ve ever admired their graceful presence and thought about adding more to your landscape, you’re in for a treat. Propagating them is a rewarding journey, and while I wouldn’t call Lilium columbianum a beginner’s absolute easiest plant to multiply, it’s certainly very doable with a little care and patience.
The Best Time to Start
Timing is everything in the garden, and with our Columbia Lilies, the sweet spot is after they’ve finished blooming and the foliage has started to yellow and die back. This is usually late summer to early fall. The plant is no longer putting its energy into flowers and is busy storing reserves in its bulb. This means the bulb is strong and ready for the disruption of propagation, giving it the best chance to establish itself before winter truly sets in.
Supplies You’ll Need
Gathering your tools before you start makes the whole process much smoother. Here’s what I usually have on hand:
- Sharp pruning shears or a clean knife. Sterilize them with rubbing alcohol between cuts!
- A well-draining potting mix. I often use a blend of peat moss, perlite, and compost – something that holds moisture but doesn’t stay waterlogged.
- Small pots or trays for your new propagations.
- Rooting hormone (optional, but can give a little boost).
- A watering can with a fine rose.
- A gentle, consistent watering method.
- For bulb division, a trowel or small shovel.
Propagation Methods
Lilium columbianum is best propagated through bulb division. It’s the most reliable and least stressful method for this particular lily.
Bulb Division
This is where we gently separate young bulbs, called “offsets” or “daughter bulbs,” from the parent bulb.
- Excavate with Care: Once the foliage has died back, it’s time to dig. With your trowel, start a good distance away from the center of the plant to avoid damaging the bulb. Gently loosen the soil around the clump.
- Extract the Clump: Carefully lift the entire clump of bulbs from the ground. You’ll see the main bulb, and often, smaller bulbs attached to its sides or base.
- Clean and Assess: Gently brush away as much of the soil as you can from the bulbs. This is when you’ll clearly see the offsets. They usually look like smaller versions of the main bulb, attached by a tiny bit of stem or directly to the mother bulb.
- Separate the Offsets: This is the crucial part. You want to gently twist or pull the offsets away from the parent bulb. If an offset has its own small root system already attached, that’s a bonus! If it doesn’t, don’t worry too much; it will grow them. If a bit of stem is attached, that’s ideal.
- Replant or Pot: You can replant these divisions directly into their new garden homes or pot them up individually. They should be planted at the same depth they were previously growing, typically 4-6 inches deep. If potting, use your well-draining mix and place each division in its own pot.
The “Secret Sauce” (Pro Tips)
Now, here are a few little tricks I’ve picked up over the years that can really make a difference:
- Don’t Rush the Separation: When you’re pulling those offsets away, be patient. If something feels like it’s really stuck, a gentle wiggle and twist is better than a hard yank. You want to minimize damage to both the parent bulb and the offset. If you snap an offset off cleanly, that’s perfectly fine!
- Let Them Callus: If an offset has a large wound where it was separated from the mother bulb, I sometimes let it sit in a dry, shady spot for a day or two. This allows the cut surface to “callus over”, which helps prevent rot once planted. It’s like giving it a little protective scab!
- Think About Mulch: Once you’ve replanted your divisions, a light layer of mulch is your friend, especially if you’re planting them out in the garden rather than in pots. Mulch helps retain moisture, but more importantly, it insulates the soil, protecting developing roots from drastic temperature fluctuations.
Aftercare & Troubleshooting
Once your new Columbia Lilies are tucked into their pots or new spots in the garden, give them a good, gentle watering. Keep the soil consistently moist but not soggy. For potted divisions, you might find they stay a bit drier, so check them regularly.
The biggest thing to watch out for is rot. If you see your bulbs looking mushy or gray, it’s usually a sign of too much moisture and not enough drainage. If you catch it early, you might be able to dig them up, cut away the rotted bits, and replant in fresh, dry soil. Sadly, once bulbs go extensively mushy, they’re usually beyond saving.
Don’t expect too much from your new divisions in their first year. They’re focusing on establishing strong root systems. You might get a small bloom, or you might not see any flowers at all. And that’s perfectly okay! They’re building their strength for future glory.
Enjoy the Process!
Propagating plants is an act of hope and a celebration of nature’s resilience. Be patient with your Lilium columbianum divisions. Some might take a little longer to show signs of life than others. Enjoy the satisfaction of nurturing these beautiful lilies from their parent plant into their own flourishing individuals. Happy gardening!
Resource:
https://identify.plantnet.org/k-world-flora/species/Lilium%20columbianum%20Leichtlin/data