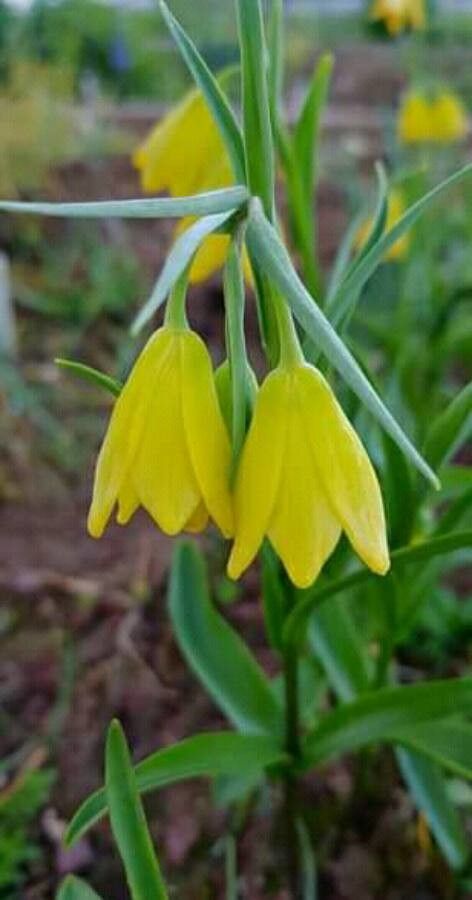
Hello fellow plant lovers! Today, we’re diving into the delightful world of Fritillaria conica. If you’ve ever seen these beauties gracing a garden, you’ll know their charm. They boast these gorgeous, bell-shaped flowers, often in shades of purple or yellow, and they really add a touch of unique elegance to any planting. Propagating them is a wonderful way to expand your collection or share these treasures with friends. Now, full disclosure, Fritillaria conica isn’t exactly a “stick it in a pot and forget it” kind of propagation. It requires a bit more attention to detail, but with a little patience, it’s absolutely achievable and incredibly rewarding.
The Best Time to Start
For Fritillaria conica, the sweet spot for propagation is right after they’ve finished flowering and their foliage has begun to naturally die back. This typically happens in late spring or early summer. This is when the plant is transitioning into its dormant phase, a crucial time for many bulbous plants. Trying to propagate them while actively growing can stress them, and we certainly don’t want that!
Supplies You’ll Need
- Well-draining potting mix: A mix specifically designed for bulbs or cacti/succulents works wonderfully. You can also create your own by combining equal parts peat moss, perlite, and coarse sand.
- Small pots or trays: Terracotta pots are excellent as they allow for good air circulation.
- Sharp, clean pruning shears or a knife: We need clean cuts to minimize disease.
- Rooting hormone (optional but recommended): This can give your cuttings a helpful boost.
- Dibber or pencil: For making planting holes.
- Watering can with a fine rose: For gentle watering.
- Labels and a permanent marker: To keep track of what’s what!
Propagation Methods
Fritillaria conica is typically propagated from offsets (or “bulblets”). These are essentially miniature bulbs that grow around the base of the main bulb.
- Gently Lift the Parent Bulb: When the foliage has yellowed and dried, it’s time. Carefully dig around the parent plant using your trowel. You want to lift the entire bulb clump. It’s best to do this on a dry day.
- Separate the Offsets: Once you have the main bulb, you’ll likely see smaller bulbs attached. These are your offsets! Gently twist or carefully cut these small bulblets away from the parent bulb. If they have tiny roots already, that’s a fantastic sign!
- Allow to Dry (Optional but helpful): Some gardeners like to let these offsets air dry for a day or two in a cool, dry, shaded spot. This helps any cut surfaces to callus over, reducing the risk of rot when you replant them.
- Planting Time: Fill your small pots or trays with your well-draining mix. Make a hole in the soil using your dibber or pencil, roughly twice the depth of your offset’s height.
- Plant the Offsets: Place each offset in its hole, pointy end up (this is where the new growth will emerge). Gently firm the soil around it.
- Initial Watering: Water lightly to settle the soil. Avoid drenching them.
The “Secret Sauce” (Pro Tips)
Here are a couple of tricks I’ve learned over the years that really make a difference.
- Don’t crowd your pots. Give those new offsets a little breathing room. If you plant too many in one pot, they can compete for resources and be more susceptible to fungal issues.
- Think of this as a “rest and recuperate” phase. That period where they’re drying out before planting? It’s like giving them a little spa treatment before they get back to work growing.
- When you’re separating the offsets, always use sterilized tools. A quick dip in rubbing alcohol kills off any nasty bacteria or fungi lurking on your shears.
Aftercare & Troubleshooting
Once planted, move your pots to a cool, dry, and frost-free location to overwinter. Think of a unheated garage, a cold frame, or a sheltered spot in the garden. Do not keep them in a warm house. They need that cool period to properly develop.
Water sparingly through the winter, only when the soil feels dry to the touch. You might not see much happening above ground, and that’s perfectly normal!
The first signs of success will be a tiny shoot emerging in early spring. Once you see this, you can move them to a brighter, but still cool, location, and start watering a bit more regularly.
The most common problem you’ll encounter is rot. This is usually caused by overwatering or poor drainage. If you notice a slimy, mushy offset, or a developing shoot turning yellow and limp, it’s likely rot. If caught early, you can try gently removing the affected part and replanting in fresh, dry soil, but often, it’s a sign it’s time to start again.
A Encouraging Closing
Propagating Fritillaria conica is a journey, not a race. Be patient with your new little bulbs. Celebrate that first tiny sprout, and know that you’re bringing another bit of floral magic into the world. Happy gardening!
Resource:
https://identify.plantnet.org/k-world-flora/species/Fritillaria%20conica%20Boiss./data