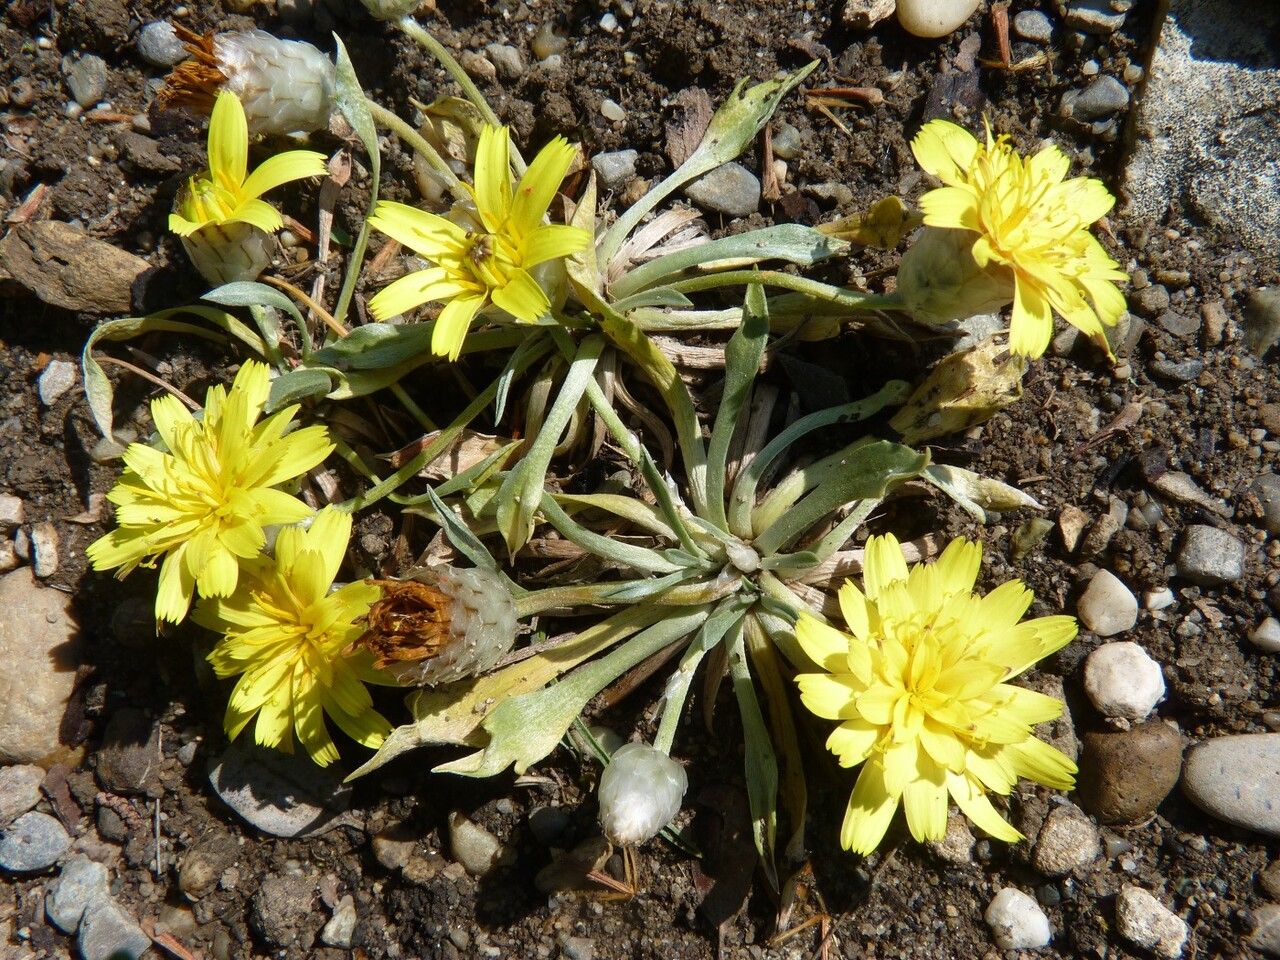
Hello fellow plant lovers! If you’re anything like me, you’re always looking for ways to fill your garden with more of the plants you adore. Today, we’re talking about one of my personal favorites: Catananche caespitosa. It’s that charming little pincushion flower, also known as tufted cupid’s dart, with its delicate, papery blooms that dance in the breeze. Seeing it spread and knowing I helped create those new beauties? Pure garden joy! Now, as for its propagation, Catananche caespitosa is generally quite forgiving, making it a wonderful project for both seasoned gardeners and those just dipping their toes into the world of propagation.
The Best Time to Start
For the highest success rate with Catananche caespitosa, I’ve found that late spring to early summer is your sweet spot. This is when the plant is actively growing, full of vigor, and ready to put that energy into developing new roots. Starting too early in the chill of spring can lead to disappointment, while waiting until the intense heat of mid-summer can stress the young cuttings or divisions.
Supplies You’ll Need
Here’s what I like to have on hand before I get my hands dirty:
- Sharp, clean pruning shears or a sharp knife: For making clean cuts.
- A good quality potting mix: Something that drains well is key. I often use a mix of equal parts potting soil and perlite or coarse sand.
- Rooting hormone (optional but recommended): This can give your cuttings a helpful boost, especially if you’re aiming for stem cuttings.
- Small pots or propagation trays: Clean ones are a must to prevent disease.
- A spray bottle: For misting.
- Labels and a marker: It’s easy to forget what you planted where!
- For division: A small trowel or garden fork.
Propagation Methods
Catananche caespitosa is most commonly propagated through division and, with a little care, stem cuttings.
Division (My Go-To Method!)
This is really the easiest and most reliable way to multiply your Catananche caespitosa.
- Dig Up the Parent Plant: In late spring or early summer, gently dig around the base of your mature plant with a trowel or garden fork. Try to lift the entire clump from the soil.
- Inspect and Separate: Gently shake off excess soil. You’ll see the plant has multiple crowns or sections. Using your hands or a clean trowel, carefully pull the root ball apart into smaller sections. Each section should have healthy roots and at least one or two growing points (buds). If a section seems weak or lacks roots, it’s best to discard it.
- Replant Immediately: Replant the divisions into their new homes in prepared garden beds or pots. Make sure they are planted at the same depth they were previously growing. Water them in well.
Stem Cuttings (A Bit More Patience Needed)
This method requires a little more attention, but it’s very rewarding.
- Take Cuttings: In late spring or early summer, select healthy, non-flowering stems from your Catananche caespitosa. Using your clean pruning shears, cut a stem about 3-4 inches long. Make the cut just below a leaf node (where a leaf attaches to the stem).
- Prepare the Cuttings: Remove the lower leaves from the cutting, leaving just a few leaves at the top. If the leaves are very large, you can even cut them in half to reduce water loss through transpiration.
- Apply Rooting Hormone (Optional): Dip the cut end of the stem into rooting hormone, tapping off any excess.
- Plant the Cuttings: Fill small pots or a propagation tray with your well-draining potting mix. Insert the cuttings about an inch deep into the soil, ensuring the leaf nodes are buried.
- Water and Cover: Mist the soil lightly and then cover the pots or tray with a clear plastic bag or a humidity dome. This creates a mini-greenhouse effect.
The “Secret Sauce” (Pro Tips)
Here are a couple of things I’ve learned over the years that really make a difference:
- Don’t overcrowd divisions: When dividing, give each new section enough space to grow. If you cram plants too close together, they’ll compete for resources and might not thrive as well.
- Bottom heat is your friend for cuttings: If you’re doing stem cuttings, placing your propagation tray on a heat mat designed for plants can significantly speed up root formation. It mimics the warmth of late spring soil and encourages those roots to develop faster.
Aftercare & Troubleshooting
Once your divisions are replanted or your cuttings have rooted (you’ll see new growth on the cuttings, or gently tugging on the cutting will reveal resistance after a few weeks), it’s time for aftercare.
- Watering: Keep the soil consistently moist but not soggy. Misting is great for cuttings, but once roots form, water them thoroughly when the top inch of soil feels dry. Avoid overhead watering for newly established plants, as this can encourage fungal issues.
- Light: Place your new plants in a bright spot with indirect sunlight. Avoid direct, scorching sun, especially for cuttings. As they grow stronger, you can gradually introduce them to more sun.
- Signs of Trouble: The most common enemy here is rot. If you see mushy stems or leaves, it’s usually a sign of overwatering or poor drainage. If you catch it early, you can try to increase airflow, reduce watering, or even repot in fresh, dry soil. Brown, crispy leaves can indicate the plant is too dry or getting too much direct sun.
A Warm Encouragement
Watching a new plant emerge from a small cutting or a divided piece is one of the most satisfying experiences in gardening. Don’t be discouraged if not every attempt is a runaway success. Gardening is a journey, and each step, even the ones with a few wilting leaves, teaches us something invaluable. Be patient, enjoy the process, and soon you’ll have a whole garden of these delightful cupid’s darts! Happy propagating!
Resource:
https://identify.plantnet.org/k-world-flora/species/Catananche%20caespitosa%20Desf./data