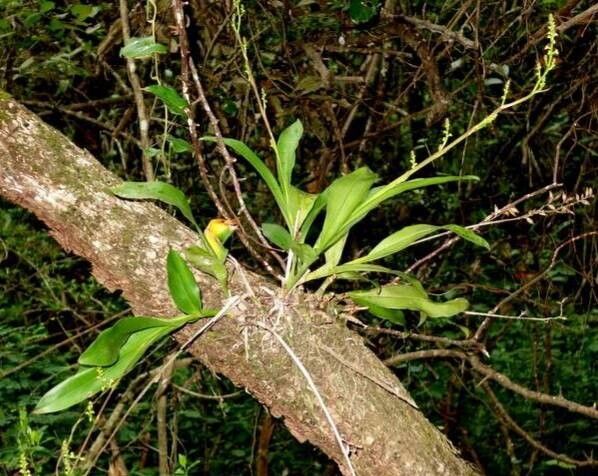
Hey there, fellow plant enthusiasts! I’m so excited to chat with you today about a little gem that’s been bringing smiles to my garden for years: Polystachya concreta. If you’re looking for an orchid that’s a bit different, with a charming, almost whimsical growth habit and beautiful blooms, then this is your gal.
For me, propagating Polystachya concreta is one of those purely joyful gardening activities. It’s like getting tiny gifts from your existing plants. This isn’t the most challenging orchid to propagate, but it does require a little attention to detail. Don’t let that deter you, though! With a bit of care, you’ll be rewarded with a whole new troop of these delightful orchids.
The Best Time to Start
The sweet spot for propagating Polystachya concreta is when the plant is actively growing. Think spring and early summer. You’ll notice new shoots and roots emerging during this time. Taking cuttings or dividing when the plant is in its growth spurt means it’s got plenty of energy to dedicate to healing and establishing itself. Avoid propagating when the plant is dormant or in full bloom; it’s just too much stress.
Supplies You’ll Need
Gathering your tools beforehand makes the whole process smoother. Here’s what I always have on hand:
- Sharp, sterile pruning shears or a clean knife: Essential for making clean cuts to prevent disease.
- Potting medium: For division, a well-draining orchid mix is key. You can buy a pre-made one or mix your own with bark, sphagnum moss, and perlite. For cuttings, a mix of perlite and sphagnum moss works wonderfully.
- Small pots or divisions containers: Clean pots are a must.
- Rooting hormone (optional but helpful): A good quality rooting powder can give your cuttings a helpful boost.
- Spray bottle: For misting.
- Labels and a permanent marker: To keep track of your new plant babies!
Propagation Methods
There are a couple of ways we can encourage new life from your Polystachya concreta. Let’s dive in!
Division
This is often the easiest and most successful method for Polystachya concreta. It’s perfect for when your plant has grown quite full and you notice it’s developing multiple pseudobulbs or “growth points.”
- Gently remove the plant from its pot. If it’s stuck, a little teasing around the edges with a trowel might help.
- Carefully shake off as much of the old potting mix as you can. We want to see the roots.
- Identify distinct sections. Look for areas where there are at least 2-3 pseudobulbs and a healthy root system.
- Using your sterile shears or knife, carefully slice between the sections. Make sure each division has good roots attached. If the roots are really tangled, you might need to gently untangle them with your fingers. Don’t be afraid to get a little rough, but always be mindful of the roots!
- Pot each division into its own clean pot with fresh, well-draining orchid mix.
- Water lightly and place in bright, indirect light.
Stem Cuttings (for experienced propagators)
This method is a bit more advanced and not always guaranteed, but it can be very rewarding when it works!
- Select a healthy, mature stem that has at least two or three pseudobulbs and shows no signs of disease or pests.
- Using your sterile shears, make a clean cut just below the lowest pseudobulb. You want to ensure you have a decent length of the stem, including those eyes where new growth can emerge.
- Remove any lower leaves that might rot once placed in the medium.
- Dip the cut end in rooting hormone (if using).
- Plant the cutting in a small pot filled with a moist medium. I like a mix of perlite and sphagnum moss for this. The pseudobulbs should be mostly covered, but the top leaves should be exposed.
- Moisten the medium thoroughly, but don’t saturate it.
The “Secret Sauce” (Pro Tips)
Here are a few things I’ve learned that really make a difference:
- Sterilize, sterilize, sterilize! I can’t stress this enough. Every tool, every pot should be clean. A quick wipe with rubbing alcohol between cuts is your best friend against nasty fungal infections.
- Don’t overwater newly divided plants or cuttings. This is probably the biggest mistake beginners make. They think more water equals faster growth, but it usually leads to rot. Let the potting mix dry out slightly between waterings. A good misting from your spray bottle is often enough for the first few weeks.
- Consider bottom heat. If you’re trying stem cuttings, placing the pot on a gentle seedling heat mat can significantly speed up root development. Just a little warmth encourages those roots to get moving!
Aftercare & Troubleshooting
Once your divisions or cuttings show signs of new growth – tiny leaves or roots peeking out – you’re on your way!
Continue to water as needed, allowing the potting mix to dry slightly between waterings. Maintain bright, indirect light. Avoid direct sun, which can scorch those young leaves. Gradually acclimate them to the same conditions as your mature plants.
The most common issue you might encounter is rot. This usually happens from overwatering or poor air circulation. If you see a pseudobulb turning mushy and black, or a cutting simply failing to root and looking limp and brown, it’s likely rot. Sadly, at that point, it’s usually best to discard the affected piece to prevent it from spreading. If you notice fungal spots on leaves, address it with a fungicide.
A Encouraging Closing
Seeing a new plant sprout from a piece of an old one is a truly magical feeling. Be patient with your Polystachya concreta babies. Some may take their time, and that’s perfectly okay. Enjoy the process, celebrate every little sign of growth, and soon you’ll have a whole new collection of these delightful orchids to admire! Happy propagating!
Resource: