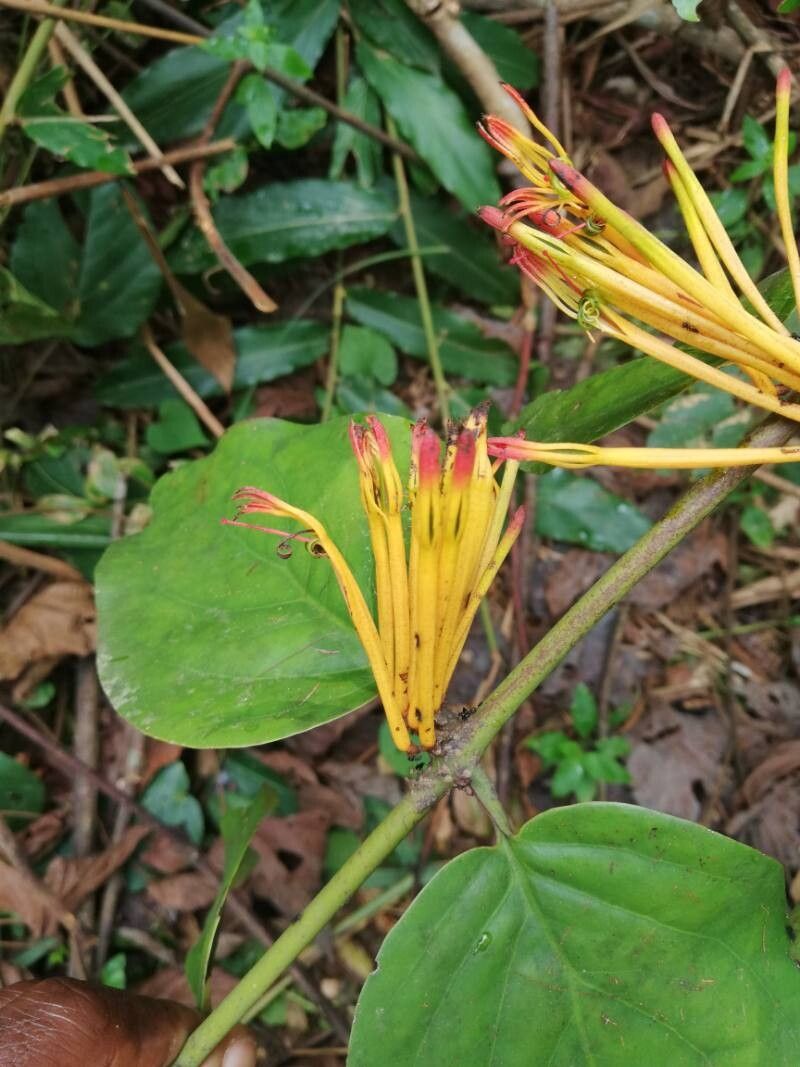
Oh, Phragmanthera capitata! If you’ve ever seen those gorgeous clusters of vibrant flowers gracing a garden, you’ll know exactly why this plant captures our hearts. It’s a true showstopper, isn’t it? Getting more of them to nurture and admire is such a wonderful feeling, a little bit of garden magic you can create yourself.
Now, I won’t lie – propagating Phragmanthera capitata can be a bit of a journey, especially for absolute beginners. It’s not the easiest plant to get going from scratch, but with a little focus and the right approach, you’ll be rewarded with success. Think of it as a gardening challenge that’s absolutely worth the effort!
The Perfect Moment to Get Started
Timing is everything in the garden, and for Phragmanthera capitata, spring is truly your best friend. This is when the plant is buzzing with new growth. Once the threat of frost has passed and the days are starting to lengthen, that’s your cue. You want to work with cuttings that are actively growing and have plenty of energy to put into forming new roots. Avoid trying to propagate during a dormant period; you’ll likely find yourself with less than stellar results.
Gathering Your Garden Tools
Before we dive in, let’s make sure you have everything ready. It makes the whole process so much smoother:
- Sharp Pruning Shears or a Hobby Knife: Clean, sharp tools are crucial for making clean cuts that heal well.
- Rooting Hormone Powder or Gel: This is a big help for encouraging root development. A good quality one makes a noticeable difference.
- A Well-Draining Potting Mix: I like a blend of equal parts perlite, peat moss, and compost. This gives good aeration and moisture retention.
- Small Pots or Seedling Trays: Whatever you have that’s clean and appropriate for cuttings.
- A Clear Plastic Bag or Humidity Dome: To create a humid microclimate for your cuttings.
- Watering Can with a Fine Rose: For gentle watering.
- Labels and a Pen: To keep track of what you’ve planted and when!
Bringing New Life: Propagation Methods
The most common and successful way to propagate Phragmanthera capitata is through stem cuttings. Here’s how I do it:
- Select Your Cuttings: Head out to your healthy parent plant on a lovely spring morning. Look for semirigid, healthy stems that are about 4-6 inches long. You want stems that have started to firm up but aren’t woody. Pinch off a few leaves from the bottom third of the stem; this is where your new roots will emerge.
- Prepare the Cuttings: Using your sharp shears, make a clean cut just below a leaf node. A leaf node is where a leaf joins the stem – it’s a hotspot for root formation. Remove any lower leaves, ensuring you have at least two nodes that will be below the soil line.
- Apply Rooting Hormone: Dip the cut end of each stem into your rooting hormone. Swirl gently to coat, then tap off any excess.
- Plant Your Cuttings: Fill your pots or trays with your prepared potting mix. Make a small hole in the center of each with your finger or a pencil. Carefully insert the base of your cutting into the hole, ensuring at least one or two leaf nodes are buried. Gently firm the soil around the stem.
- Water Gently: Water the soil thoroughly but gently until water runs out of the drainage holes.
The “Secret Sauce” – My Insider Tips
After years of coaxing plants to grow, I’ve picked up a few tricks that seem to make a big difference.
- Embrace Mist: Phragmanthera capitata loves a bit of humidity. Once your cuttings are planted, I like to lightly mist the leaves daily. This helps keep them turgid while they’re trying to establish roots.
- Bottom Heat is Your Friend: This might sound a bit fancy, but trust me, it’s a game-changer. Placing your pots on a gentle heat mat (the kind used for seedlings) can significantly speed up root formation. It mimics the warmth of spring soil and gives your cuttings that extra push.
- Don’t Overcrowd: Resist the urge to cram too many cuttings into one pot. Give them a little breathing room. This helps prevent fungal issues and ensures each cutting gets enough light and air circulation.
Keeping an Eye on Them: Aftercare and Troubleshooting
Once your cuttings are nestled in their warm, humid environment, it’s time for patience. Keep the soil consistently moist but not waterlogged. And remember that humidity dome or plastic bag? Keep it on! It’s your secret weapon to maintaining that humid atmosphere.
You’ll know your cuttings are happy when you see new leaf growth starting to emerge. This is a fantastic sign they’re forming roots! Gently tugging on a cutting will reveal resistance if roots are present.
Watch out for rot. If you notice your cuttings softening, turning mushy, or developing dark spots, it’s often a sign of too much moisture and poor air circulation. If this happens, remove the affected cutting immediately, ensure the remaining soil isn’t waterlogged, and increase air flow slightly. Sometimes, a cutting is just a cutting that didn’t make it, and that’s okay. We learn from every plant, or lack thereof!
Keep Nurturing and Enjoy!
Propagating Phragmanthera capitata is a wonderful way to expand your garden and connect with these beautiful plants on a deeper level. It might take a little patience, and some cuttings might be braver than others, but the joy of watching new life spring forth is truly unparalleled. So, get your hands dirty, embrace the process, and before you know it, you’ll have a whole new collection of these blooming beauties to share. Happy gardening!
Resource: