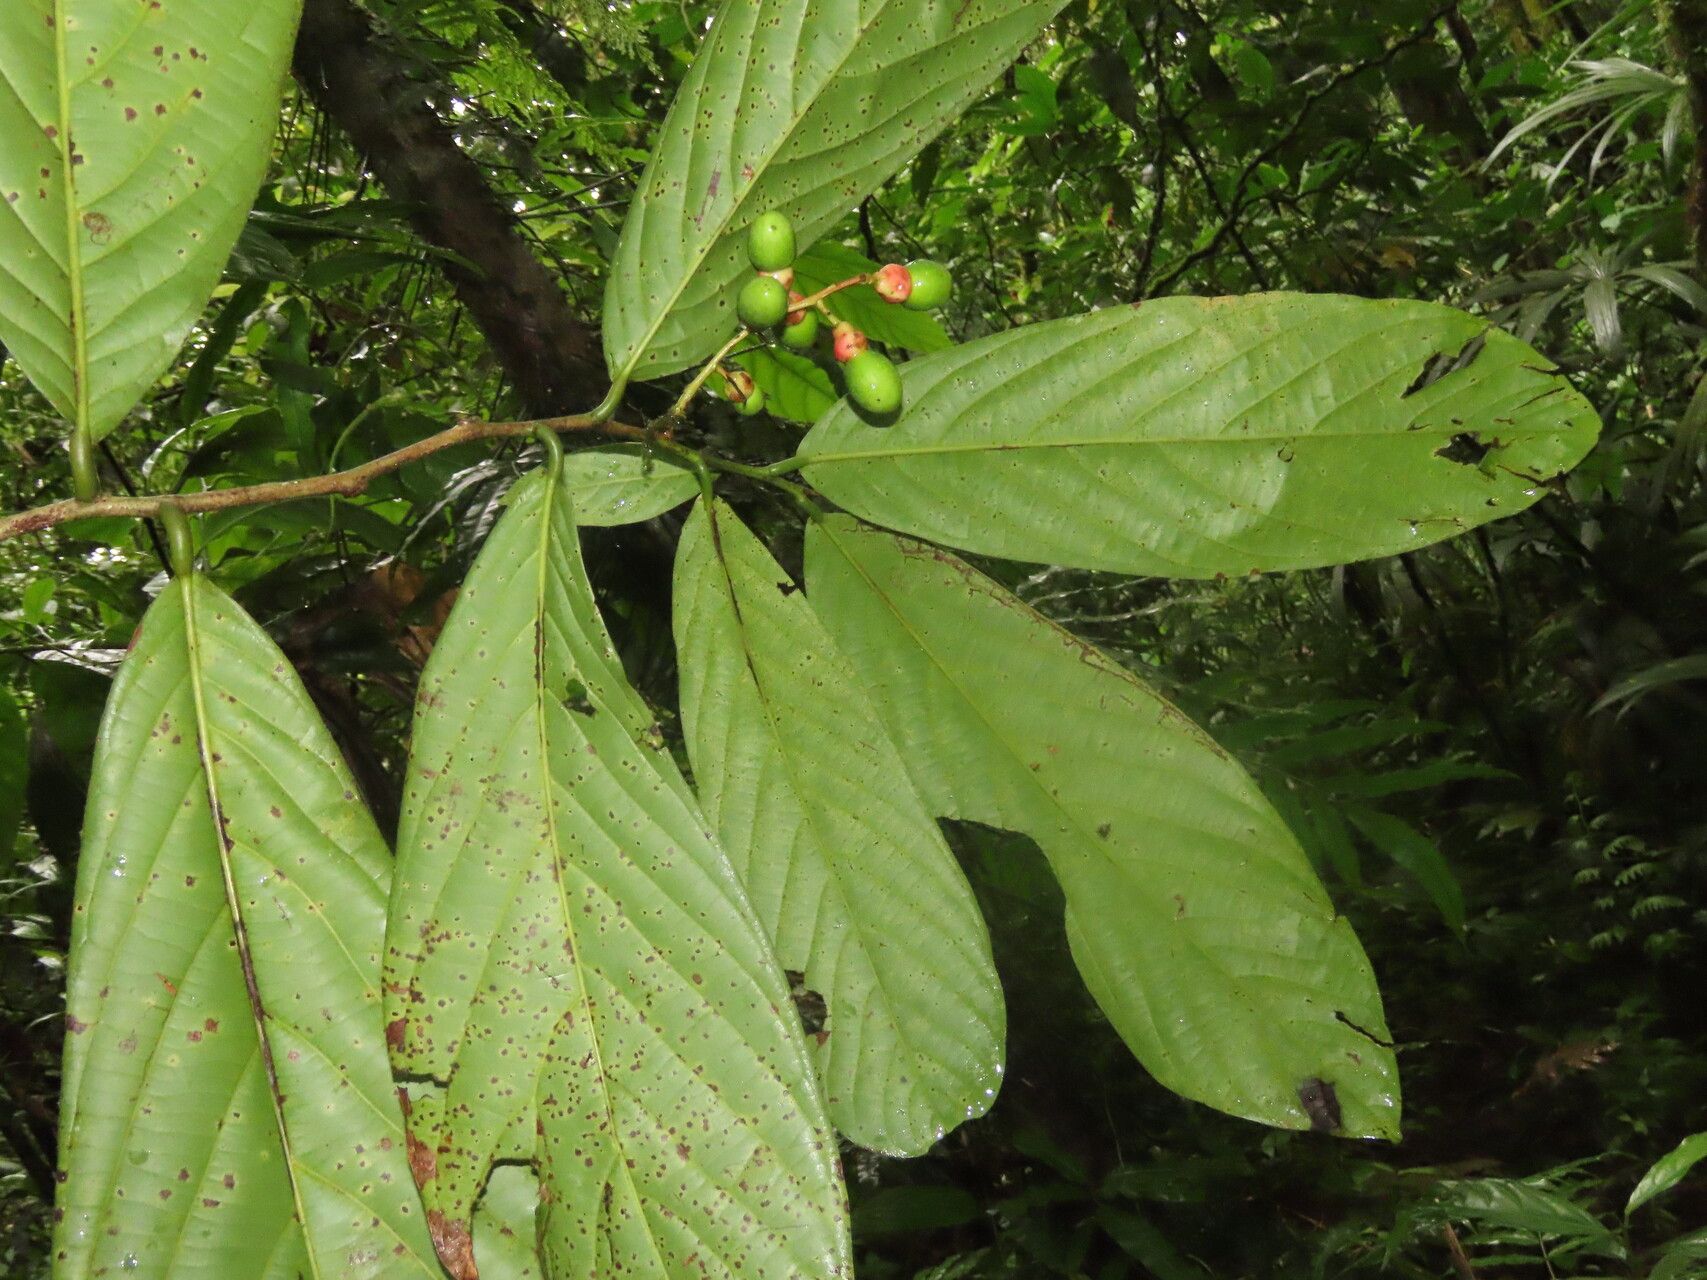
Oh, hello there! It’s so lovely to have you join me for a chat about one of my absolute favorite trees: Ocotea atirrensis. If you’re looking for a magnificent addition to your garden, a tree that offers lush, glossy foliage and a real sense of place, then this is it. Its beauty is undeniable, and there’s a special kind of magic in nurturing a plant from a tiny cutting into something substantial. Now, I won’t sugarcoat it – propagating Ocotea atirrensis can be a little trickier than, say, a common pothos. It’s more of an intermediate project, but with a bit of care and patience, I promise you, it’s incredibly rewarding.
The Best Time to Start
For the highest success rate, I’ve found that late spring to early summer is your golden window. This is when the plant is actively growing, and those fresh shoots usually have the best energy for rooting. You want to take cuttings from healthy, new growth that’s started to firm up a bit – not the impossibly floppy, brand-new tips, but not the old, woody stems either. Think of it as that perfect stage in between.
Supplies You’ll Need
Before we get our hands dirty, let’s gather our tools. Here’s what I usually have on hand:
- Sharp pruning shears or a clean, sharp knife: For making clean cuts.
- Rooting hormone powder or gel: This is crucial for encouraging root development.
- A well-draining potting mix: I love a blend of equal parts perlite and peat moss, or a good quality seed-starting mix.
- Small pots or seedling trays: With drainage holes, of course!
- A clear plastic bag or a propagator lid: To create a humid environment.
- Watering can or spray bottle: For gentle watering.
- Optional: A heat mat: This can really make a difference, especially if your propagation area is a bit cool.
Propagation Methods
While you might find information on other methods, I’ve had the most consistent success with stem cuttings for Ocotea atirrensis. It’s straightforward once you get the hang of it.
- Select Your Cuttings: Head out to your Ocotea atirrensis and look for that perfect semi-hardwood growth. You’re aiming for cuttings that are about 4-6 inches long. Gently snap or cut them just below a leaf node (that’s where the leaves grow from the stem).
- Prepare the Cuttings: Once you have your cuttings, strip off the lower leaves. You want to expose at least two or three leaf nodes along the bottom of the stem. This is where the roots will emerge. You can leave the top couple of leaves, but if they are very large, I often give them a light trim to reduce water loss through transpiration.
- Apply Rooting Hormone: Dip the cut end of the stem into your rooting hormone. Gently tap off any excess. This step really gives your cuttings a boost.
- Plant Your Cuttings: Fill your pots or trays with your well-draining potting mix. Make a small hole in the center with your finger or a pencil. Carefully insert the prepared cutting into the hole, ensuring that at least one or two of the leaf nodes are buried in the soil. Gently firm the soil around the base of the cutting.
- Create Humidity: Now, this is important! Water the soil gently until it’s evenly moist, but not waterlogged. Then, cover the pot or tray with a clear plastic bag or a propagator lid. This traps moisture and creates that humid microclimate your cuttings desperately need. If you’re using individual pots, you can place them inside a larger plastic bag, making sure the leaves don’t touch the plastic.
The “Secret Sauce”
Here are a couple of my little tricks that have really helped me out over the years:
- Bottom Heat is Your Best Friend: If you have the space, placing your pots on a gentle heat mat can dramatically speed up root development. The warmth encourages the roots to grow from the bottom up. Just make sure the heat isn’t too intense.
- Don’t Let Those Leaves Drip! While you want high humidity, prevent the leaves from sitting in water inside the propagator. This is a quick recipe for fungal problems. If I see condensation pooling heavily on the leaves, I’ll gently dab it off with a paper towel. It’s all about a balance of moisture without rot.
Aftercare & Troubleshooting
Once your cuttings are potted and covered, place them in a bright spot with indirect light. Avoid direct sunlight, which can scorch them. Check the soil moisture regularly and water gently when the top layer feels dry.
The real excitement begins when you start to see signs of life! New growth appearing from the top of the cutting is a fantastic indicator that roots are forming. You can also give a very gentle tug on the cutting; if there’s resistance, it means roots have taken hold. Once you see good root development, you can gradually acclimate your new little plant to normal room humidity by slowly opening the propagator or lifting the plastic bag for longer periods.
Now, for the not-so-fun part: troubleshooting. The most common issue you’ll face is rot. If your cutting turns mushy and black, it’s usually a sign of too much moisture and not enough air circulation. If you see this happening, remove the affected cutting immediately to prevent it from spreading. Sometimes, despite our best efforts, a cutting just won’t root. Don’t be discouraged! It happens to the best of us. It might mean the cutting wasn’t quite ready, or the conditions weren’t ideal.
A Encouraging Closing
Propagating plants, especially beautiful specimens like Ocotea atirrensis, is a journey of learning and patience. It’s about observing, adapting, and enjoying the small victories. So, take a deep breath, gather your supplies, and give it a go. Be patient with your little cuttings, celebrate every bit of new growth, and know that even if not every attempt is successful, you’re gaining valuable experience. Happy propagating, and I can’t wait to hear all about your successes!
Resource:
https://identify.plantnet.org/k-world-flora/species/Ocotea%20atirrensis%20Mez%20&%20Donn.Sm./data