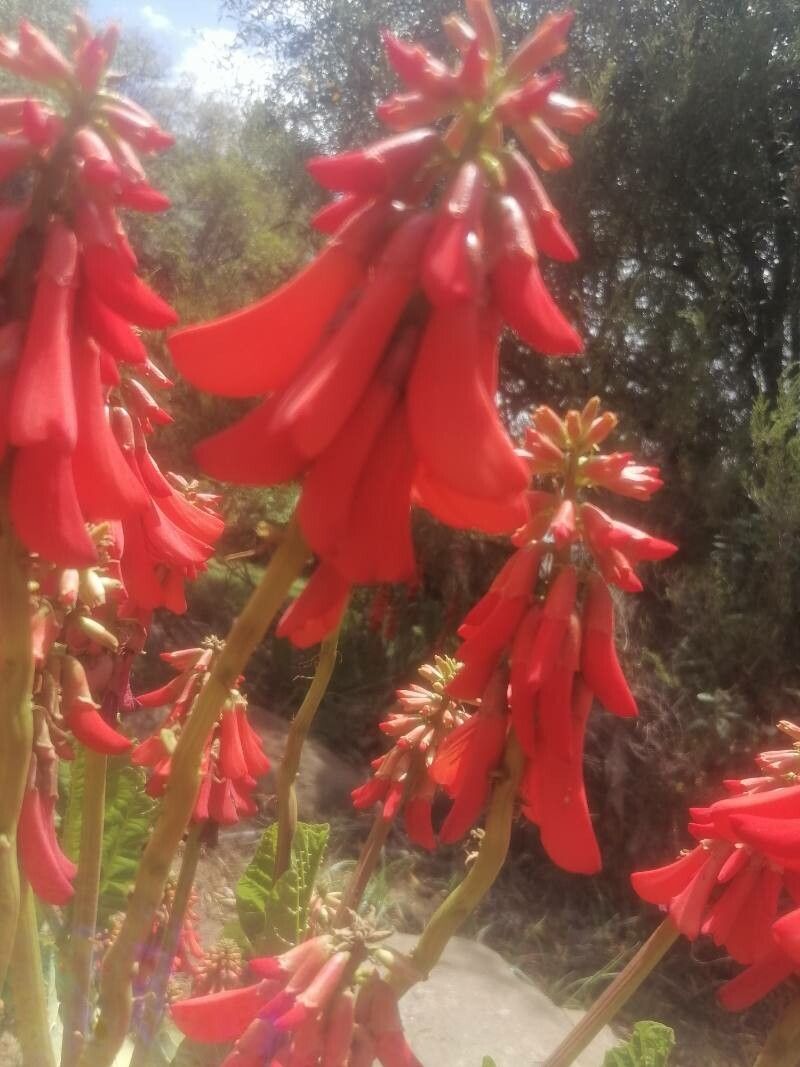
Oh, hello there! Come on in, grab a mug of your favorite brew. I’m so glad you’re interested in propagating Erythrina zeyheri, also known as the Common Coral Tree. It’s a magnificent plant, isn’t it? With those vibrant coral-red flowers that just put a smile on your face, it’s a real showstopper in any garden. And the best part? You can grow more of these beauties yourself!
Propagating these trees might sound a bit daunting, especially if you’re new to the plant world. But I can tell you, with a little patience and a few key steps, it’s absolutely achievable. I’ve found it to be a truly rewarding experience, watching a tiny cutting or a dormant root segment transform into a healthy young tree. It connects you to the plant in a special way. For beginners, it leans towards moderately easy – not snap-your-fingers easy, but definitely within reach with a bit of care.
The Best Time to Start
For Erythrina zeyheri, I’ve found the most success happens when the plant is actively growing, but not stressed. That means late spring or early summer is generally your sweet spot. The days are getting longer, the temperatures are warming up, and the plant has a good reserve of energy to put into rooting. Avoid trying to propagate from very old, woody stems or during the harshness of winter.
Supplies You’ll Need
Let’s get our toolkit ready! Here’s what you’ll want to have on hand:
- Pruning shears or a sharp knife: Clean and sharp is crucial for a clean cut.
- Rooting hormone (powder or liquid): This is a lifesaver, especially for stem cuttings. It really encourages those roots to form faster.
- Potting mix: A well-draining mix is essential. I like to use a blend of peat moss, perlite, and a little bit of compost. Aim for something that won’t stay waterlogged.
- Small pots or trays: For your cuttings or root sections. Make sure they have drainage holes!
- Plastic bags or a propagator: To create a humid environment for cuttings.
- Labeling stakes: You’ll thank yourself later for knowing what you planted where!
- Watering can or spray bottle: For gentle watering.
Propagation Methods
There are a couple of ways we can coax new life from our Coral Tree. Let’s dive into the most effective ones.
1. Stem Cuttings: This is perhaps the most common method.
- First, select healthy, semi-hardwood stems. Look for growth that’s a year or two old – it should be firm but still have a bit of flexibility. Avoid brand-new, flimsy growth or old, woody branches.
- Using your clean pruning shears, take cuttings that are about 6-8 inches long. Make your cut just below a leaf node (where a leaf attaches to the stem).
- Strip off the lower leaves, leaving just a couple at the very top. This helps the cutting focus its energy on rooting, not on supporting too much foliage.
- Now, dip the cut end into your rooting hormone. Tap off any excess.
- Insert the treated end into your prepared potting mix. Make a hole with a finger or a pencil first to avoid rubbing off the hormone. Gently firm the soil around the cutting.
- Water gently to settle the soil.
- To keep things humid, you can cover the pot with a plastic bag, creating a mini-greenhouse. Make sure the leaves don’t touch the sides of the bag too much. Place the pot in a bright spot out of direct sunlight.
2. Root Cuttings (Division): This works wonderfully if you happen to have a larger, established plant that you’re looking to divide, or if you find a root that has been exposed.
- Ideally, do this during dormancy, or just as new growth is starting.
- Gently excavate around the base of the plant to expose some of the thicker roots.
- Using a clean, sharp knife, take root sections that are at least pencil thickness and a few inches long. If the root has a bud or growth point, that’s a bonus!
- You can treat these root cuttings with rooting hormone as well, though it’s not always as critical as with stem cuttings.
- Plant these root sections horizontally just under the surface of your potting mix, or vertically with the growth bud facing upwards.
- Water gently and keep the soil consistently moist, but not soggy. These can also benefit from a bit of humidity.
The “Secret Sauce” (Pro Tips)
Alright, time for a couple of little tricks I’ve picked up over the years that often make a big difference.
- My absolute favorite tip for stem cuttings is using bottom heat. Place your potted cuttings on a seedling heat mat. This gentle warmth encourages root development much more effectively than just ambient room temperature. It’s like a little warm spa for your cuttings!
- When using the plastic bag method for stem cuttings, don’t let the leaves touch the water. If you’re watering a bit too enthusiastically and water pools at the bottom, the leaves sitting in that water are just asking for fungal rot. I often prop the leaves up gently with a skewer if they look like they’re going to droop into any moisture.
- If you’re working with root cuttings, don’t be afraid to use slightly larger pieces. While smaller bits can work, chunkier root sections with visible buds tend to have a higher success rate and get going quicker.
Aftercare & Troubleshooting
Once you start seeing those magical little roots appearing (you might see new leaf growth, which is a great sign!), it’s time for a little pampering.
- Gradually acclimate your new plants to normal humidity. Start by removing the plastic bag for a few hours each day, then eventually, take it off completely.
- Continue to water when the top inch of soil feels dry. Don’t overwater; it’s the quickest way to invite rot.
- Once your cuttings have a good root system and are actively growing, you can transplant them into their own, slightly larger pots.
Now, what if things don’t go as planned? The most common culprit is rot. If your cutting turns black and mushy, or the root section shrivels and looks waterlogged, that’s usually a sign of too much moisture and poor drainage. Make sure your soil mix is airy and that you’re not overwatering. Another sign of trouble is if your cutting simply shows no signs of life after a few weeks. This can happen if the cutting was too old, too young, or just didn’t have the energy to root. Don’t be discouraged; just try again!
A Encouraging Closing
Growing new plants from cuttings or roots is such a rewarding journey. It takes a bit of practice, and not every attempt will be perfect, but that’s all part of the fun of gardening. Be patient with your little Coral Tree cuttings, give them the love and attention they need, and before you know it, you’ll have new Erythrina zeyheri to admire and share. Happy propagating!
Resource:
https://identify.plantnet.org/k-world-flora/species/Erythrina%20zeyheri%20Harv./data