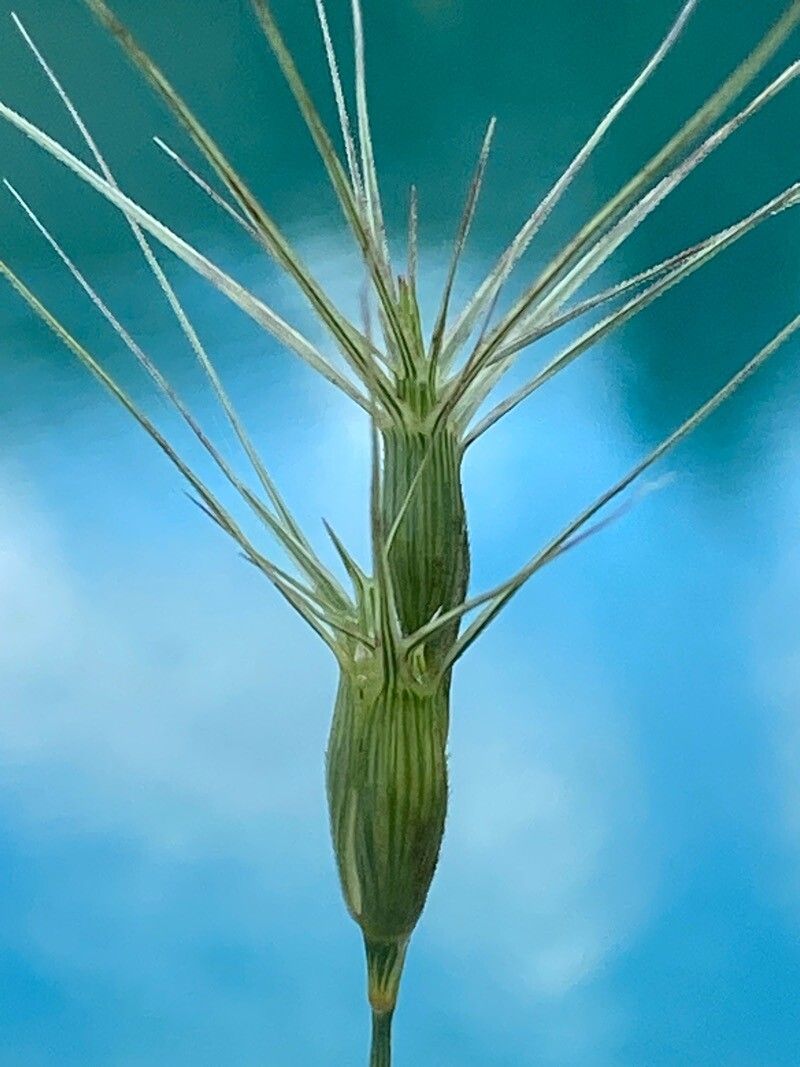
When I first stumbled upon Aegilops biuncialis, it was its wild, architectural beauty that drew me in. Those spiky, wheat-like flower heads dangling gracefully above its blue-green foliage create such a unique texture in the garden. It’s not a plant you see everywhere, and that’s part of its charm. Propagating it myself has been incredibly rewarding, allowing me to fill more corners of my garden with its untamed elegance. For a beginner, I’d say Aegilops biuncialis is moderately easy to propagate, especially if you’re patient and follow a few key steps.
The Best Time to Start
For the highest success rate, I’ve found that late spring to early summer is your golden window. Ideally, you’ll want to propagate from healthy, actively growing stems. This is when the plant has plenty of energy stored up, making it more resilient and ready to put out new roots.
Supplies You’ll Need
Gathering your tools beforehand makes the whole process so much smoother. Here’s what I always have on hand:
- Sharp, clean pruning shears or a craft knife
- A well-draining potting mix. I usually mix equal parts peat moss or coir with perlite or pumice.
- Small pots or seed trays with drainage holes
- Rooting hormone (optional, but it can give a nice boost)
- A spray bottle for misting
- Labels or plant markers
- A clear plastic bag or propagation dome
Propagation Methods
Aegilops biuncialis can be propagated quite successfully through stem cuttings. It’s my go-to method for increasing my stock.
- Select your cutting: Look for a healthy, non-flowering stem that’s about 4-6 inches long. It should be slightly firm, not too soft and new, but also not woody and old.
- Make the cut: Using your sharp pruning shears or knife, make a clean cut just below a leaf node (where a leaf attaches to the stem). This is where roots are most likely to form.
- Remove lower leaves: Gently strip off the leaves from the bottom 2-3 inches of the stem. You want to expose the nodes, as this is where root development will happen.
- Apply rooting hormone (optional): If you’re using rooting hormone, dip the cut end of the stem into it, tapping off any excess.
- Plant your cutting: Fill your small pots with your well-draining potting mix. Make a small hole in the center with your finger or a pencil. Insert the cutting into the hole, ensuring the nodes you bared are buried in the soil. Gently firm the soil around the base of the cutting.
- Water gently: Water the soil lightly to settle it around the cutting.
The “Secret Sauce” (Pro Tips)
These little tricks are what I’ve learned over the years that really make a difference:
- My absolute favorite trick is to use bottom heat. Placing your pots on a heated propagation mat really encourages root development. The warmth from below signals to the cutting that it’s time to grow!
- Don’t be tempted to overwater! The key is to keep the soil consistently moist but not soggy. Overwatering is the quickest way to invite rot, which is the enemy of cuttings. A light misting with your spray bottle every day or two usually does the trick, especially if you’ve covered the pot.
- When you cover your cuttings, whether with a plastic bag or a propagation dome, make sure the leaves don’t touch the sides of the plastic. This traps too much moisture and can lead to fungal issues. Aim for good air circulation, even when creating a humid environment.
Aftercare & Troubleshooting
Once your cuttings are planted and settled, place them in a spot that receives bright, indirect light. Avoid direct sunlight, which can scorch the delicate leaves. Mist the leaves regularly to keep humidity high, especially if you don’t have a propagation dome.
You’ll know your cutting has taken root when you see:
- New leaf growth appearing.
- A slight resistance when you gently tug on the cutting.
If you notice leaves turning yellow and mushy, or the stem itself becomes soft and dark, this is often a sign of rot. Usually, this means the cutting is lost. Unfortunately, it’s a common learning curve. The best approach is to discard the rotted cutting and try again, perhaps with a better-draining mix or less frequent watering.
A Encouraging Closing
Growing new plants from cuttings is a little act of magic, isn’t it? It might take a few tries to get it just right, but the reward of seeing those first tiny roots emerge is truly special. Be patient with your Aegilops biuncialis cuttings, trust in the process, and enjoy watching new life unfurl in your hands. Happy gardening!
Resource:
https://identify.plantnet.org/k-world-flora/species/Aegilops%20biuncialis%20Vis./data