Hello, fellow garden enthusiasts! It’s so lovely to have you join me today. I’ve been playing in the dirt for two decades now, and there’s one joy that never gets old: coaxing new life from existing plants. Today, we’re going to dive into the wonderful world of Acalypha scabrosa.
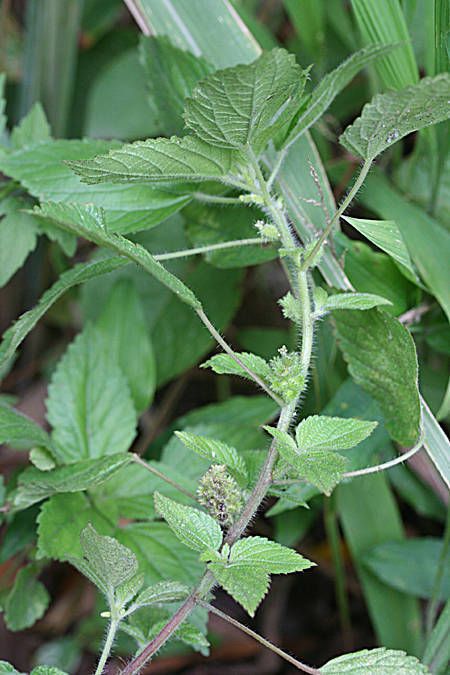
This fizzy-haired beauty, with its delightful, bottlebrush-like blooms, brings such cheerful energy to any sunny spot. Its fuzzy texture and vibrant colors are simply captivating. And the best part? It’s surprisingly rewarding to propagate, which means you can share this joy with friends or simply fill your own garden with more of these beauties without breaking the bank. If you’re new to the plant propagation game, Acalypha scabrosa is a fantastic plant to start with. It’s quite forgiving!
The Best Time to Start
When it comes to getting the highest success rate, spring and early summer are your golden ticket. This is when the plant is in its most vigorous growth phase. You’re looking for new, non-woody growth – the soft, flexible stems are full of life and ready to form roots. Avoid older, woody stems; they’re much less likely to sprout.
Supplies You’ll Need
Here’s what you’ll want to have on hand before we get our hands dirty:
- Sharp, clean pruning shears or a knife: A clean cut is crucial to prevent disease.
- Rooting hormone powder (optional but recommended): This can give your cuttings a helpful boost.
- Well-draining potting mix: A blend of peat moss or coco coir, perlite, and a bit of compost works wonderfully. You can also use a specialized seedling or cutting mix.
- Small pots or seedling trays: Clean pots are a must!
- Clear plastic bags or a propagation dome: These help maintain humidity.
- Watering can with a fine spray nozzle: Gentle watering is key.
- Labels and a pen: Don’t forget to label your precious new babies!
Propagation Methods
The most reliable way to propagate Acalypha scabrosa is through stem cuttings. It’s straightforward and yields great results.
- Take Your Cuttings: Gently identify a healthy, new stem on your established Acalypha scabrosa. Using your clean pruning shears, cut a piece that’s about 4-6 inches long. Make the cut just below a leaf node (where a leaf attaches to the stem).
- Prepare the Cuttings: Remove the lower leaves from your cutting, leaving just a few at the top. This prevents them from rotting once planted. If you’re using rooting hormone, dip the cut end into the powder, tapping off any excess.
- Plant the Cuttings: Fill your small pots or trays with your prepared potting mix. Make a small hole in the center of each pot with your finger or a pencil. Insert the cut end of each stem cutting into the hole, ensuring the leaf nodes are buried under the soil. Gently firm the soil around the stem to hold it in place.
- Provide Humidity: Water the soil gently until it’s moist but not waterlogged. Then, cover the pots with a clear plastic bag or a propagation dome to create a humid environment. This is vital for preventing the cuttings from drying out.
- Find a Sunny Spot: Place your pots in a warm location that receives bright, indirect light. Direct sun can scorch the delicate cuttings.
The “Secret Sauce” (Pro Tips)
Every gardener has a few tricks up their sleeve, and here are a couple that I’ve found make a real difference with Acalypha scabrosa:
- The Water Dip Trick: Before planting your cuttings, I like to dip the cut end into a glass of water for a minute. This helps the rooting hormone adhere better to the stem.
- Bottom Heat is Your Friend: If you have a bit of extra space and an inexpensive seedling heat mat, using bottom heat can significantly speed up root development. This little bit of warmth encourages the plant to send out roots more quickly. Just place your pots on top of it.
Aftercare & Troubleshooting
Once your cuttings are planted, the real waiting game begins! Keep the soil consistently moist but never soggy. The plastic bag or dome should help keep humidity high, but you might need to open it for a few minutes each day to allow for air circulation, preventing mold.
You’ll know your cuttings are happy and have rooted when you see new leaf growth appearing from the top. This can take anywhere from 3 to 6 weeks, so be patient! You can also give a gentle tug – if you feel resistance, it means roots have formed.
What if things go wrong? The most common issue is rot. If your cuttings look limp, mushy, or have a blackening stem, they’ve likely succumbed to rot. This usually happens from too much moisture and poor air circulation. If you see this, it’s best to discard the affected cuttings and ensure your next batch has better drainage and ventilation. Brown, crispy leaves can mean the cuttings are drying out too quickly, so check your humidity levels.
A Encouraging Closing
Propagating plants, especially lovely ones like Acalypha scabrosa, is a journey of patience and observation. Don’t be discouraged if your first few attempts aren’t perfect. Each time you try, you learn a little more, and soon enough, you’ll have a whole colony of these delightful plants to enjoy. Happy gardening, and may your cuttings flourish!
Resource:
https://identify.plantnet.org/k-world-flora/species/Acalypha%20scabrosa%20Sw./data